Imagine, if you will, the cozy comfort of a classic apple crisp. Now picture the rich, indulgent creaminess of a perfectly baked cheesecake. Got it? Well, someone had the brilliant, wonderful idea to smash them together into one perfect, single-serving dessert.
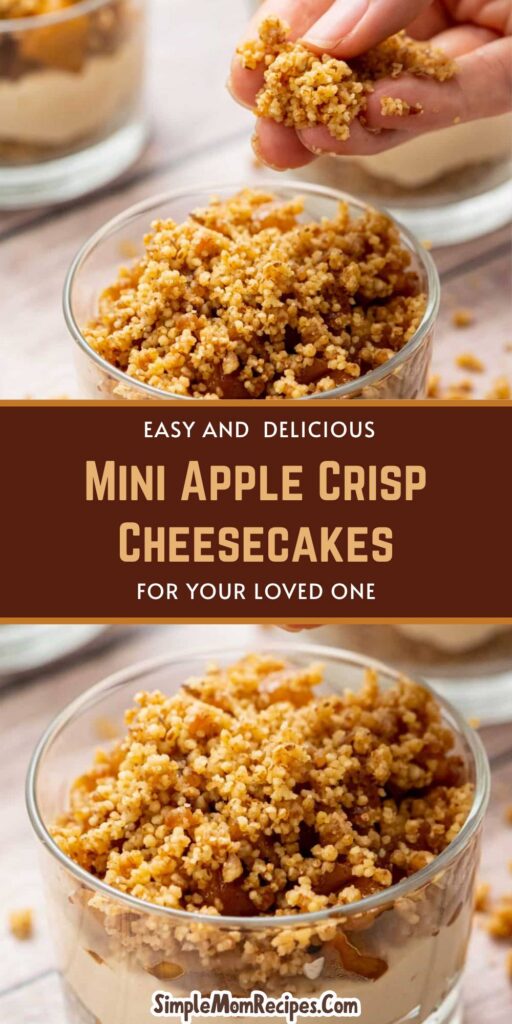
These mini apple crisp cheesecakes are a little bit of magic in a muffin cup. They’re the ultimate answer to your autumn baking cravings, and honestly, they’re just a joy to make. You get a buttery graham cracker crust, a velvety-smooth filling, a layer of spiced apples, and a crunchy streusel crown all in one delightful bite.
And the best part? They’re so much less fussy than a full-sized cheesecake. No water baths, no worrying about giant cracks, just simple, straightforward, and utterly delicious results. Let’s get baking.
Why You’ll Adore These Mini Treats
Honestly, what’s not to love? They combine two of the most beloved desserts in the world into one portable package. It’s a flavor combination that feels both nostalgic and excitingly new at the same time.
They are perfect for parties, potlucks, or just treating yourself on a crisp fall afternoon. Everyone gets their own individual dessert, which always feels a little bit special, don’t you think? No slicing, no serving, just pure, unadulterated enjoyment.
And from a baker’s perspective, they are incredibly forgiving. The gradual cooling process in the oven practically guarantees a beautiful, crack-free top every single time. It’s a recipe that makes you look like a pastry pro, with minimal stress involved.
Ingredients Needed for the Recipe
Gathering your ingredients is the first step to baking success. Using the right components, at the right temperature, makes all the difference here. Let’s break it down.
For the Apple Topping:
- 1 apple, peeled and finely diced
- 1 ½ teaspoons ground cinnamon
For the Crumble:
- ½ cup all-purpose flour
- ⅓ cup light brown sugar, packed
- ½ teaspoon ground cinnamon
- ¼ teaspoon salt
- ¼ cup unsalted butter, melted
For the Crust:
- 1 cup graham cracker crumbs
- ¼ cup unsalted butter, melted
For the Cheesecake Filling:
- 12 ounces cream cheese, room temperature
- ½ cup granulated sugar
- 1 tablespoon all-purpose flour
- ½ cup sour cream, room temperature
- 1 ½ teaspoons vanilla extract
- ¼ teaspoon salt
- 2 large eggs, room temperature
The Best Apples for Baking
Choosing your apple is a big part of the flavor story here. You don’t want an apple that will turn to complete mush, nor one that’s too bland. It’s all about finding that perfect balance of texture and taste.
I strongly recommend using a tart apple, like a Granny Smith. Its bright, sharp flavor cuts through the sweetness of the cheesecake and the crumble beautifully. It provides a lovely contrast that keeps each bite interesting.
For a more complex flavor, try using two different kinds. Maybe one tart Granny Smith and one semi-tart, firm apple like Fuji or Pink Lady. The combination creates a little symphony of apple goodness in every mini cheesecake.
How to make Mini Apple Crisp Cheesecakes?
This process is a fun little assembly line of deliciousness. We’ll build our cheesecakes from the bottom up, creating distinct, perfect layers. Just follow the steps, and you really can’t go wrong.
Preparing the Apple Topping
Start with your finely diced apple. The key word here is *fine*—you want small pieces that will soften nicely and distribute well.
Toss those little apple bits with the cinnamon in a small bowl until they’re fully coated. Set this aside for now; it’s patiently waiting for its moment to shine on top of the creamy filling.
Creating the Crumble
In a medium bowl, whisk together the flour, brown sugar, cinnamon, and salt. Whisking ensures everything is evenly distributed, so you get consistent flavor in every crumble cluster.
Now, pour in that melted butter. Stir it in with a fork or a small spatula until the mixture starts to clump together and looks like coarse, wet sand. This is your future crispy, crunchy topping.
Building the Crust
Preheat your oven to 325°F (163°C). This initial higher heat is perfect for toasting the crust and giving it a head start. Line your muffin pan with cupcake liners—this is non-negotiable for easy removal!
In another medium bowl, mix the graham cracker crumbs with the melted butter. It should feel like wet sand that holds together when you pinch it. Divide this mixture evenly among the 12 liners.
Use a small glass, a measuring spoon, or your fingers to press the crumbs firmly into the bottom of each liner. You want a compact, even layer. Bake this for just 5 minutes, then let it cool on a wire rack.
Crafting the Cheesecake Filling
Now, reduce your oven temperature to 300°F (149°C). This lower, gentler heat is the secret to a creamy, not puffy, cheesecake filling. In a large bowl, beat the room-temperature cream cheese and sugar together until it’s completely smooth and silky.
Scrape down the sides of the bowl, then add the flour, sour cream, vanilla, and salt. Mix it all in until it’s just combined and smooth again. You don’t want to overmix once we add the eggs.
Speaking of eggs, add them one at a time, mixing on low speed after each one until the yolk is just incorporated. This careful approach prevents you from whipping too much air into the batter, which can cause cracking.
Assembling and Baking
Now for the fun part! Evenly divide the cheesecake filling among the 12 prepared crusts. A cookie scoop or two spoons works perfectly for this.
Sprinkle the cinnamon-coated apples evenly over the top of each unbaked cheesecake. Then, finish them all off with a generous sprinkle of your prepared crumble mixture.
Bake for 15 minutes. Then, and this is the crucial part, turn the oven OFF but leave the cheesecakes inside for another 10 minutes. This gradual temperature drop is everything.
After 10 minutes, crack the oven door open with a wooden spoon and let the cheesecakes sit in the cooling oven for another 15 minutes. This slow, slow cooling is the ultimate trick to preventing cracks and achieving the perfect texture.
The Final Chill
Finally, remove the pan from the oven and let the cheesecakes cool completely at room temperature. Once they’re no longer warm, transfer them to the refrigerator to chill for at least one hour, though overnight is even better.
This chilling time allows the flavors to meld and the structure to firm up, making them sliceable and perfect. The patience is absolutely worth it, I promise.
Tips
Room temperature is not a suggestion, it’s a rule. Your cream cheese, sour cream, and eggs must be at room temp to blend smoothly into a lump-free batter. Cold ingredients are a one-way ticket to a grainy filling.
When dicing your apple, think small. You’re aiming for pieces no larger than a pea. These mini cheesecakes are delicate, and a large chunk of apple can make them difficult to eat and can release too much moisture.
Resist the urge to peek! While the cheesecakes are in the initial baking and cooling phases inside the oven, keep that door closed. Sudden drafts of cold air can make them fall or crack. Trust the process.
Ingredient Substitutions and Swaps
Out of graham crackers? You can easily use digestive biscuits or even vanilla wafers for the crust. Just crush them up into fine crumbs and use the same amount by volume. The flavor will change slightly, but it’ll still be delicious.
If you only have salted butter, that’s okay. Just omit the extra salt called for in the crust and crumble recipes. You’ll still want to keep the salt in the filling, though, as it’s crucial for balancing the sweetness.
For the sour cream, plain Greek yogurt is a fantastic one-to-one substitute. It provides the same tangy moisture that keeps the cheesecake filling incredibly lush. The result is virtually identical.
Serving and Presentation Ideas
These little gems are stunning all on their own, but a tiny extra touch can make them feel truly restaurant-worthy. A simple drizzle of warm caramel sauce or a dollop of freshly whipped cream right before serving is pure heaven.
For a gathering, consider setting up a mini dessert bar. Place the cheesecakes in the center with small bowls of toppings like salted caramel, hot fudge, chopped toasted pecans, or even a sprinkle of flaky sea salt.
They are perfect for holidays like Thanksgiving, where oven space is precious. You can make them a day or two in advance, and they free up the oven for the big bird. They are a make-ahead dream.
How to Store and Freeze for Later
Once assembled and chilled, these cheesecakes will keep beautifully in an airtight container in the refrigerator for up to 4 days. The flavors actually deepen and improve after a day, making them an ideal make-ahead dessert.
Yes, you can freeze them! Place the fully cooled and chilled cheesecakes on a baking sheet and flash-freeze for about an hour, or until solid. This prevents them from sticking together.
Once frozen, transfer them to a freezer-safe bag or container. They’ll keep for up to 2 months. To serve, just thaw them overnight in the refrigerator. It’s like having a little slice of fall, anytime you want it.

Mini Apple Crisp Cheesecakes Recipe
Description
These mini apple crisp cheesecakes are a delightful fall dessert that combines the creamy goodness of cheesecake with the warm, comforting flavors of apple crisp. This easy-to-make recipe features a homemade graham cracker crust, a smooth and creamy cheesecake filling, and a cinnamon streusel topping. Perfect for parties and gatherings, these individual treats bring all the cozy autumn vibes in a single serving!
ingredients
Apple Topping
Crumble
Crust
Cheesecake Filling
Instructions
Apple Topping
- Place finely diced apples and 1½ teaspoons cinnamon in a small bowl. Stir until apples are evenly coated. Set aside.
Crumble
- In a medium bowl, whisk together flour, brown sugar, ½ teaspoon cinnamon, and salt.
- Add melted butter and stir until the mixture is well combined and crumbly. Set aside.
Crust
- Preheat oven to 325°F (163°C). Line a 12-cup muffin tin with cupcake liners.
- In a medium bowl, mix graham cracker crumbs and melted butter until combined. Divide evenly among the cupcake liners and press firmly into the bottom of each.
- Bake crusts for 5 minutes. Remove from oven and let cool on a wire rack while preparing the filling.
Cheesecake Filling
- Reduce oven temperature to 300°F (149°C). In a large bowl, beat cream cheese and granulated sugar until smooth.
- Add flour, sour cream, vanilla extract, and salt. Mix until fully incorporated.
- Add eggs one at a time, mixing well after each addition. Do not overmix.
- Evenly distribute the cheesecake filling into the prepared crusts. Top each with a spoonful of cinnamon-coated apples, then sprinkle with crumble topping.
- Bake for 15 minutes. Turn off the oven and leave the cheesecakes inside for 10 minutes.
- Crack open the oven door and let the cheesecakes sit for another 15 minutes to cool gradually.
- Remove from oven and chill in the refrigerator for at least 1 hour before serving.
Nutrition Facts
Servings 12
- Amount Per Serving
- Calories 285kcal
- % Daily Value *
- Total Fat 15.6g24%
- Saturated Fat 9.2g46%
- Cholesterol 65mg22%
- Sodium 220mg10%
- Potassium 120mg4%
- Total Carbohydrate 32g11%
- Dietary Fiber 1g4%
- Sugars 22g
- Protein 4.5g9%
- Calcium 60 mg
- Iron 0.8 mg
* Percent Daily Values are based on a 2,000 calorie diet. Your daily value may be higher or lower depending on your calorie needs.
Note
- Use 2 types of apples for more complex flavor—try Granny Smith and Pink Lady.
- Dice apples finely so they fit well on the small cheesecakes and bake evenly.
- Cool gradually by turning off the oven and cracking the door—this prevents sinking or cracking.
- Make ahead: These can be made 1–2 days in advance and stored covered in the fridge.
