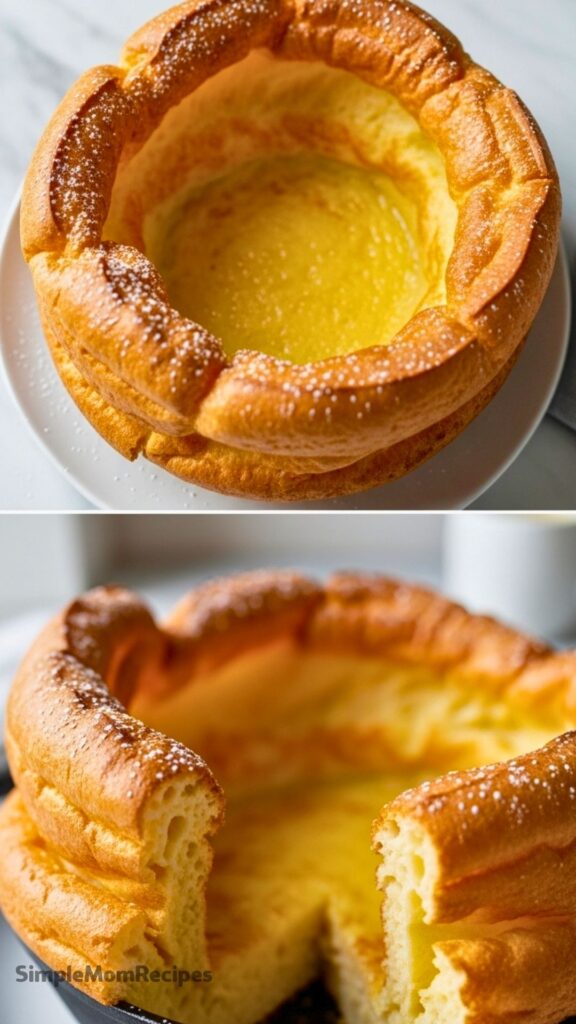
A puffed, golden pancake that rises like a quiet surprise in your oven, then sinks into buttery folds ready for syrup and sugar.
The oven light is on and I’m crouched in front of it like it’s a tiny stage show. The batter just went in, and already the edges are starting to lift. Not gently either. They’re climbing the sides of the pan like they’ve got somewhere to be. I always forget how dramatic these things are.
I tap the oven door once. Not for any real reason. Just habit. Then I realize I probably shouldn’t mess with it. Too late now. The butter smell hits first. Then that eggy, slightly sweet scent that somehow doesn’t feel like breakfast yet. More like something halfway between custard and pancake.
I stand up, wipe my hands on a towel that’s already kind of damp, and wait.
A quick moment before cooking started
This wasn’t even the plan this morning. I was thinking regular pancakes. Flat, predictable, done in batches. But I opened the fridge and saw too many eggs sitting there, and suddenly this felt easier. One pan. No flipping. Less standing over heat.
Also, and this matters, I didn’t feel like babysitting a skillet today.
German pancakes solve that. You mix, you pour, you disappear for 20 minutes. It’s almost lazy cooking, but it looks like you tried really hard.
Ingredients I Used for the Recipe
- 6 large eggs – they do most of the lifting, literally
- 1 cup milk – smooths everything out and keeps it soft
- 1 cup all-purpose flour – structure, but not too much
- 1 teaspoon vanilla extract – just enough warmth
- A small pinch of salt – balances the sweetness
- 5 tablespoons butter – melted in the pan for crispy edges
How to make German Pancakes?

Step 1 – Preheat and melt the butter
I set the oven to 425°F and toss the butter straight into the baking dish. No greasing, no fuss. It melts while the oven heats up. I’ve burned it before by forgetting it in there too long, so now I check it early. You want melted, not browned.
Step 2 – Mix the batter
Everything goes into a blender. Eggs, milk, flour, vanilla, salt. I blend until it looks smooth, but not too long. Once I over-blended and it came out weirdly dense. Now I stop as soon as the lumps are gone.
Step 3 – Pour over melted butter
I pull the hot dish out carefully. The butter is bubbling a little. That’s perfect. I pour the batter right over it. It hisses slightly, which always feels like a good sign.
Step 4 – Bake and don’t touch it
Back into the oven it goes. I set a timer for 22 minutes but usually peek around 20. The edges puff up high and turn golden. The middle stays softer and dips slightly. I try not to open the oven too early. I’ve done that and watched it deflate mid-bake. Not great.
Step 5 – Serve right away
It comes out all dramatic and puffed, then slowly sinks as it cools. That’s normal. I dust powdered sugar on top while it’s still warm and add syrup. Sometimes berries if I have them. Most days, I don’t.
Something that almost ruined it
One time I forgot the salt. It sounds small, but it made everything taste flat. Not sweet, not savory, just… blank. Now I always add that pinch, even if I’m rushing.
Another time I used a glass dish instead of metal. It still worked, but the edges didn’t get that crispy lift. They just kind of sagged. So yeah, metal pan matters more than I thought.
Texture, smell, and the part I wait for
The best part isn’t actually the first bite. It’s that moment right when it comes out of the oven. The edges are tall and golden, almost like a popover. The center is soft and slightly custardy.
Then the smell hits fully. Butter, eggs, a hint of vanilla. It fills the kitchen in a way regular pancakes never do.
I always tear off a corner piece first. The crispy edge. It’s a little salty, a little sweet, and way better than the middle if I’m being honest.
The middle is softer, almost like a thick crepe. Good, but different. I usually drown that part in syrup.
Tips
- Use a metal pan if you can. It helps the edges rise and crisp better.
- Don’t over-blend the batter. Smooth is enough.
- Make sure the butter is hot when you pour the batter in. That sizzle matters.
- Avoid opening the oven early. It can collapse before it sets.
- Serve immediately. It deflates fast, and that puff is part of the fun.
- If it sticks slightly, just scoop it out. It’s not meant to be perfect slices anyway.
This post contains affiliate links. German Pancakes was one of my favorite breakfasts growing up, and now I get why. They feel a little dramatic, a little messy, and completely worth it. They puff up like they’re showing off, then settle into something soft and buttery.
Top them with powdered sugar and syrup and they’re kind of hard to stop eating. If these are new to you, seriously, just try them once. They look complicated but they’re not. They’re actually one of the easiest breakfasts I make when I don’t feel like trying too hard.
And yeah, I still crouch in front of the oven every time. Some habits stick.
German Pancakes Recipe
Description
Experience the magic of German Pancakes, also known as Dutch Babies. This simple, oven-baked breakfast delight puffs up dramatically in the pan, creating crispy golden edges and a soft, custard-like center. Perfect for a special weekend breakfast, these pancakes are best served warm with a dusting of powdered sugar and your favorite syrup.
Ingredients
Batter
For Baking & Serving
Instructions
Preheat and Melt Butter
Preheat your oven to 425°F (220°C). Place the 5 tablespoons of butter into a 9x13 inch metal baking dish or cast-iron skillet. Place the dish in the preheating oven to melt the butter while you prepare the batter.Ensure the butter is fully melted but not browned.Prepare the Batter
In a blender, combine the eggs, milk, flour, salt, and vanilla extract. Blend on high speed until the mixture is completely smooth and no lumps of flour remain. This usually takes about 20-30 seconds.Using a blender ensures a smooth texture and helps incorporate air for a better rise.Combine and Bake
Carefully remove the hot baking dish from the oven. Immediately pour the blended batter over the melted butter. Return the dish to the oven quickly to maintain the heat.Be careful when handling the hot dish and pouring the batter to avoid splashing.Bake Until Puffed
Bake for 22-27 minutes. Do not open the oven door during this time, as the drop in temperature can cause the pancake to deflate prematurely. The pancake is done when the edges are deeply golden brown and puffy, and the center is set.Cooking time may vary slightly depending on your oven and the material of your baking dish.Serve Warm
Remove from the oven. The pancake will begin to deflate as it cools, which is normal. Serve immediately while still warm. Sprinkle generously with powdered sugar and drizzle with maple syrup.Optional: Add fresh berries or lemon juice for a fresh twist.
Nutrition Facts
Servings 4
- Amount Per Serving
- Calories 310kcal
- % Daily Value *
- Total Fat 18g28%
- Saturated Fat 10g50%
- Trans Fat 0.5g
- Cholesterol 290mg97%
- Sodium 180mg8%
- Potassium 150mg5%
- Total Carbohydrate 26g9%
- Dietary Fiber 1g4%
- Sugars 4g
- Protein 11g22%
* Percent Daily Values are based on a 2,000 calorie diet. Your daily value may be higher or lower depending on your calorie needs.
Note
For best results, use a metal pan rather than glass, as metal conducts heat better and helps the pancake puff higher. Ensure all ingredients are at room temperature for optimal blending.
