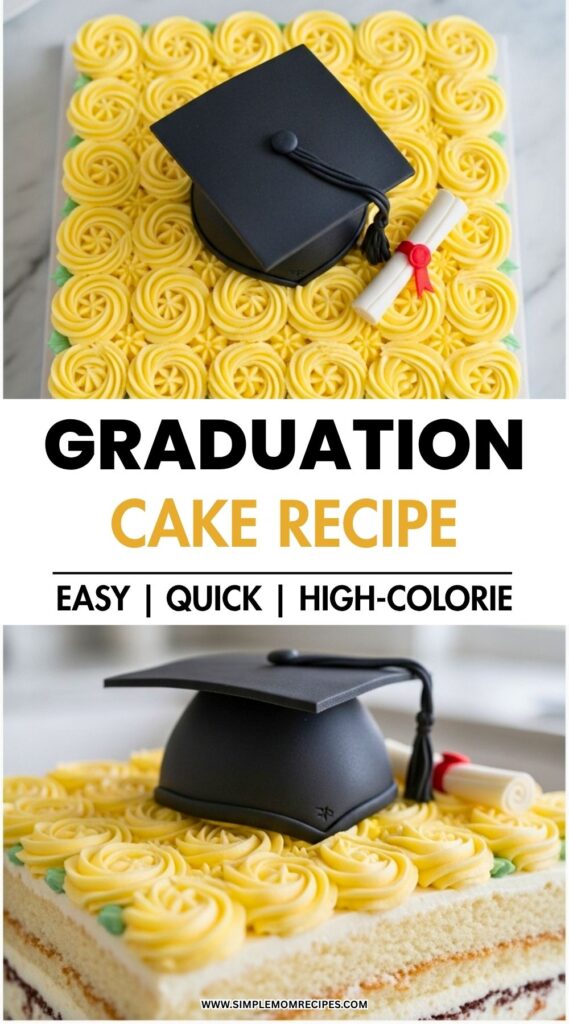
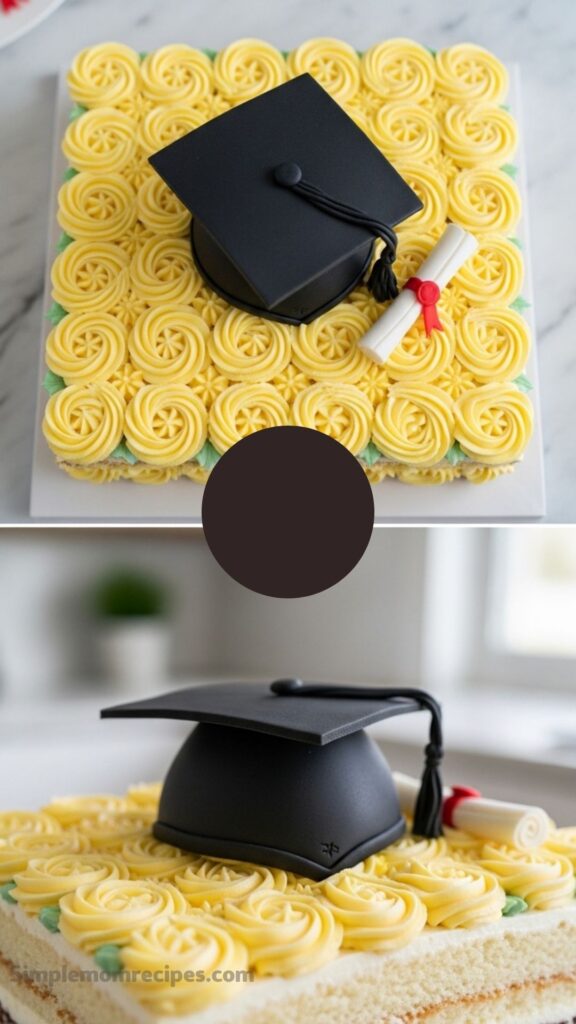
A big, cheerful sheet cake topped with a tiny cap and rolled diploma – soft layers, buttery frosting, and just enough chaos to feel homemade.
I was halfway through frosting when I realized I’d forgotten to chill the dome cake. Of course. The one part that actually needed to be firm. I stood there, spatula in hand, buttercream slowly sliding like it had somewhere better to be. I scraped it off, stuck the whole thing in the fridge, and pretended that was always the plan.
This cake isn’t delicate. It’s big, a little dramatic, and kind of fun to mess with. The whole idea is simple though – a sheet cake as the base, a small dome for the cap, and a rolled diploma sitting off to the side like it casually earned itself.
I made this for a family graduation, and all I had to go on was “make it look like a cap and diploma.” No design sketch. No exact colors. Just vibes. That actually made it easier. I stopped overthinking and just started assembling pieces like I was building something out of edible blocks.
Learn how to make easy graduation cake with this step by step tutorial. This sheet cake is decorated with marshmallow fondant and buttercream frosting and includes a cap and diploma. Perfect for Kindergarten, high school or university graduates. It sounds like a lot, but once everything is baked, it turns into a layering and decorating project more than anything else.
A quick moment before things got messy
I always line up everything before I start. Not in a neat, organized way. More like controlled chaos. Bowls here, spatulas there, fondant wrapped in plastic so it doesn’t dry out. I tell myself I’ll clean as I go. I never do.
The rice krispie treats sat there looking too plain, and I almost skipped the diploma part. Then I thought, no, that’s literally half the theme. So I pushed through and rolled them anyway, even though they kept sticking to my hands.
Ingredients I Used for the Recipe
- 2 yellow sheet cakes (9×13 each) – soft base layers that keep things light
- 2 chocolate sheet cakes (9×13 each) – adds contrast and a richer flavor
- 1 small dome cake (about 5-inch) – becomes the graduation cap
- 10 cups buttercream frosting (tinted yellow) – for covering and piping roses
- 4 cups marshmallow fondant (half black, half white) – shapes the cap and diploma
- 1 batch rice krispie treats – rolled into the diploma center
- Powdered sugar – keeps fondant from sticking everywhere
- Food coloring or edible marker – small touch-ups if needed
- Ribbon (optional) – for wrapping the diploma
- Bubble tea straws or dowels – support so things don’t sink
How to make Easy Graduation Cake {Cap & Diploma}?
Step 1 – Bake and cool everything
I baked all the sheet cakes first and let them cool completely. I rushed one tray slightly and paid for it later when the frosting started melting. Just wait. It’s worth it.
Step 2 – Prep the buttercream
I made a big batch and tinted it yellow. It looked way too bright at first, almost neon, but it softened once spread out. I kept it slightly thick so it would hold the piping shape.
Step 3 – Shape the cap base
I placed the dome cake on a board and spread a thin crumb coat. It wasn’t perfect. Some crumbs showed. I chilled it anyway and moved on. Once firm, I covered it with black fondant and smoothed it out as best as I could.
Step 4 – Make the cap top
I cut a square from cardboard, spread a thin layer of frosting, and covered it with black fondant. The edges were messy, so I trimmed them with a knife. Not perfectly straight, but good enough once placed on top.
Step 5 – Add tassel detail
I folded a small ribbon and stuck it in the center with a bit of frosting. Then added a tiny fondant circle over it. This part almost fell apart twice before it finally held.
Step 6 – Build the diploma
I rolled the rice krispie treats into a log shape. It cracked a little, so I pressed it back together. Then I wrapped it in white fondant and added two small circles at the ends. It suddenly looked like an actual diploma.
Step 7 – Stack the sheet cakes
I placed the chocolate cakes side by side, spread frosting, then added the yellow layers on top. It felt slightly uneven, so I pressed down gently and hoped no one would notice.
Step 8 – Frost and decorate
I covered the whole cake in buttercream and piped large roses using a star tip. Some looked great. Some looked like blobs. I kept going anyway because once the whole cake is covered, it blends in.
Step 9 – Assemble everything
I inserted straws where the cap and diploma would sit. This step matters more than it seems. Without support, things sink fast. Then I placed both pieces on top and adjusted until it looked balanced.
Step 10 – Final touches
I added small fondant letters for a message. They weren’t perfectly aligned. I fixed two, left the rest slightly crooked. It felt more real that way.
Something that almost ruined it
The fondant started sticking to the counter like glue. I forgot to dust powdered sugar underneath. I tried lifting it and it stretched weirdly, almost tearing. I had to peel it off slowly and re-roll it. After that, I kept tossing powdered sugar everywhere like I finally learned my lesson.
Also, the buttercream got too soft at one point. I didn’t notice until the roses started losing shape. Quick fridge break fixed it, but yeah, timing matters more than I like to admit.
Tips
- Chill cakes before decorating – it makes everything easier to handle
- Use support straws under heavy decorations – otherwise they sink
- Keep fondant covered – it dries faster than expected
- Don’t overthink piping – messy roses still look good together
- Work in stages – trying to do everything at once gets frustrating
- If frosting gets too soft, chill it briefly and continue
- Use powdered sugar generously when rolling fondant
- Trim fondant slowly – rushing leads to uneven edges
Why I make it this way
I like big cakes that feel like an event on their own. This one does that without needing perfect skills. It’s more about assembling pieces than mastering technique. You bake, stack, shape, and adjust as you go.
Also, I don’t always want to deal with complicated tiered cakes. This gives that same “wow” feeling but stays manageable. Even with a few mistakes, it still looks like you put serious effort into it.
And honestly, the little imperfections? They help. The slightly uneven cap, the not-so-perfect roses, the diploma that’s not exactly centered. It all comes together in a way that feels homemade, not showroom perfect.
That’s usually what people remember anyway.
Easy Graduation Cake Recipe
Description
Celebrate the big achievement with this stunning and easy Graduation Cake! This sheet cake features a classic buttercream rose design, topped with an edible marshmallow fondant graduation cap and a Rice Krispie treat diploma. Perfect for kindergarten, high school, or university graduates, this cake is as delicious as it is impressive.
Ingredients
Cakes
Frosting & Decorations
Instructions
Preparation
Bake the Cakes
Preheat oven to 350°F (175°C). Grease and flour two 9x13 inch pans for the yellow cake, two 9x13 inch pans for the chocolate cake, and one 5-inch dome pan. Bake according to your preferred recipe instructions until a toothpick inserted comes out clean. Allow all cakes to cool completely on wire racks.You will have leftover batter from the dome cake; use it for cupcakes if desired.Prepare Frosting
While cakes are cooling, prepare the American buttercream. Tint approximately 8-9 cups of the frosting yellow using gel food coloring. Reserve about 1 cup of white frosting for assembling the decorations.Chill the frosting for 15 minutes if it is too soft to pipe.
Make the Graduation Cap
Cover the Dome
Place the cooled dome cake on a small cake board. Frost smoothly with a thin layer of buttercream. Chill in the refrigerator for 20 minutes to set. Roll out the black fondant and drape it over the chilled dome. Smooth with a fondant smoother and trim excess at the base with a pizza cutter. Insert a bubble tea straw into the center for support later.Ensure the fondant is smooth and free of air bubbles.Create the Cap Top
Cut a square piece of cardboard (approx. 4x4 inches). Use a black edible marker to color the sides of the cardboard so it doesn't show if the fondant slips. Spread a thin layer of frosting on top of the cardboard, then cover with black fondant. Trim excess. Cut a small circle of black fondant for the center. Attach a folded ribbon or fondant strip to the center using corn syrup, then place the small circle on top to secure it.Use melted chocolate or royal icing to stick the cardboard square to the top of the dome cake.
Make the Edible Diploma
Form the Core
Take a portion of Rice Krispie treats and roll them into a tight cylinder/log shape. Lightly coat the outside with white buttercream frosting to help the fondant adhere.Keep the log uniform in thickness.Cover with Fondant
Roll out white fondant. Place the Rice Krispie log on one end and roll it up, covering the sides completely. Trim excess fondant. Cut two small white fondant circles and attach them to the open ends of the log with a dab of frosting. Tie a red ribbon or fondant strip around the middle.Steam lightly to remove powdered sugar residue if needed.
Assembly
Layer the Sheet Cakes
Place the two chocolate sheet cakes side-by-side on a large rectangular cake board. Spread a layer of yellow frosting on top. Place the two yellow sheet cakes on top of the chocolate layer. Frost the entire assembled sheet cake smoothly with yellow buttercream.Chill the frosted cake for 30 minutes to firm up the crumb coat.Pipe Roses
Fit a piping bag with a large star tip (e.g., Wilton 1M). Pipe yellow buttercream roses all over the top and sides of the sheet cake. Ensure even coverage.Keep the piping bag cool to maintain definition in the roses.Final Placement
Insert bubble tea straws or dowels into the sheet cake where the cap and diploma will sit to provide support. Carefully place the graduation cap dome and the diploma on top. Add any additional lettering or decorations to the cake board.Handle the fondant decorations gently to avoid fingerprints.
Nutrition Facts
Servings 30
- Amount Per Serving
- Calories 485kcal
- % Daily Value *
- Total Fat 20g31%
- Saturated Fat 12g60%
- Trans Fat 0.5g
- Cholesterol 65mg22%
- Sodium 320mg14%
- Potassium 150mg5%
- Total Carbohydrate 72g24%
- Dietary Fiber 1g4%
- Sugars 55g
- Protein 4g8%
* Percent Daily Values are based on a 2,000 calorie diet. Your daily value may be higher or lower depending on your calorie needs.
Note
Make ahead: Bake cakes and make frosting 2 days in advance. Store in airtight containers. Assemble and decorate 1 day before the event. Store in the fridge, but bring to room temperature 1 hour before serving for best texture. Fondant may become sticky in the fridge due to condensation; steam lightly to restore sheen if necessary.
