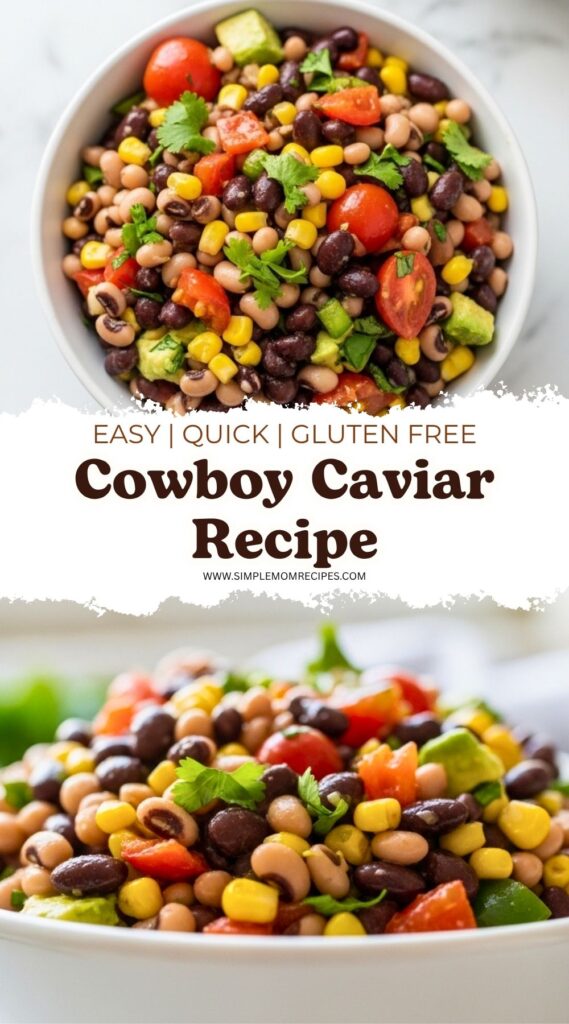
Bright, tangy cowboy caviar with a quick homemade dressing, packed with beans, corn, and fresh crunch – one small tweak keeps it from turning oily
I started with too much onion. I could tell halfway through chopping. That sharp smell hit first, then my eyes watered, and I just kept going anyway. Bad decision. I almost dumped it all in the bowl out of habit, but something in my brain said stop, just… stop. So I scooped a little pile back onto the cutting board with my fingers like a gremlin trying to undo things.
That’s kind of how this whole thing goes for me. Not perfectly measured. Not super neat. But it works.
Cowboy caviar sounds fancy, but it’s really not. It’s a big, messy bowl of beans, chopped vegetables, and a tangy dressing that somehow disappears faster than anything else on the table. I used to think it was just another bean salad. It’s not. It’s sharper, brighter, louder. You scoop it like salsa but it eats like a full meal if you’re not paying attention.
I came across a version tucked inside a long string of recipes and side dishes, labeled simply as Cowboy Caviar, and it stuck with me. The idea was simple but also kind of genius – take pantry stuff, add fresh crunch, and fix the one annoying problem most versions have: too much oily bottled dressing. That part always bugged me too.
So I made my own version. Tweaked it mid-way. Forgot the lime at first. Added it later. Ate half of it standing up.
A quick moment before I actually started
I almost didn’t make this.
I had opened the fridge, saw the beans, the half-used cilantro bunch that was one day away from going bad, and just closed the door again. Felt like too much chopping. But then I remembered how fast this comes together once you actually start.
Also, I was hungry in that impatient way where snacks won’t fix it.
So I pulled everything out. Bowls everywhere. Knife slightly dull, which I ignored. That came back to annoy me when I hit the bell pepper.
Ingredients I Used for the Recipe
- 2 cans black-eyed peas, drained well – these make the base and keep it hearty
- 1 can black beans, rinsed – adds a softer texture contrast
- 1 1/2 cups corn – I used frozen, thawed in a hurry under tap water
- 1 1/2 cups chopped tomatoes – juicy and fresh, even if they’re not perfect
- 1 bell pepper, chopped small – I went with red for sweetness
- About 1/2 small red onion – not the whole thing, learned that the hard way
- 1/2 cup cilantro, chopped – stems included, no patience to pick leaves only
- 1 jalapeño, seeds mostly removed – I left a few by accident
- 1 avocado – added at the end for creaminess
- 1/3 cup olive oil – for the dressing
- 3 tablespoons lime juice – I forgot at first, then fixed it
- 2 cloves garlic, minced – slightly uneven pieces, whatever
- 1 teaspoon salt – then adjusted later
- 1 teaspoon dried oregano – adds that familiar savory note
- 1/2 teaspoon dried basil – subtle but nice
- 1 teaspoon honey – just a touch to balance the acidity
- A pinch red pepper flakes – optional, I added more than planned
- Black pepper – a few cracks, not measured
How to make Cowboy Caviar?
Step 1 – Drain things properly
I rushed this part and regretted it. I drained the beans and corn, but not enough at first. When I mixed everything later, there was a little pool forming at the bottom. Not terrible, but it dulls the flavor. So yeah, shake them dry. Let them sit a minute. It matters more than you think.
Step 2 – Chop everything small
This is the part that feels endless for about five minutes. Tomatoes, pepper, onion, jalapeño. I tried to keep things evenly small, but honestly some chunks were bigger. Didn’t ruin anything. Just made certain bites louder than others.
Step 3 – Throw it all in a big bowl
Beans, corn, chopped vegetables, cilantro. I always underestimate bowl size and end up switching halfway. Did that again here. Start bigger than you think you need.
Step 4 – Mix the dressing separately
Olive oil, lime juice, garlic, salt, oregano, basil, honey, red pepper flakes. I whisked it in a mug because it was nearby. Tasted it. Too sharp. Added a tiny bit more honey. Better.
Step 5 – Combine and toss
Poured the dressing over everything and mixed. Slowly at first, then less carefully. This is where I noticed the onion was a bit much. Still fine, just stronger.
Step 6 – Let it sit
I tried to eat it immediately. It was okay. Then I walked away for like 20 minutes. Came back. Way better. The flavors settle and mellow a bit.
Step 7 – Add avocado last
Cut it too early once before and it went weirdly brown and soft. Now I wait. Toss it in gently right before serving so it stays fresh and creamy.
Something that almost ruined it
The dressing ratio.
I almost added more oil. It looked like it needed it. Everything felt a little dry at first glance. But I held off, and I’m glad I did. After sitting, the vegetables release a bit of moisture and everything loosens up naturally.
If I had added more oil, it would’ve gone slippery. That’s the problem I’ve had before with other versions. Too glossy, too heavy. This one stays bright and kind of light, even though it’s filling.
Also, the jalapeño. I thought I had removed all the seeds. I had not. One bite hit hard. Not unbearable, just… surprising. Next time I’ll check more carefully. Or maybe not. It kept things interesting.
When I actually like making this
Not for fancy dinners. Not for anything that requires plating or looking neat.
This is for when people are around and nobody wants to think too much about food. Or when I want something in the fridge that I can keep going back to without reheating.
It works cold. It works room temp. It works straight out of the bowl while standing in the kitchen.
I’ve eaten it with chips, obviously. But also just with a spoon. And once stuffed into a tortilla with scrambled eggs. That one was messy but good.
There’s something about the mix of textures that keeps it from getting boring. Soft beans, crisp peppers, juicy tomatoes, creamy avocado. Every bite shifts a little.
Tips
- Don’t rush draining the beans – extra water kills the flavor balance
- Start with less onion than you think – you can always add more later
- Taste the dressing before mixing – it should feel slightly sharp on its own
- Let it sit at least 20 minutes – this part actually changes everything
- Add avocado right before serving – not earlier, trust me
- If it feels bland, it probably needs salt or lime, not more oil
- Chop things small but don’t stress perfection – uneven bites are fine
- Store it covered in the fridge – it gets even better the next day, slightly softer but more blended
I keep going back to this because it’s flexible. You can tweak it without breaking it. Add more heat, skip the cilantro if you’re one of those people, throw in extra corn if you like sweetness.
And it never feels heavy, even when you eat way too much of it. Which I always do.
Also, small note. I did find that tiny reference buried in a long chain of recipes and side dishes, mentioning how this cowboy caviar is meant to be simple, all-natural, and not drowning in bottled dressing. That part stuck. Because yeah, that’s the difference. A quick homemade mix instead of something store-bought changes the whole vibe.
Anyway. Next time I’ll sharpen my knife first. Probably.
Cowboy Caviar Recipe
Description
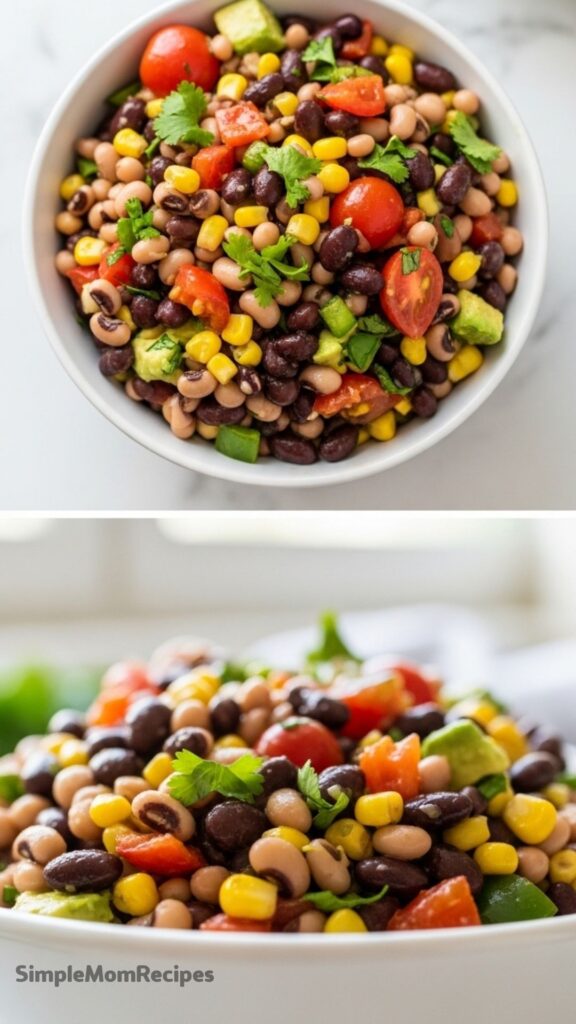
This vibrant and zesty Cowboy Caviar, also known as Texas Caviar, is a hearty bean salad that doubles as a delicious dip. Made with black-eyed peas, black beans, corn, fresh veggies, and a tangy homemade Italian dressing, it’s a vegan and gluten-free crowd-pleaser perfect for parties, potlucks, or a healthy snack. Unlike store-bought versions, this recipe uses fresh ingredients and a simple scratch-made dressing for superior flavor.
Ingredients
Cowboy Caviar Base
Homemade Italian Dressing
Instructions
Prepare the Vegetables
In a large serving bowl, combine the rinsed and drained black-eyed peas, black beans, corn, chopped tomatoes, bell pepper, red onion, cilantro, and jalapeños. If using avocado, do not add it yet.Ensure beans and corn are well-drained to prevent watery salad.Make the Dressing
In a small cup or jar, whisk together the olive oil, red wine vinegar (or lime juice), garlic, oregano, basil, maple syrup/honey, salt, black pepper, and red pepper flakes until well blended and emulsified.Taste and adjust salt or vinegar as needed.Combine and Marinate
Drizzle the dressing over the vegetable and bean mixture. Toss gently until everything is evenly coated. Let the mixture marinate in the refrigerator for at least 20 minutes to allow flavors to meld.Can be made up to 4 days in advance (without avocado).Serve
Just before serving, stir in the diced avocado if using. Serve with tortilla chips, as a side salad, or over greens. Enjoy!Great with crushed corn chips or pepitas on top.
Nutrition Facts
Servings 8
- Amount Per Serving
- Calories 185kcal
- % Daily Value *
- Total Fat 10g16%
- Saturated Fat 1.5g8%
- Sodium 380mg16%
- Potassium 450mg13%
- Total Carbohydrate 22g8%
- Dietary Fiber 6g24%
- Sugars 4g
- Protein 6g12%
* Percent Daily Values are based on a 2,000 calorie diet. Your daily value may be higher or lower depending on your calorie needs.
Note
Storage: Keep covered in the refrigerator for up to 4 days. Add avocado only right before serving to prevent browning. Serving Suggestion: Excellent with tortilla chips, as a topping for grilled chicken or fish, or scooped into lettuce cups for a low-carb option.
