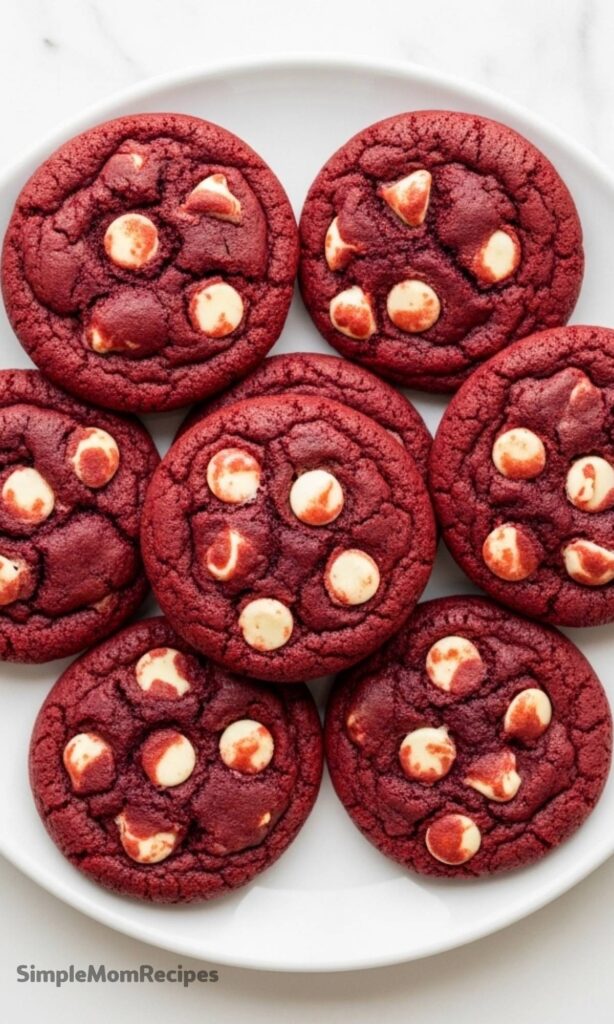
There’s something truly special about a cookie that feels like a celebration, and these red velvet wonders are exactly that.
They capture the soul of a classic red velvet cake but hand it to you in a soft, chewy, infinitely shareable form.
A Cookie with a Heart
You don’t need a special occasion to bake these, but they have a way of making any day feel a little more festive.
That vibrant color is an instant mood-lifter, a cheerful hello from the plate that promises a deliciously tender bite.
Ingredients Needed for the Recipe
- Unsalted Butter: Provides a rich, creamy base and helps the cookies spread beautifully as they bake.
- Cream Cheese: This is the secret weapon, lending a subtle tang and creating an incredibly soft, cake-like texture.
- White & Dark Brown Sugar: The white sugar encourages a slight crispness at the edges, while the brown sugar adds moisture and a deep, caramel-like sweetness.
- Baking Soda: Works as the leavening agent, giving the cookies their perfect lift and a little puff.
- Kosher Salt & Vanilla Extract: These two enhance all the other flavors, balancing the sweetness and adding warmth.
- Egg and Egg Yolk: The extra yolk is a little trick for extra chewiness and a richer, more tender crumb.
- Red Food Coloring: It’s what gives these cookies their signature bold and cheerful identity.
- All-Purpose Flour: The main structure of the cookie, holding all that goodness together.
- Natural Cocoa Powder: This is key for that authentic, mild red velvet flavor, rather than an intense chocolate hit.
- White Chocolate Baking Chips: They create sweet, melty pockets and mirror the classic cream cheese frosting pairing.
How to make Red Velvet Cookies Recipe?

Step 1 – PREPARE YOUR STATION
Start by getting your oven ready, heating it to 350°F, which is the perfect temperature for a slow, even bake.
Grab your baking sheets and line them with parchment paper or a silicone mat; this prevents sticking and makes cleanup a breeze.
Step 2 – CREAM THE FOUNDATION
In the bowl of your stand mixer, combine the room-temperature butter, cream cheese, both sugars, baking soda, salt, and vanilla.
Mix on a medium speed until everything is perfectly smooth, pale, and fluffy, which should take just a minute or two.
Step 3 – INCORPORATE THE WET INGREDIENTS
Scrape down the sides of the bowl to ensure everything is mixed in, then add the whole egg and mix until it disappears into the batter.
Follow with the egg yolk, and then, carefully, the red food coloring, mixing on a lower speed to avoid any colorful splatters.
Step 4 – BRING IN THE DRY TEAM
With the mixer on its lowest setting, add the all-purpose flour and the natural cocoa powder.
Mix only until the last streaks of dry ingredients vanish; overmixing at this stage can lead to a tougher cookie.
Step 5 – FOLD IN THE SWEETNESS
Now, pour in about a cup and a half of the white chocolate chips, saving the rest for later.
Stir them in gently, just until they’re evenly scattered throughout the vibrant red dough.
Step 6 – SHAPE WITH A LITTLE DAMPNESS
Here’s a pro tip: dampen your hands slightly with water and then give them a quick pat with a towel.
This little bit of moisture prevents the dough from sticking to your palms as you roll it into generous, one-inch balls.
Step 7 – BAKE TO PUFFY PERFECTION
Place the dough balls on your prepared sheets and bake them one sheet at a time for 11 to 13 minutes.
You’ll know they’re done when the edges look set and dry, while the centers remain soft and delightfully puffy.
Step 8 – THE FINISHING TOUCH
The moment the cookies come out of the oven, press the reserved white chocolate chips into their warm, puffy tops.
Let them cool on the baking sheet for five minutes; they’ll deflate slightly, becoming perfectly chewy as they rest.
The Cream Cheese Connection
That block of cream cheese in the dough isn’t just for flavor; it’s a textural miracle worker.
It introduces a wonderful softness and a slight tang that cuts through the sweetness, making each cookie incredibly satisfying.
Tips
- For a truly professional look, always reserve some chips to press on top after baking; it makes them look bakery-worthy.
- Using room-temperature butter and cream cheese is non-negotiable; it ensures a smooth, homogenous dough that bakes evenly.
- If your dough feels a bit sticky when rolling, don’t hesitate to re-wet your hands; it’s the easiest way to manage it.
- Resist the urge to bake two sheets at once; giving each batch the oven’s full attention guarantees consistent results.
Ahead-of-Time Baking
This dough is a fantastic candidate for your freezer, ready for any sudden cookie craving or unexpected guest.
Simply roll the dough into balls, freeze them solid on a tray, and then transfer to a freezer bag for up to a month.
The Color Conundrum
Getting that classic red color does require a little help from liquid food coloring for the best result.
Natural alternatives tend to turn brown when baked, so a trusted brand like McCormick is your best bet for that brilliant, cheerful hue.
Red Velvet Cookies Recipe
Description
These soft, chewy red velvet cookies taste just like red velvet cake—but with less effort! Infused with cream cheese and studded with white chocolate chips, they’re perfect for Valentine’s Day or any time you’re craving a festive, tender treat. Easy to make, freeze, or bake ahead!
Ingredients
Instructions
- Preheat your oven to 177°C (350°F). Line two baking sheets with parchment paper or silicone mats.
- In a stand mixer fitted with a paddle attachment, combine butter, cream cheese, white sugar, brown sugar, baking soda, salt, and vanilla extract. Mix on medium speed for 1–2 minutes until creamy and uniform.
- Scrape down the bowl. Add the egg and mix until incorporated. Repeat with the egg yolk, then add red food coloring and mix on low to avoid splatter.
- Add flour and cocoa powder. Mix on low until just combined—do not overmix.
- Fold in 1½ cups of white chocolate chips until evenly distributed.
- Wet your hands lightly and roll dough into 1-inch balls (heaping tablespoons). Place on prepared baking sheets, spaced 2 inches apart.
- Bake one sheet at a time for 11–13 minutes, until edges are set but centers are still soft.
- Immediately after removing from oven, press reserved white chocolate chips onto the tops of the warm cookies. Let cool on sheet for 5 minutes, then transfer to a wire rack.
Nutrition Facts
Servings 36
- Amount Per Serving
- Calories 180kcal
- % Daily Value *
- Total Fat 9gg14%
- Saturated Fat 5gg25%
- Trans Fat 0gg
- Cholesterol 25mgmg9%
- Sodium 150mgmg7%
- Potassium 85mgmg3%
- Total Carbohydrate 24gg8%
- Dietary Fiber 1gg4%
- Sugars 16gg
- Protein 2gg4%
- Calcium 40 mg
- Iron 1 mg
* Percent Daily Values are based on a 2,000 calorie diet. Your daily value may be higher or lower depending on your calorie needs.
Note
- Storage: Store cooled cookies in an airtight container for up to 5 days, or freeze for up to 1 month.
- Freeze dough: Portion unbaked dough balls into a freezer bag and bake from frozen—just add 1–2 extra minutes.
- No white chocolate? Substitute milk or dark chocolate chips, though the classic red velvet look will change.
- For deeper red: Use 2 tablespoons of food coloring; for subtle burgundy, use just 1 teaspoon.
