Let’s talk about ice cream. The good, creamy, soul-soothing kind. For the longest time, loving it felt like a tiny betrayal, a daily dance with guilt. That all changed for me with a surprisingly loud kitchen gadget.
The Ninja Creami isn’t just an appliance. It’s a permission slip. A way to have your ice cream and eat it too, every single day, while sticking to your goals. The magic is in turning simple, wholesome ingredients into something spectacularly indulgent.
It’s honestly become one of my favorite kitchen experiments. So, I’m sharing my absolute best base recipes to get you started on your own frosty, protein-packed adventures.
Why This Kind of Ice Cream is a Game-Changer
Store-bought “healthy” ice creams can be pricey and, let’s be honest, sometimes a bit lackluster in flavor. When you make it yourself, you’re in full control.
You choose the flavors, the sweetness, the texture. It becomes a creative outlet, not just a treat. Plus, the cost per pint is a fraction of the specialty brands.
It feels clever, like you’ve discovered a secret. And the best part? No fancy culinary skills are required. Just a little mixing, some patience while it freezes, and the courage to press a very noisy button.
Ingredients Needed for the Recipe
Here’s the beautiful part: you don’t need a long list. Each recipe below uses a slightly different combination from this core pantry. Think of them as your building blocks.
- Ready-to-Drink Protein Shake: The ultimate shortcut for flavor and creaminess. It’s the liquid base that does double duty.
- Greek Yogurt: Adds a wonderful tang and thick, rich body to the final texture. It’s a protein powerhouse on its own.
- Cottage Cheese: Don’t knock it till you try it. Blended smooth, it creates an incredibly creamy, neutral base that’s packed with protein.
- Milk or Milk Substitute: Almond, coconut, oat—whatever you prefer. This helps with blending and achieving the perfect scoopable consistency after spinning.
- Protein Powder: Totally optional, but a great way to amplify flavor and protein content. Use a powder you already enjoy the taste of.
- Powdered Peanut Butter: Concentrated peanut flavor without all the oil. It blends in seamlessly for a delicious nutty twist.
- Instant Pudding Mix: A secret weapon for extra creaminess and a flavor boost. Just a little bit makes a big difference.
- Vanilla Extract or Cocoa Powder: Your classic flavor enhancers. Pure and simple.
- Sweetener of Choice: Honey, maple syrup, a dash of stevia—this is your chance to tailor it to your taste.
How to make ?
The process is the same for every base. That’s what makes it so easy. You mix, you freeze, you spin. The real work happens in your freezer and the machine.
Just remember, patience is key. Trying to spin a container that isn’t fully frozen solid just won’t work. Trust the overnight freeze.
Step 1- Choose and Mix Your Base
Pick one of the recipe combinations below. You can mix everything right in the Creami pint container. A small whisk, a spoon, or even a battery-operated frother works perfectly.
The goal is just to get everything smooth and well combined. For the cottage cheese version, if you want it super smooth, give it a quick blend in a regular blender first.
Step 2- The Essential Rest
This might seem like a strange step, but don’t skip it. After mixing, let the container sit on your counter for 5 to 10 minutes, uncovered.
This allows any powders to fully hydrate and the mixture to settle. It helps prevent a powdery or icy texture later on.
Step 3- Freeze Solid
Now, snap on the lid. Make sure it’s on securely. Place the container in your freezer on a flat, level surface.
Let it freeze for a full 24 hours, or at minimum, overnight. It needs to be a solid block. This is the hardest part, the waiting.
Step 4- The Main Event: First Spin
Take the frozen pint from the freezer. Let it sit on the counter for about 10 minutes, or run warm water over the sides for 30 seconds.
This loosens it just enough from the container. Pop it into the Creami, secure the lid, and hit the “Lite Ice Cream” button. Brace for the roar. It’s loud, but it’s a beautiful sound.
Step 5- The Re-Spin for Perfection
After the first cycle, you’ll see something that looks like finely shaved snow. Take the container out, remove the lid.
Add about an ounce or two of your milk or milk substitute right into the center. This liquid is crucial. It helps the machine transform that snow into creamy dreaminess.
Put it back in and press “Re-Spin.” Once is usually enough, but if it still looks crumbly, you can re-spin one more time.
Step 6- The Fun Part: Mix-Ins
Now for the artistry. Take your freshly spun ice cream out again. Use a spoon to make a well in the center.
Add your crushed cookies, chopped nuts, chocolate chips, or swirl of fruit. Press the “Mix-In” button. In seconds, your custom creation is ready.
Four Fantastic Base Recipes to Try
These are my personal favorites. Each has its own character and starting point. I suggest beginning with the Fairlife one, it’s incredibly forgiving and delicious.
The Simple Fairlife Base: Pour in a 12oz chocolate Fairlife shake. Add 3oz of vanilla Greek yogurt and 2 tablespoons of powdered peanut butter. Mix. That’s it. It’s my weekly go-to.
The Tangy Greek Yogurt Base: Whisk together 1 ¼ cups of Greek yogurt, ¼ cup of milk, a teaspoon of vanilla, and if you want, a scoop of vanilla protein powder. It’s thick, tangy, and satisfying.
The Classic Protein Shake Base: Combine 12oz of milk, 1 ½ scoops of chocolate protein powder, 2 tablespoons of cocoa powder, and a tablespoon of sweetener. A pure, chocolatey delight.
The Surprisingly Creamy Cottage Cheese Base: Blend 1 ½ cups of cottage cheese, ½ cup of milk, a tablespoon of honey, and 2 tablespoons of cheesecake-flavor pudding mix until silky smooth. You won’t believe the texture.
Tips
- Always freeze your pint on a level shelf. An uneven freeze makes the spinning process less effective.
- Don’t overfill the container. Stay at or below the “Max Fill” line. The mixture needs room to expand as it freezes and gets churned.
- Fat is flavor, and creaminess. Using higher-fat ingredients like whole milk or full-fat yogurt will give you a richer final product.
- Experiment without fear. The beauty of this is customization. Try new yogurt flavors, different pudding mixes, or extracts like almond or coconut.
- If your ice cream is too hard after storing leftovers, let it thaw a few minutes or give it a quick re-spin with a splash of milk to bring it back to life.
Mastering the Perfect Texture
If you find your first attempts are a bit icy or crumbly, don’t worry. There are easy fixes. The “re-spin” with a bit of liquid is the most important one.
For guaranteed creaminess from the start, consider adding a “creamer” agent. A tablespoon of instant pudding mix is my favorite easy add-in.
A quarter teaspoon of guar gum or xanthan gum works wonders too. Start small. You can always add more next time.
Remember, the machine is powerful. It can handle dense, frozen blocks. Trust the process, and don’t be afraid to use that re-spin button a second time if you need to.
Serving and Endless Variations
This is where the fun truly never ends. Once you have your creamy base, the topping and mix-in world is yours. I love keeping a stash of pre-crushed toppings in little jars.
Think smashed graham crackers for a s’mores vibe, toasted pecans, freeze-dried strawberry pieces, or dark chocolate chunks.
You can also do swirls. After the final spin, gently fold in a ribbon of sugar-free chocolate syrup or a fruit compote. The possibilities are genuinely endless, and that’s what keeps me coming back to my Creami, day after day.
It turns a simple treat into a little moment of kitchen magic, every single time.
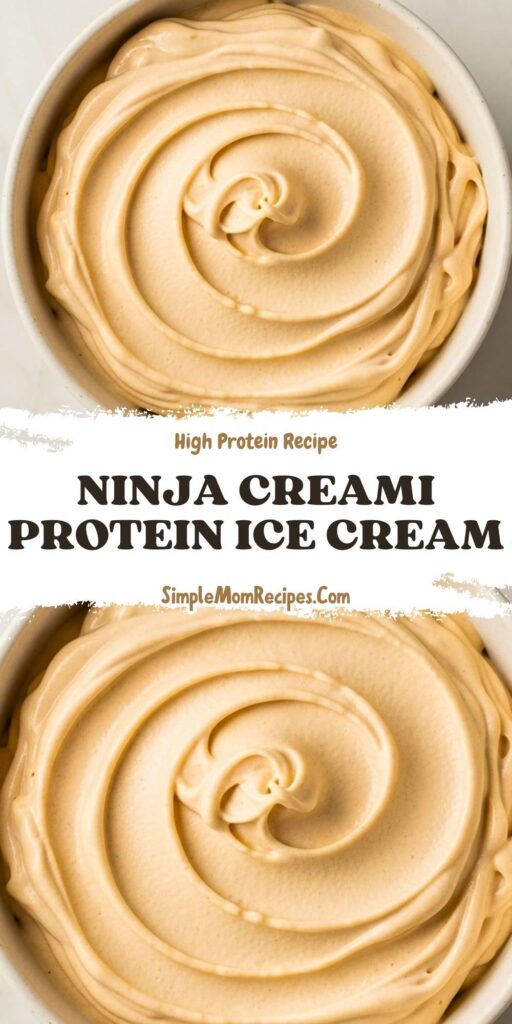
Ninja Creami Protein Ice Cream Recipe
Description
Enjoy guilt-free, high-protein ice cream with this easy Ninja Creami recipe! Perfect for low-carb, keto, or fitness-focused diets, this dessert requires no baking and can be made with or without protein powder. Customize flavors, textures, and mix-ins to create your dream macro-friendly treat.
ingredients
Creami Fairlife Ice Cream (Base Recipe)
Alternative Bases (Choose One)
For Mix-In (Optional)
Instructions
Prepare Base
Add all ingredients for your chosen base directly into your Ninja Creami pint container. Use a handheld frother or spoon to mix until smooth.For cottage cheese version, blend in a food processor first if you prefer a smooth texture.Rest
Let the mixture rest uncovered for 5–10 minutes at room temperature.Freeze
Cover the container and freeze overnight (at least 8–12 hours) on a level surface. Do not exceed the max fill line.Process in Ninja Creami
Remove the frozen pint from the freezer. Let it sit at room temperature for 10 minutes OR run warm water over the outside for 15–20 seconds.First Spin
Place the container into the Ninja Creami and press the 'Lite Ice Cream' button.Re-Spin
Add 1–2 ounces of milk or milk substitute, then press the 'Re-Spin' button. Repeat if needed until creamy.Add Mix-Ins (Optional)
Press the 'Mix-In' button after adding crushed cookies, nuts, or other desired toppings.
Nutrition Facts
Servings 1
- Amount Per Serving
- Calories 281kcal
- % Daily Value *
- Total Fat 3.5g6%
- Saturated Fat 1.5g8%
- Cholesterol 10mg4%
- Sodium 368mg16%
- Potassium 420mg12%
- Total Carbohydrate 19.5g7%
- Dietary Fiber 3g12%
- Sugars 9g
- Protein 43g86%
- Calcium 30 mg
- Iron 1 mg
* Percent Daily Values are based on a 2,000 calorie diet. Your daily value may be higher or lower depending on your calorie needs.
Note
- Tip: Higher-fat ingredients (full-fat yogurt, whole milk) yield creamier results.
- Customize: Mix and match RTD shakes, yogurt flavors, and pudding types for endless combos.
- No protein powder? Totally fine—these recipes work great without it!
- Storage: Keep unused pints frozen for up to 1 week before processing.
