

There are some recipes that feel a little too simple to write about, and then you take a bite and remember exactly why they deserve attention. That’s how I feel about a grilled peanut butter and jelly sandwich. It starts as something most of us grew up eating, but once it hits a hot skillet with butter, it becomes a completely different thing.
I actually stumbled into making this by accident years ago. I was halfway through making a grilled cheese when I realized I was out of cheese. Peanut butter and jelly happened to be sitting on the counter, so I gave it a shot. I honestly expected a mess. Instead, I ended up standing over the stove making a second one immediately.
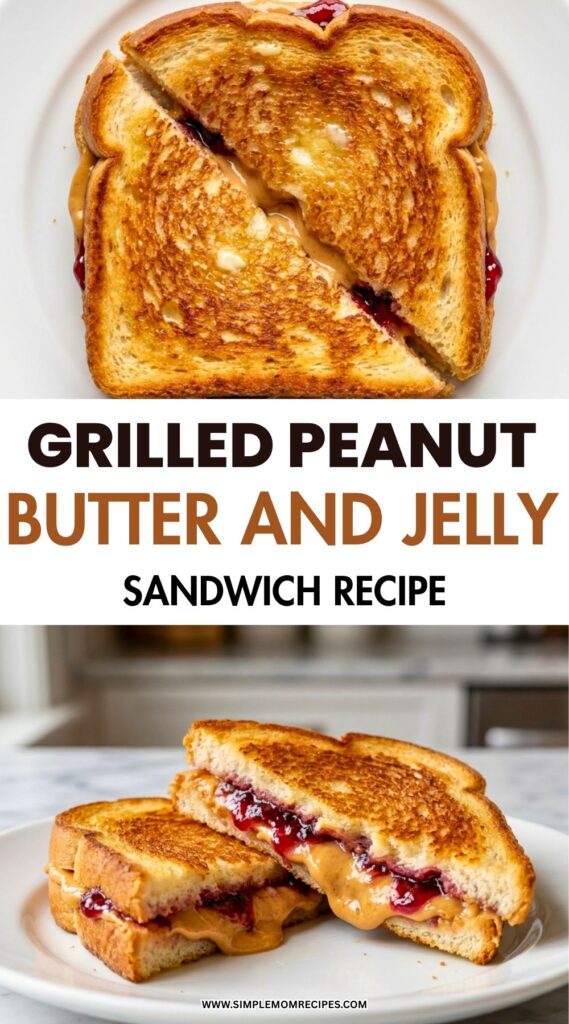
The outside gets golden and crisp while the peanut butter turns warm and creamy. The jelly softens just enough to become almost syrupy. It feels comforting in a way that fancy desserts never quite manage.
What’s in This Article
- Why this sandwich works so well
- Ingredients I used for the recipe
- Step-by-step instructions
- A few things I learned after making it many times
- Helpful tips for the best results
A Childhood Favorite That Somehow Got Better
Regular peanut butter and jelly sandwiches are already hard to dislike. They’re cheap, quick, and always seem to hit the spot. Grilling the sandwich takes maybe eight extra minutes, but the payoff is huge.
The butter creates a crisp crust that reminds me of French toast without the sweetness. At the same time, the filling becomes warm and gooey. The contrast between crunchy bread and soft filling is what keeps me coming back.
I also like that it uses ingredients I almost always have in the kitchen. No special shopping trip required. If I’ve got bread, peanut butter, jelly, and butter, I’m good to go.
Ingredients I Used for the Recipe
- 2 teaspoons butter – for spreading on the outside of the bread so it grills up golden and crisp.
- 2 slices white bread – the base of the sandwich. Soft white bread browns beautifully.
- 2 teaspoons fruit jelly – adds sweetness and that classic PB&J flavor. I usually use grape or strawberry.
- 1 teaspoon peanut butter – brings richness and balances the sweetness from the jelly.
That’s the traditional version I make most often. Sometimes I use whatever jelly is open in the refrigerator. I’ve even used mixed berry preserves when that’s all I had left.
How to Make Grilled Peanut Butter and Jelly Sandwich?
Step 1 – Get Everything Ready
I like to set all the ingredients on the counter before I start. This recipe moves quickly once the pan gets hot, so having everything within reach makes things easier.
Take out the butter, bread, peanut butter, and jelly. A butter knife is really all you need.
Step 2 – Butter the Bread
Spread butter on one side of each bread slice. I try to cover the surface evenly so the bread browns at the same rate.
The buttered sides will face outward when the sandwich is assembled. That’s what creates the crispy exterior.
Step 3 – Add the Filling
Spread jelly on the unbuttered side of one bread slice. Spread peanut butter on the unbuttered side of the other slice.
I used to overload the filling because I thought more was better. What actually happened was jelly leaking into the pan. Now I keep it moderate and get much cleaner results.
Step 4 – Build the Sandwich
Place the slices together with the peanut butter and jelly sides facing each other.
Give the sandwich a gentle press with your hand. Nothing aggressive. Just enough to help everything stay together.
Step 5 – Heat the Skillet
Warm a griddle or skillet over medium heat. If you’re using a temperature-controlled griddle, around 350°F works nicely.
One mistake I made early on was rushing the process with high heat. The bread browned too quickly while the middle stayed cool. Medium heat is much more forgiving.
Step 6 – Grill the First Side
Place the sandwich onto the hot cooking surface.
Let it cook until the bottom turns golden brown. I usually leave it alone for several minutes rather than constantly checking. Moving it too much slows down browning.
Step 7 – Flip and Finish
Carefully flip the sandwich and cook the second side until it’s equally golden and crisp.
The whole sandwich should be heated through. The peanut butter becomes silky and the jelly softens into a warm layer of sweetness.
Step 8 – Rest and Serve
I know it’s tempting to cut into it immediately, but I give it a minute or two first. The filling is incredibly hot right off the skillet.
After a short rest, slice it in half and serve. The cross-section always looks better than I expect for such a simple recipe.
A Few Things I Learned After Making It More Times Than I Can Count
The bread matters more than people think. Basic white bread delivers that classic diner-style texture, but thicker sandwich bread creates a heartier bite.
I also learned that natural peanut butter can behave differently than regular peanut butter. The oils sometimes separate and make the sandwich a little messier. It still tastes great, but I usually reach for standard creamy peanut butter when making this.
Another surprise was how much kids love it. The first time I served grilled PB&J instead of the regular version, the reaction was immediate. Nobody wanted the cold version afterward.
I’ve experimented with cinnamon-raisin bread, and it was honestly fantastic. The sweetness from the raisins worked really well with the warm peanut butter. It felt almost like dessert.
I’ve also tried adding chocolate spread once or twice. Definitely not an everyday thing, but it turned the sandwich into something closer to a treat than lunch.
Tips
Keep the Heat Moderate
Medium heat gives the bread time to become crisp while warming the filling. High heat tends to burn the outside before the center gets warm.
Don’t Overfill the Sandwich
Too much jelly or peanut butter sounds great in theory. In practice, it usually squeezes out the sides and creates a sticky skillet.
Use Soft Butter
Soft butter spreads much more evenly across the bread. Cold butter can tear the bread and leave uneven spots.
Press Lightly, Not Firmly
A gentle press helps hold everything together. Pressing too hard pushes the filling out before it even starts cooking.
Let It Cool Briefly Before Eating
The filling gets surprisingly hot. Giving the sandwich a minute to rest makes it easier and safer to eat.
Try Different Jellies
Grape and strawberry are classics, but raspberry, blackberry, and mixed berry all work beautifully. Sometimes I just use whatever jar is closest to empty.
At the end of the day, this recipe isn’t trying to be impressive. That’s probably why I like it so much. It’s simple, affordable, and comforting in a way that never seems to get old. Every time I make one, I’m reminded that good food doesn’t need a long ingredient list or complicated instructions.
A grilled peanut butter and jelly sandwich takes a childhood staple and turns it into something warm, crispy, and surprisingly satisfying. Whenever I need a quick lunch, an easy snack, or just a little comfort food on a busy afternoon, this is one of the first things that comes to mind.
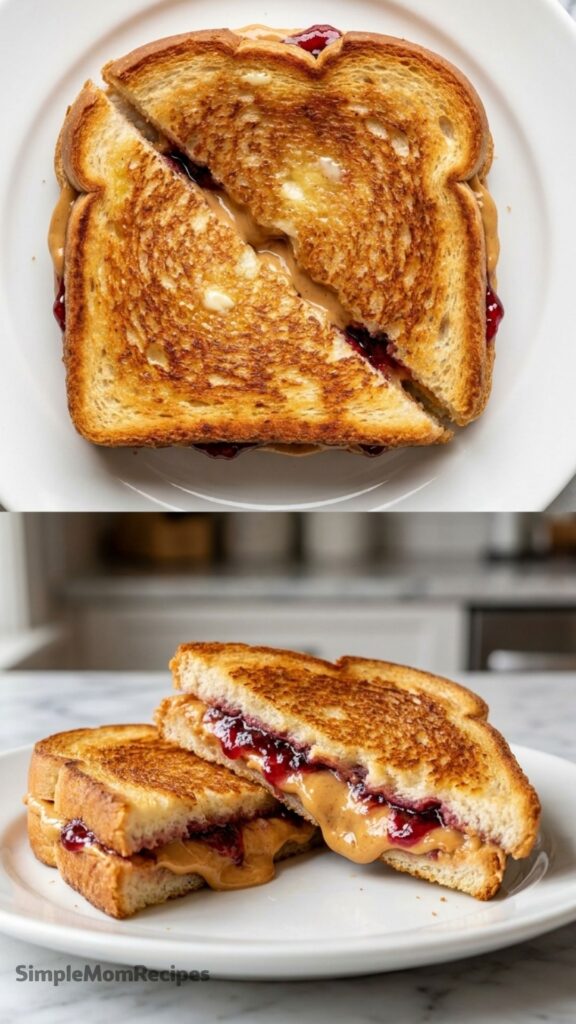
Grilled Peanut Butter and Jelly Sandwich Recipe
Description
This grilled peanut butter and jelly sandwich takes a childhood favorite and transforms it into something even better. Golden, buttery bread surrounds warm, creamy peanut butter and soft, sweet jelly for a comforting meal or snack that's ready in minutes. The crispy exterior and gooey filling create the perfect balance of textures, making this simple sandwich feel surprisingly special.
Ingredients
Instructions
Prepare Ingredients
Gather the butter, bread, peanut butter, and jelly. Set everything within easy reach before heating the skillet.Butter the Bread
Spread butter evenly on one side of each bread slice. These buttered sides will face outward during cooking.Add the Filling
Spread jelly on the unbuttered side of one bread slice and peanut butter on the unbuttered side of the other slice.Avoid overfilling to prevent leaks while cooking.Assemble the Sandwich
Place the slices together with the peanut butter and jelly sides facing each other. Gently press the sandwich together.Heat the Skillet
Preheat a skillet or griddle over medium heat, approximately 175°C (350°F).Medium heat allows the filling to warm through without burning the bread.Cook the First Side
Place the sandwich on the hot skillet and cook until the bottom becomes golden brown and crisp.Avoid moving the sandwich too often.Flip and Finish
Carefully flip the sandwich and cook the second side until golden brown and heated through.Rest and Serve
Remove from the skillet and allow the sandwich to rest for 1 to 2 minutes before slicing and serving.The filling will be very hot immediately after cooking.
Nutrition Facts
Servings 1
- Amount Per Serving
- Calories 290kcal
- % Daily Value *
- Total Fat 13gg20%
- Saturated Fat 5gg25%
- Trans Fat 0gg
- Cholesterol 20mgmg7%
- Sodium 300mgmg13%
- Potassium 130mgmg4%
- Total Carbohydrate 36gg12%
- Dietary Fiber 2gg8%
- Sugars 12gg
- Protein 8gg16%
- Calcium 4% mg
- Iron 8% mg
* Percent Daily Values are based on a 2,000 calorie diet. Your daily value may be higher or lower depending on your calorie needs.
Note
- Keep the heat moderate: Medium heat gives the bread time to crisp while warming the filling evenly.
- Don't overfill: Too much peanut butter or jelly can squeeze out during cooking.
- Use soft butter: Softened butter spreads evenly and helps create a perfectly golden crust.
- Try different jellies: Strawberry, grape, raspberry, blackberry, or mixed berry all work wonderfully.
- Let it rest: A short cooling period prevents burns from the hot filling.

