I had one chicken tender already turning golden while I was still standing there wondering if the oil was hot enough. That’s usually how things go in my kitchen. I start with a plan, then halfway through I’m adjusting, tasting, moving bowls around, and trying not to drip egg mixture all over the counter.
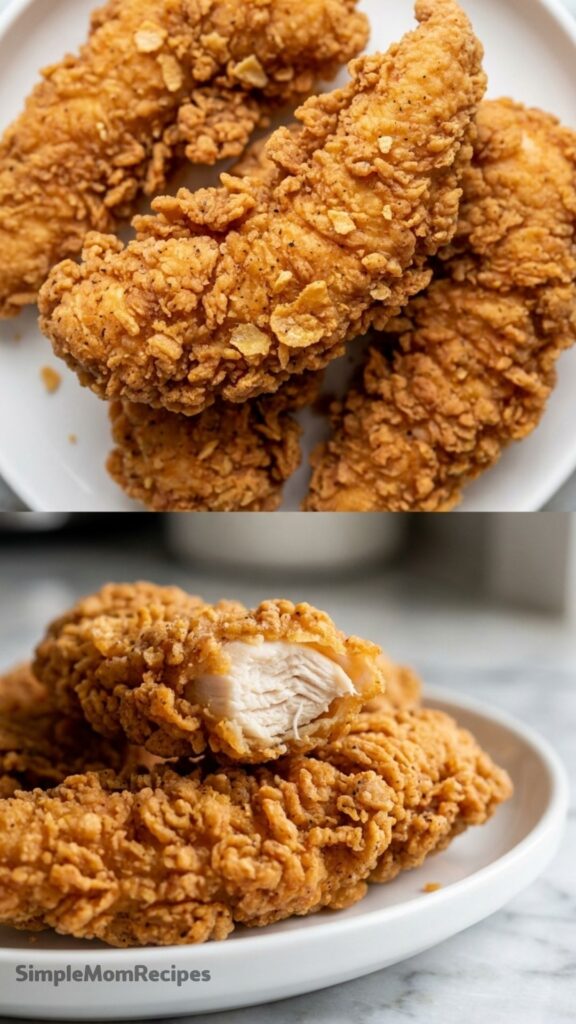
Chicken tenders are one of those foods that disappear faster than almost anything else I make. I can put a huge plate on the table and somehow everyone acts like I only cooked six pieces. The crispy coating, the juicy chicken inside, and that little crunch you hear when you bite into one just works every single time.
What I like most is that they don’t require anything fancy. No complicated ingredients. No special equipment. Just chicken, flour, seasoning, egg, and enough patience to fry them properly.
Patience is the hard part for me.
I tend to peek too much. Flip too early. Crowd the pan because I’m hungry and want dinner finished already. Every mistake teaches something though. Burned breading taught me oil can get hotter than I think. Soggy chicken taught me that adding too many pieces at once is a terrible idea.
These days I keep it simple, and the results are a lot more reliable.
A Little Thing I Always Do Before Frying
There’s a habit I picked up after several disappointing batches. Once the chicken gets coated, I leave it alone for a few minutes.
It doesn’t seem important. It looks like nothing is happening.
But those few minutes help the coating settle onto the chicken. The flour absorbs some moisture from the egg mixture and starts sticking better. The breading feels slightly damp and almost pasty when it’s ready.
The first time I accidentally discovered this, I had gotten distracted looking for paper towels. By the time I came back, the chicken had been sitting there for several minutes. That batch ended up crispier than usual.
Now I do it every time.
Ingredients I Used for the Recipe
- 1 1/2 pounds chicken tenders – the main star of the meal
- 1 1/2 cups all-purpose flour – creates the crispy coating
- 3/4 teaspoon salt – seasons the crust
- 1/2 teaspoon black pepper – adds a little bite
- 1 large egg – helps the coating stick
- 2 tablespoons water – loosens the egg mixture slightly
- Vegetable oil for frying – enough to fill about 2 inches in the skillet
- Extra pinch of salt after frying – optional but I usually add it
How to make Crispy Fried Chicken Tenders?

Step 1 – Heat the oil
Pour about 2 inches of vegetable oil into a heavy skillet. Set it over medium-high heat and let it warm while preparing everything else. Keep an eye on it. Hot oil goes from perfect to too hot faster than I want to admit.
Step 2 – Season the flour
In a large bowl, combine the flour, salt, and black pepper. Stir it around well so the seasoning spreads evenly. Nothing is worse than one perfectly seasoned tender sitting next to three bland ones.
Step 3 – Prepare the egg mixture
In another bowl, beat the egg with the water until smooth. I usually use a fork because washing an extra whisk feels unnecessary.
Step 4 – Coat the chicken
Take each chicken tender and coat it in the flour mixture first. Shake off the extra flour. Dip it into the egg mixture, then return it to the flour for a second coating.
Press the flour onto the chicken with your hands. Don’t be shy about it. Those little uneven bits and rough edges become the crunchiest parts later.
Step 5 – Let the breading rest
Place the coated tenders on a tray or plate and let them sit for about 5 minutes.
This step feels small but makes a big difference. The coating sticks better and stays put during frying.
Step 6 – Test the oil
Check that the oil is ready before adding all the chicken. A tiny sprinkle of flour should sizzle immediately. If it sits there quietly, wait longer.
I once rushed this part and ended up with pale, greasy chicken that nobody wanted seconds of.
Step 7 – Fry in batches
Carefully place a few tenders into the hot oil. Don’t crowd the skillet.
Cook until the underside becomes deep golden brown, usually around 8 to 10 minutes depending on thickness. Turn them and continue cooking until both sides are crisp and the chicken is fully cooked.
The sound changes when they’re getting close. The bubbling becomes slightly quieter, which is something I pay attention to every time.
Step 8 – Drain and season
Move the cooked tenders onto a paper towel-lined plate. Sprinkle with a little extra salt while they’re still hot.
Then try not to eat three pieces before dinner starts.
I never fully succeed at that part.
The Batch That Almost Went Wrong
One evening I decided to save time by frying nearly all the chicken at once.
Bad decision.
The oil temperature dropped immediately. The coating started absorbing oil instead of crisping up. Everything looked pale and heavy.
I stood there staring at the pan knowing exactly what had happened.
Since then, I fry smaller batches even when I’m in a hurry. The difference is obvious. The crust develops faster, the color looks better, and the chicken stays juicy.
It’s one of those annoying cooking lessons where the slower method actually saves the meal.
What I Notice When They’re Done Right
The outside should have little craggy ridges and uneven crispy bits. Perfectly smooth fried chicken usually isn’t my favorite.
When I pick up a tender, I want to hear a faint crackle from the crust. Not loud. Just enough to know it’s crisp.
The smell changes too. It starts out smelling mostly like hot oil and flour, then shifts into something deeper and richer once the coating browns.
The inside stays tender and moist while the outside has enough crunch to hold up to dipping sauces.
I usually alternate between honey mustard, ranch, and barbecue sauce depending on my mood. Sometimes I don’t use any sauce at all because the seasoning on the crust is enough.
Fresh from the skillet is obviously best, but I’ve also eaten them standing at the refrigerator the next day and they were still pretty good.
Tips
- Season the flour well. The coating carries most of the flavor.
- Press the flour firmly onto the chicken during the second coating.
- Let the breaded chicken rest before frying.
- Don’t overcrowd the skillet.
- Keep an eye on the oil temperature throughout cooking.
- Use a heavy skillet that holds heat consistently.
- If one piece browns too fast, lower the heat slightly before adding more chicken.
- Drain on paper towels immediately after frying.
- Add a tiny pinch of salt while the tenders are still hot.
- If some breading falls off during frying, don’t panic. It happens occasionally even when everything else goes right.
Crispy fried chicken tenders aren’t difficult, but they’re one of those recipes that reward attention. The details matter. A few extra minutes of resting, a little patience with the oil, and resisting the urge to crowd the pan can completely change the result.
I still make small mistakes here and there. Sometimes one tender gets darker than the others. Sometimes I splash flour on my shirt. Once in a while I forget to set out paper towels before frying and end up scrambling around the kitchen while holding a pair of tongs.
None of that really matters.
What matters is pulling a batch of golden chicken from the skillet and hearing that first crunch when someone takes a bite. That’s usually the moment I know dinner worked out just fine.
Crispy Fried Chicken Tenders Recipe
Description
Truly crispy fried chicken tenders are a dinnertime staple your whole family will love. Get all the tips for making that crispy crust you crave, seasoning like a pro, and frying them up perfectly.
Ingredients
Chicken
Breading
Egg Wash
Frying
Instructions
- Heat the Oil - Fill a 9-inch cast iron or standard skillet with about 2 inches of vegetable oil. Start heating it over medium-high heat while you bread the chicken.
- Prepare Dry Mix - In a large bowl, mix together the all-purpose flour, salt, and black pepper.
- Prepare Wet Mix - In another large bowl, beat the egg with 2 tablespoons of water.
- Bread the Chicken - Dredge the chicken tenders in the seasoned flour, coating well. Shake off excess flour, dip into the egg wash, and then dredge in the flour a second time.
- Rest the Chicken - Set the breaded chicken aside to rest for about 5 minutes. This helps the coating adhere better during frying.
- Check Oil Temperature - Ensure your oil is around 365-375°F (185-190°C). You can test it by dropping a pinch of flour into the oil; if it sizzles immediately, it's ready.
- Fry the Chicken - Carefully add about 5 pieces of chicken at a time. Cook until golden brown on the first side, about 8 to 10 minutes.
- Flip and Finish - Turn the chicken tenders and fry until all sides are golden brown and the chicken is cooked through (internal temperature of 165°F).
- Drain and Serve - Transfer the cooked chicken to a paper towel-lined plate to drain excess oil. Sprinkle with a little extra salt if desired, and serve hot.
Nutrition Facts
Servings 4
- Amount Per Serving
- Calories 410kcal
- % Daily Value *
- Total Fat 18g28%
- Saturated Fat 3g15%
- Cholesterol 110mg37%
- Sodium 500mg21%
- Potassium 400mg12%
- Total Carbohydrate 35g12%
- Dietary Fiber 1g4%
- Protein 28g57%
* Percent Daily Values are based on a 2,000 calorie diet. Your daily value may be higher or lower depending on your calorie needs.
