

There are some recipes that disappear from my dinner rotation after a few months, and then there are the ones that somehow stick around year after year. This chicken chimichangas recipe definitely falls into the second group. I keep coming back to it because it’s filling, easy to change depending on what I have in the kitchen, and somehow everybody at the table gets excited when they see those crispy tortillas.
I used to think chimichangas sounded complicated. They looked like something I’d only order at a restaurant because I figured deep frying was part of the deal. Once I started making them at home, I realized I didn’t have to stand over a pot of hot oil to get that crispy bite I wanted. Baking or lightly pan frying gives me exactly what I’m looking for without turning dinner into a huge project.
I’ve made these on busy weeknights, lazy Saturdays, and even after grocery trips where I forgot half the ingredients I planned to buy. Somehow they always work out. That’s probably my favorite thing about them.
A quick look before getting started
- These chimichangas are crispy on the outside and packed with a creamy chicken filling.
- I usually bake them, but pan frying gives an even crispier finish if I have a few extra minutes.
- The filling is easy to customize with different proteins or vegetables.
- They taste great fresh and the leftovers reheat surprisingly well.
- A little salsa, sour cream, or guacamole on top makes every bite even better.
If you’ve ever wondered what makes a chimichanga different from a burrito, it’s actually pretty simple. Both use large flour tortillas wrapped around a filling, but burritos stay soft while chimichangas are cooked until the outside becomes crisp. Traditional versions are deep fried, but I honestly don’t think that’s necessary for a great homemade meal.
Ingredients I Used for the Recipe
- 2 cups cooked chicken, shredded or chopped – This is the main filling. I often use leftover roasted chicken because it saves time.
- 1 can refried beans – Makes the filling creamy and helps everything stay together.
- 1/2 cup salsa – Adds moisture and plenty of flavor.
- 1 teaspoon ground cumin – Gives the filling that warm, earthy taste.
- 1/2 teaspoon dried oregano, crushed – Brings a little extra depth without overpowering the other spices.
- 1 teaspoon chili powder – Adds gentle heat and color.
- 1 cup shredded cheddar or Mexican blend cheese – Melts into the filling and makes it rich.
- 2 green onions, chopped – Adds freshness and a mild onion flavor.
- 3 tablespoons vegetable or canola oil – Used for brushing before baking or for pan frying.
- 6 large flour tortillas – Big enough to wrap the filling securely.
- Salsa, sour cream, and guacamole – Optional toppings that make every serving even better.
I’ve also swapped the chicken for cooked ground beef, turkey, or even leftover steak. One time I mixed in corn and sautéed peppers because the fridge was looking pretty empty. Nobody complained. That’s always a good sign.
How to Make Chicken Chimichangas?
Step 1 – Prepare the chicken
If I’m not using leftover chicken, I cook chicken breasts in a skillet until they’re fully cooked and no longer pink inside. After they cool for a few minutes, I chop or shred them into bite-sized pieces.
Step 2 – Mix the filling
I add the cooked chicken to a large bowl along with the refried beans, salsa, shredded cheese, cumin, oregano, chili powder, and chopped green onions. Then I stir everything until it’s evenly combined. I always taste the filling here because it’s much easier to adjust seasoning before the tortillas are filled.
Step 3 – Fill each tortilla
I spoon about half a cup of filling into the center of each tortilla. Overfilling is tempting, and I’ve definitely done it before, but it usually leads to filling spilling everywhere while cooking.
Step 4 – Roll them tightly
I fold both sides over the filling first, then roll everything tightly just like a burrito. Keeping the seam tucked underneath helps the chimichanga stay closed while it cooks.
Step 5 – Choose how to cook them
When I’m baking them, I heat the oven to 400 degrees F. I brush each chimichanga lightly with oil and bake them for about 25 minutes until they’re golden and crisp.
If I want an even crunchier crust, I heat a skillet over medium heat with a little oil. I place each chimichanga seam side down first and gently turn them every minute or so until every side is nicely browned.
I rarely deep fry them anymore. It works, but I honestly don’t miss the extra cleanup afterward.
Step 6 – Add the toppings and serve
I serve them while they’re still hot with salsa, sour cream, guacamole, and sometimes Mexican rice on the side. The crispy tortilla mixed with the creamy filling is exactly why I keep making this recipe.
Little things I learned after making these so many times
One mistake I made early on was rushing the rolling process. I figured it wouldn’t matter. It definitely mattered. Loose tortillas started opening during cooking, and the filling escaped into the pan. They still tasted good, but they weren’t exactly pretty.
I also learned not to overload the filling with salsa. A little keeps everything moist. Too much turns the filling soft enough that it becomes harder to roll neatly.
The cheese matters more than I expected too. Freshly shredded cheese melts much smoother than pre-shredded bags, so whenever I have the extra five minutes, I grate my own.
Sometimes I make a double batch on purpose. I leave a few uncooked in the refrigerator and bake them the next day for lunch. The filling actually seems to taste even better after sitting overnight.
These have become one of those meals that don’t require much thinking anymore. I know roughly how everything should look, and I don’t stress if my measurements aren’t perfectly exact every single time. That’s probably why making them feels relaxing instead of like another task.
Tips
- Warm tortillas for a few seconds before rolling so they don’t crack.
- Don’t overfill the tortillas or they’ll be difficult to seal.
- Brush lightly with oil before baking to help them brown evenly.
- Cook seam side down first if you’re using a skillet.
- Taste the filling before rolling and adjust seasoning if needed.
- Rotisserie chicken works great when you’re short on time.
- Add cooked corn or sautéed peppers if you want extra vegetables.
- Swap the chicken for cooked ground beef, turkey, or steak if that’s what you have.
- Serve immediately for the crispiest texture.
- If you have leftovers, reheat them in the oven or an air fryer instead of the microwave to keep the tortilla crisp.
This recipe always earns another spot on my menu
I think what keeps bringing me back to chicken chimichangas is how forgiving they are. I don’t have to follow every measurement perfectly, and I don’t need fancy ingredients. As long as I have tortillas, chicken, beans, cheese, and a few spices, dinner usually comes together without much effort.
Everyone seems to have their own favorite topping too. I usually pile on salsa and a little sour cream, while someone else at the table reaches for extra guacamole. That makes serving them fun because everyone ends up with something slightly different.
There are plenty of recipes that promise to become family favorites, but this one actually earned that title in my kitchen. It’s comforting without feeling too heavy, crispy without requiring a deep fryer, and flexible enough that I never get bored with it.
If you’re looking for a dinner that’s simple enough for an ordinary weeknight but still feels like something special, this chicken chimichangas recipe is one I’d happily make again tomorrow. Honestly, I probably will.
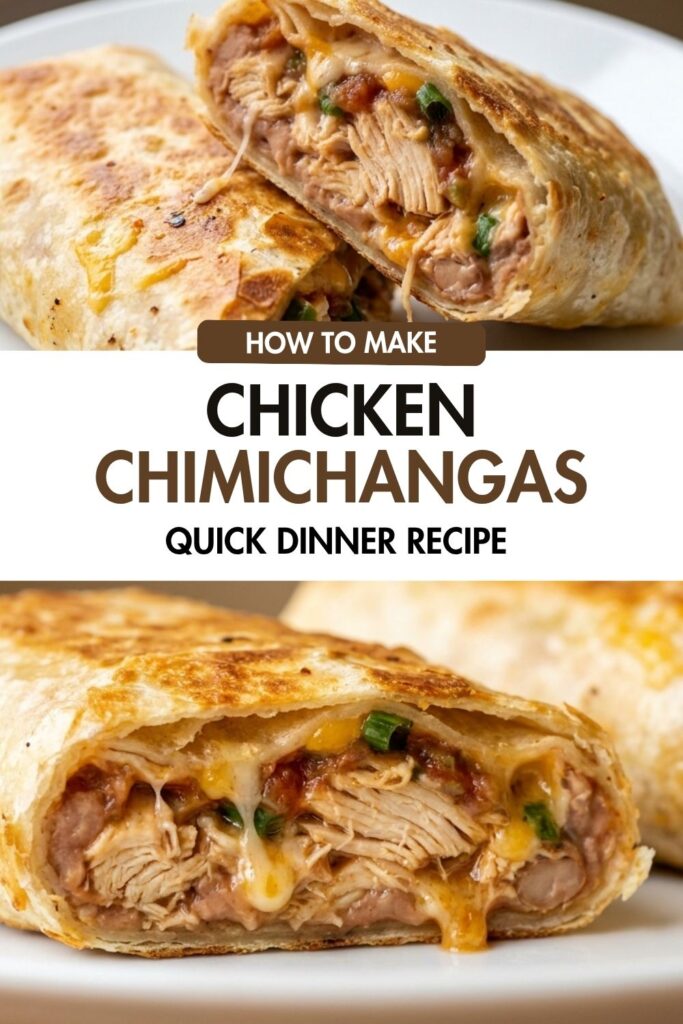
Chicken Chimichangas Recipe
Description
These homemade chicken chimichangas are filled with tender shredded chicken, refried beans, salsa, melted cheese, and warm spices, then baked or lightly pan-fried until perfectly golden and crispy. They deliver all the flavor of a restaurant favorite with less oil and are easy enough for busy weeknights. Serve them with salsa, sour cream, and guacamole for a satisfying meal everyone will enjoy.
Ingredients
Chicken Filling
Assembly
Instructions
- Preheat the oven to 200°C (400°F). If baking, line a baking sheet with parchment paper or lightly grease it.
- If needed, cook the chicken until fully cooked, then shred or chop it into bite-sized pieces.
- In a large bowl, combine the chicken, refried beans, salsa, cumin, oregano, chili powder, shredded cheese, and chopped green onions. Mix well.
- Spoon about 1/2 cup of filling into the center of each tortilla. Fold in both sides and roll tightly like a burrito with the seam underneath.
- Brush each chimichanga lightly with oil and place seam-side down on the prepared baking sheet.
- Bake for 25 minutes or until the tortillas are crisp and golden brown.Alternatively, pan fry over medium heat, turning every minute until evenly browned.
- Allow the chimichangas to rest for 5 minutes before serving.
- Serve hot with salsa, sour cream, guacamole, or your favorite Mexican-inspired side dishes.
Nutrition Facts
Servings 6
- Amount Per Serving
- Calories 485 kcalkcal
- % Daily Value *
- Total Fat 20 gg31%
- Saturated Fat 8 gg40%
- Trans Fat 0 gg
- Cholesterol 75 mgmg25%
- Sodium 980 mgmg41%
- Potassium 420 mgmg12%
- Total Carbohydrate 43 gg15%
- Dietary Fiber 6 gg24%
- Sugars 4 gg
- Protein 30 gg60%
- Calcium 22% mg
- Iron 18% mg
* Percent Daily Values are based on a 2,000 calorie diet. Your daily value may be higher or lower depending on your calorie needs.
Note
- Warm the tortillas for a few seconds before rolling to prevent cracking.
- Don't overfill or the chimichangas may burst while cooking.
- Brush with oil before baking for a crisp, golden exterior.
- Rotisserie chicken is a great shortcut for busy nights.
- Reheat leftovers in the oven or air fryer instead of the microwave to keep them crispy.

