

I used to think homemade taquitos would be fussy. Rolling tortillas sounded annoying, and I assumed they’d split apart or turn soggy. Turns out the biggest trick is simply warming the tortillas first. The first time I skipped that step, nearly every tortilla cracked. I haven’t made that mistake again.
Another thing I appreciate is how flexible these are. I can serve them for dinner with salsa and guacamole, pack them for lunches, or freeze a batch for later. They’re also surprisingly lighter than traditional fried taquitos, which means I never feel guilty reaching for another one.
What’s Inside This Article
- Why these baked taquitos became one of my favorite recipes
- The ingredients I always use
- Step by step instructions
- Helpful tips I learned after making them many times
- Serving ideas and storage advice
Why These Taquitos Stay on My Weekly Menu
I think every home cook has a handful of recipes they can almost make without looking at instructions. This has become one of mine. The filling comes together quickly, and while the taquitos bake, I usually clean the kitchen or throw together a simple salad.
One thing that surprised me was how much better the beef tastes when it gets a chance to brown instead of steaming with the onions. I always push the onions to the edges of the skillet and let the beef develop some color first. That little change adds so much flavor that I honestly notice when I rush it.
I also like that baking gives the tortillas a crisp texture without standing over hot oil. My kitchen stays cleaner, and the taquitos still come out golden and crunchy.
These also happen to fit nicely into meal prep. Each taquito packs a good amount of protein while keeping calories and carbs reasonable. That balance makes them filling enough for lunch without making me want a nap afterward.
Ingredients I Used for the Recipe
- 1 pound lean ground beef – The main filling that keeps every taquito hearty and satisfying.
- 1/2 tablespoon olive oil – Helps cook the onions while giving the beef a nice start.
- 1 medium white onion, finely diced – Adds sweetness and flavor as it softens.
- 5 garlic cloves, minced – Gives the filling a rich homemade taste.
- 2 teaspoons chili powder – Brings gentle warmth without making everything too spicy.
- 1 teaspoon kosher salt – Balances all the flavors.
- 1 teaspoon dried oregano – Adds an earthy flavor that works well with the beef.
- 1 teaspoon ground cumin – Gives the filling that classic Tex-Mex flavor.
- 1/2 teaspoon black pepper – Adds a little extra bite.
- 1/2 cup enchilada sauce – Keeps the filling moist and flavorful.
- 4 ounces shredded Monterey Jack and cheddar cheese – Melts into the beef for a creamy, cheesy center.
- 16 extra thin corn tortillas – Roll up beautifully once warmed and bake until crispy.
- Cooking spray – Helps the outside turn crisp and golden in the oven.
How to Make Cheesy Beef Baked Taquitos?
Step 1 – Prepare the Oven
Heat the oven to 400 degrees F. Spray a large baking sheet with cooking spray so the taquitos won’t stick and they’ll crisp up nicely underneath.
Step 2 – Brown the Beef
Warm the olive oil in a large skillet. Add the onions around the outside of the pan and place the ground beef in the center. Let the beef brown before breaking it apart. This gives the meat much better flavor than stirring everything together right away.
Step 3 – Finish Cooking the Filling
Once the beef has developed some color, stir in the garlic with the onions and continue cooking until everything is tender. Break the beef into small crumbles as it finishes cooking.
Step 4 – Add the Seasonings
Sprinkle in the chili powder, salt, oregano, cumin, and black pepper. Pour in the enchilada sauce and stir until every bite of beef is coated.
Step 5 – Stir in the Cheese
Turn off the heat before adding the shredded cheese. Stir until it melts into the filling. It becomes creamy without being overly cheesy, which I think is the perfect balance.
Step 6 – Warm the Tortillas
Wrap the tortillas inside a damp paper towel and microwave them for about a minute. They should feel almost too warm to hold. This single step makes rolling incredibly easy.
Step 7 – Roll the Taquitos
Add a spoonful of filling to each tortilla. Roll them tightly and place them seam side down on the prepared baking sheet. Leave a little space between each one so the hot air can circulate.
Step 8 – Bake Until Crispy
Lightly spray the tops with cooking spray before baking for about 25 to 30 minutes. They’re ready once the tortillas become crisp and beautifully golden.
Serving Them My Favorite Way
I almost always serve these with a quick dip made from plain Greek yogurt and salsa. It takes less than a minute to stir together, and the cool, creamy flavor works perfectly with the crispy taquitos.
If I’m putting them out for friends, I’ll add guacamole, pico de gallo, sliced jalapenos, chopped cilantro, and extra salsa. The colorful toppings make the whole plate look like I spent way more time cooking than I actually did.
Sometimes I even serve them alongside rice and beans to make a complete dinner. Other nights they’re the dinner all by themselves, and honestly nobody complains.
These also reheat surprisingly well. I usually warm leftovers in the oven or air fryer because they stay crispy. The microwave works too when I’m in a hurry, though the tortillas soften a little.
If I’m planning ahead, I’ll double the recipe and freeze half before they disappear. Future me is always grateful on busy days.
Tips
- Warm every tortilla before rolling to prevent cracking.
- Don’t overfill them or they’ll split while baking.
- Brown the beef first for much richer flavor.
- Freshly shredded cheese melts better than packaged shredded cheese.
- Leave space between each taquito so they crisp evenly.
- Spray the tops lightly with cooking spray for a golden finish.
- Use an air fryer at 375 degrees F for about 10 to 12 minutes if you prefer.
- Add cooked rice, beans, or cauliflower rice if you want the filling to stretch further.
- Freeze cooled taquitos in a single layer before transferring them to a freezer bag.
- Reheat in the oven whenever possible to bring back the crisp texture.
I keep coming back to these cheesy beef baked taquitos because they solve a problem I seem to have every week. I want something comforting, filling, and easy, but I don’t always want to spend an hour cooking or deal with frying. This recipe checks every box for me.
I’ve made tiny mistakes along the way. I’ve overstuffed them. I’ve forgotten to warm the tortillas. I’ve crowded the baking sheet because I was impatient. Every one of those shortcuts reminded me that the little details actually matter here.
Now I know better. I take an extra minute to heat the tortillas properly, I brown the beef until it develops good color, and I give each taquito enough room to crisp in the oven. Those simple habits consistently give me the crunchy outside and cheesy center I’m looking for.
If you’re making homemade taquitos for the first time, don’t stress about getting every roll perfectly tight. Mine certainly weren’t. They still tasted fantastic, and every batch gets a little neater than the last. That’s part of the fun.
For me, good recipes are the ones that don’t just taste great once. They’re the ones I actually want to cook again next week. These cheesy beef baked taquitos have earned that spot in my kitchen, and I don’t see them leaving anytime soon.
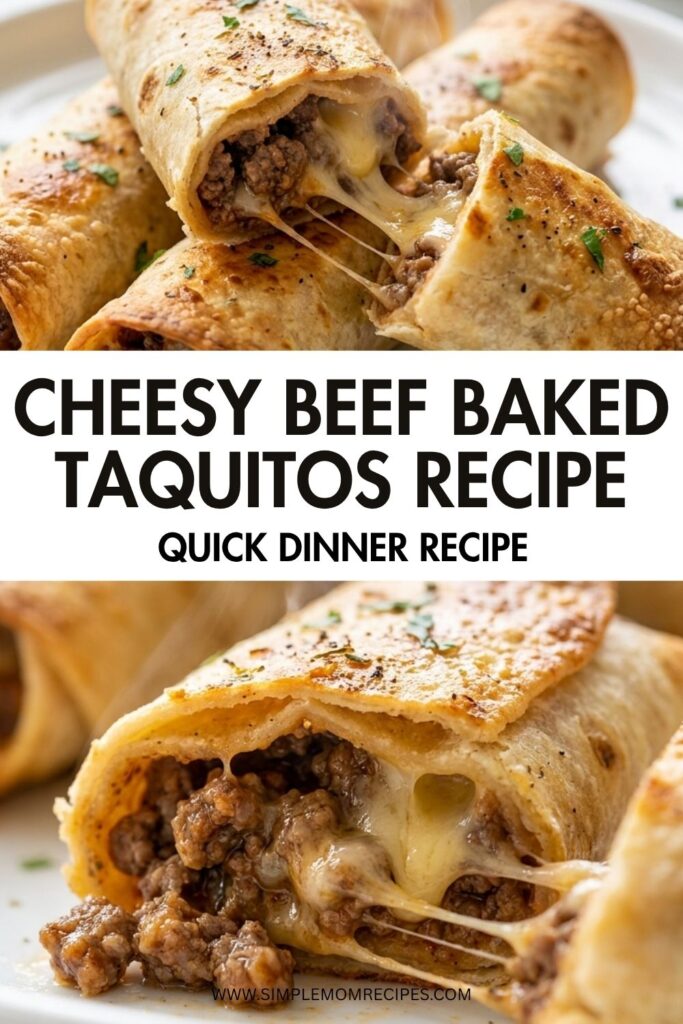
Cheesy Beef Baked Taquitos Recipe
Description
These cheesy beef baked taquitos are packed with seasoned ground beef, melted Monterey Jack and cheddar cheese, and wrapped in warm corn tortillas before being baked until perfectly crispy. They deliver all the crunch and flavor of traditional taquitos without deep frying, making them an easy weeknight dinner, game day snack, or freezer-friendly meal that everyone loves.
Ingredients
For the Filling
For Assembly
Instructions
Step 1
Preheat the oven to 200°C (400°F). Lightly coat a large baking sheet with cooking spray.Step 2
Heat olive oil in a large skillet. Add the diced onion around the edges and place the ground beef in the center. Allow the beef to brown before breaking it apart.Step 3
Stir in the garlic and cook until the onion is soft and the beef is fully cooked.Step 4
Add chili powder, salt, oregano, cumin, and black pepper. Stir in the enchilada sauce until everything is evenly coated.Step 5
Remove the skillet from the heat and stir in the shredded cheese until melted.Step 6
Wrap the corn tortillas in a damp paper towel and microwave for about 1 minute until warm and flexible.Step 7
Place about 2 tablespoons of filling onto each tortilla, roll tightly, and place seam-side down on the prepared baking sheet.Step 8
Lightly spray the tops with cooking spray and bake for 25 to 30 minutes until golden brown and crispy.Step 9
Let the taquitos rest for 5 minutes before serving with salsa, guacamole, sour cream, or your favorite dipping sauce.
Nutrition Facts
Servings 8
- Amount Per Serving
- Calories 305 kcalkcal
- % Daily Value *
- Total Fat 15 gg24%
- Saturated Fat 6 gg30%
- Trans Fat 0.5 gg
- Cholesterol 55 mgmg19%
- Sodium 570 mgmg24%
- Potassium 360 mgmg11%
- Total Carbohydrate 22 gg8%
- Dietary Fiber 3 gg12%
- Sugars 2 gg
- Protein 20 gg40%
- Calcium 18% mg
- Iron 14% mg
* Percent Daily Values are based on a 2,000 calorie diet. Your daily value may be higher or lower depending on your calorie needs.
Note
- Warm the tortillas first. This prevents them from cracking while rolling.
- Brown the beef well. Letting the meat caramelize adds much deeper flavor.
- Don't overfill. Too much filling can cause the taquitos to split during baking.
- Freeze extras. Cool completely before freezing in a single layer for easy reheating.
- Reheat in the oven or air fryer. This keeps the tortillas crispy.

