I’ve baked a lot of cookies over the years. Some were forgettable. Some were way too fussy for what they delivered. These are the ones I keep returning to when I want something that feels special but still relaxed enough to make on an ordinary afternoon.
The first time I made them, I was mostly curious about using real vanilla bean. I had always relied on extract, and honestly thought the bean might be overrated. It wasn’t. The aroma alone convinced me I was doing something right.
What I like most is that these cookies don’t try too hard. They’re soft in the center, lightly crisp at the edges, and they taste warm and familiar without being boring. They also hold their shape beautifully, which means I can cut them into whatever I feel like that day.
I’ve made them for holidays, random cravings, and once at midnight because I couldn’t sleep. Every batch came out slightly different, which I actually love. Baking should feel alive, not mechanical.
Ingredients I Used for the Recipe
- 2 1/4 cups all-purpose flour – This gives the cookies their structure. I spoon and level it so they don’t turn dense.
- 1/2 teaspoon baking powder – Adds just a little lift so they stay soft instead of flat.
- 1/4 teaspoon salt – Balances the sweetness and makes the vanilla stand out more.
- 3/4 cup unsalted butter, softened – The base of all the richness. I let it sit out until it presses easily with a finger.
- Seeds from 1 whole vanilla bean – The star ingredient. This brings a deep, real vanilla flavor you can actually see.
- 3/4 cup granulated sugar – Sweetens and helps create those lightly crisp edges.
- 1 large egg at room temperature – Helps everything come together smoothly.
- 2 teaspoons pure vanilla extract – Adds another layer of flavor to support the bean.
- Extra flour for rolling – Just enough to keep the dough from sticking everywhere.
How to make ?

Step 1 – Mix the Dry Ingredients
I whisk the flour, baking powder, and salt together in a medium bowl. Nothing fancy here. I just make sure it’s evenly combined so there are no surprises later.
Step 2 – Cream the Butter and Sugar
In a larger bowl, I beat the softened butter and sugar until it looks light and creamy. This usually takes about a minute. When it starts to look fluffy, I know I’m on the right track.
Step 3 – Add the Vanilla Bean
I scrape the seeds from the vanilla bean straight into the bowl. They clump together at first, and I always worry they won’t mix in, but they do. After another minute or two of mixing, the dough smells incredible.
Step 4 – Add Egg and Vanilla Extract
I beat in the egg and the vanilla extract until everything is smooth. I scrape down the sides because I’ve learned the hard way that skipping that step leaves streaks of butter hiding in the dough.
Step 5 – Combine Wet and Dry
The dry ingredients go in next, mixed on low speed. The dough looks a little soft, which is exactly how it should be. If it feels sticky, I add a tablespoon of flour, but only if it truly needs it.
Step 6 – Roll Out the Dough
I divide the dough into two portions and roll each one out to about 1/4 inch thick. I do this between parchment or on a lightly floured surface. This step feels messy sometimes, but that’s part of the charm.
Step 7 – Chill the Dough
I stack the rolled dough between parchment layers, cover it, and refrigerate for at least an hour. Chilling is non-negotiable. If I rush this step, the cookies spread and lose their shape.
Step 8 – Cut the Shapes
Once chilled, I cut out shapes using cookie cutters. The dough is much easier to handle now. I reroll scraps gently so they don’t get tough.
Step 9 – Bake Until Just Golden
I bake them at 350°F for about 11 to 12 minutes. I look for lightly golden edges, not full browning. Overbaking ruins the soft texture, and I’ve definitely done that before.
Step 10 – Let Them Cool Completely
I let the cookies sit on the baking sheet for a few minutes, then transfer them to cool fully. Decorating warm cookies is a mistake I only made once.
Decorating Them Is Half the Fun
Sometimes I make a simple vanilla bean buttercream, sometimes I don’t bother at all. These cookies taste good either way. When I do frost them, I keep it casual and imperfect.
I mix softened butter with confectioners’ sugar, a splash of cream, vanilla, and a little more vanilla bean. If it’s too thick, I add a tiny bit more cream. Too thin, more sugar. No stress.
Coloring the frosting depends on my mood. I’ve used sprinkles, left them plain, or swirled two colors together without planning anything. The less I overthink decorating, the better they usually look.
One thing to know is the frosting stays soft. These aren’t the kind of cookies you stack into a perfect tower. They’re meant to be enjoyed, a little messy, maybe with icing smudged on your fingers.
Tips I Learned From Trial, Error, and a Few Bad Batches
Chilling the Dough Is Worth It
I used to skip chilling because I was impatient. The cookies spread into blobs. Now I treat that hour like part of the recipe, not a delay.
Use Real Vanilla Bean If You Can
The flavor is deeper and warmer. Extract alone works, but the bean gives these cookies their personality. Plus those tiny specks make them feel homemade in the best way.
Don’t Overmix After Adding Flour
Once the dry ingredients go in, I mix just until combined. Overmixing makes the cookies tougher, and they lose that tender bite.
Watch the Oven Closely
These go from perfect to overdone faster than expected. I start checking early because every oven behaves a little differently.
Roll the Dough Evenly
If some parts are thinner, they bake faster and turn crisp. Keeping the thickness consistent makes the whole batch come out the same.
Let Them Be Imperfect
Some shapes puff oddly. Some edges crack. That’s fine. These cookies aren’t meant to look factory-made, and honestly they taste better when they don’t.
I’ve learned that recipes like this become favorites not because they’re flawless, but because they’re forgiving. I can make them carefully or casually, for a celebration or just because I want something warm from the oven.
Every time I bake these, the kitchen smells like vanilla and butter for hours. That alone makes the effort worth it.
Vanilla Bean Sugar Cookies
Description
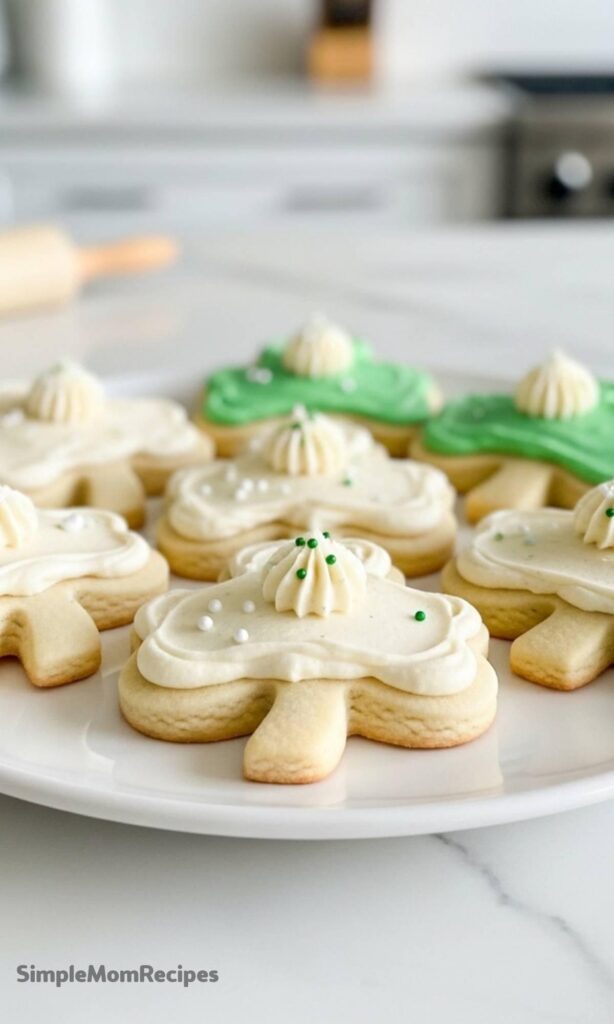
Delight in the magic of St. Patrick's Day with our scrumptious Vanilla Bean Sugar Cookies! These delectable treats are infused with the essence of pure vanilla beans, offering a burst of flavor with every bite. Perfect for celebrating the luck of the Irish, these cookies are beautifully baked and decorated to add a touch of charm to your festivities. Roll out the dough, cut into festive shamrock shapes, and top with creamy vanilla bean buttercream for an irresistible treat.
ingredients
Vanilla Bean Sugar Cookies
Vanilla Bean Buttercream Frosting
Instructions
Make the Cookie Dough
- In a medium bowl, whisk together the flour, baking powder, and salt until well blended. Set aside.
- In a large bowl, using a handheld or stand mixer with paddle attachment, beat the softened butter and granulated sugar on high speed for about 1 minute until well combined.
- Add the scraped vanilla bean seeds and continue beating on high speed for 1-2 minutes until the mixture is creamy and fragrant.
- Beat in the egg and vanilla extract on high speed for about 1 minute until fully combined. Scrape down the sides and bottom of the bowl as needed.
- Add the dry ingredients to the wet ingredients and mix on low speed until just combined. The dough will be slightly soft. If too sticky for rolling, add 1 additional tablespoon of flour.
Chill and Cut the Dough
- Divide the dough into 2 equal portions. Place each portion on a lightly floured piece of parchment paper or silicone baking mat.
- Using a lightly floured rolling pin, roll each portion to approximately 1/4-inch thickness. Dust with more flour if the dough feels sticky.
- Lightly flour the top of one rolled dough, place a sheet of parchment paper over it, then stack the second rolled dough on top. Cover tightly with plastic wrap or aluminum foil and refrigerate for at least 1-2 hours, or up to 2 days.
- When ready to bake, preheat oven to 350°F (177°C). Line 2-3 large baking sheets with parchment paper or silicone baking mats.
- Remove dough from refrigerator. Gently lift the top layer of dough. If it sticks, run your hand underneath to release. Use festive cookie cutters (shamrocks, leprechaun hats) to cut shapes. Re-roll scraps and continue cutting until all dough is used.
- Place cut cookies on prepared baking sheets, spacing them about 3 inches apart. Bake for 11-12 minutes, or until edges are lightly golden. Rotate baking sheets halfway through for even baking if your oven has hot spots.
- Allow cookies to cool on the baking sheet for 5 minutes, then transfer to a wire rack to cool completely before frosting.
Make the Vanilla Bean Buttercream & Decorate
- For the frosting: In a large bowl, beat the softened butter and scraped vanilla bean seeds on medium speed until creamy, about 2 minutes.
- Add the sifted confectioners' sugar, heavy cream, and vanilla extract. Beat on low speed for 30 seconds to incorporate, then increase to medium-high speed and beat for 2 minutes until light and fluffy. Taste and add a pinch of salt if frosting is too sweet.
- If desired, divide frosting among small bowls and tint with gel food coloring. Use a piping bag fitted with a small tip (like Ateco 30) or an offset spatula to frost cooled cookies. Pipe shamrock shapes with green frosting or decorate as desired. Add sprinkles while frosting is still soft.
- Allow frosting to set slightly before stacking. Store frosted cookies covered at room temperature for up to 1 day or refrigerated for up to 1 week. Unfrosted cookies keep covered at room temperature for up to 5 days or refrigerated for up to 1 week.
Nutrition Facts
Servings 24
- Amount Per Serving
- Calories 220kcal
- % Daily Value *
- Total Fat 11gg17%
- Saturated Fat 7gg35%
- Trans Fat 0gg
- Cholesterol 30mgmg10%
- Sodium 75mgmg4%
- Potassium 40mgmg2%
- Total Carbohydrate 28gg10%
- Dietary Fiber 0.5gg2%
- Sugars 20gg
- Protein 2gg4%
- Calcium 2% mg
- Iron 4% mg
* Percent Daily Values are based on a 2,000 calorie diet. Your daily value may be higher or lower depending on your calorie needs.
Note
- Vanilla bean paste substitution: If you don't have whole vanilla beans, use 1 teaspoon vanilla bean paste when adding the vanilla extract for the cookies. To replace both vanilla extract and vanilla bean, use 1 Tablespoon vanilla bean paste total.
- Make ahead tip: The cookie dough can be prepared and chilled up to 2 days in advance, or frozen for up to 1 month. Thaw overnight in the refrigerator before rolling and cutting.
- Frosting consistency: If frosting is too thick, add 1 teaspoon of cream at a time. If too thin, add a little more sifted confectioners' sugar.
- Storing decorated cookies: For best results, store frosted cookies in a single layer. If stacking is necessary, place parchment paper between layers to protect decorations.
