I didn’t expect this tuna pasta salad to become one of those things I just make without thinking. You know the kind. The bowl comes out, the water goes on to boil, and suddenly you’re halfway done before you even realize you started.
It reminds me of the pasta salads I grew up eating at family get-togethers, except this one actually has flavor. Not just mayo and noodles. There’s brightness from lemon, crunch from celery, and those little pops of sweetness from peas that somehow make the whole thing feel complete.
I started making it because I needed something fast for lunch prep. Now I make it for road trips, last-minute dinners, and honestly, sometimes just because I want something cold and comforting from the fridge.
It’s simple food. But when it’s done right, simple food hits harder than complicated recipes ever do.
Ingredients I Used for the Recipe
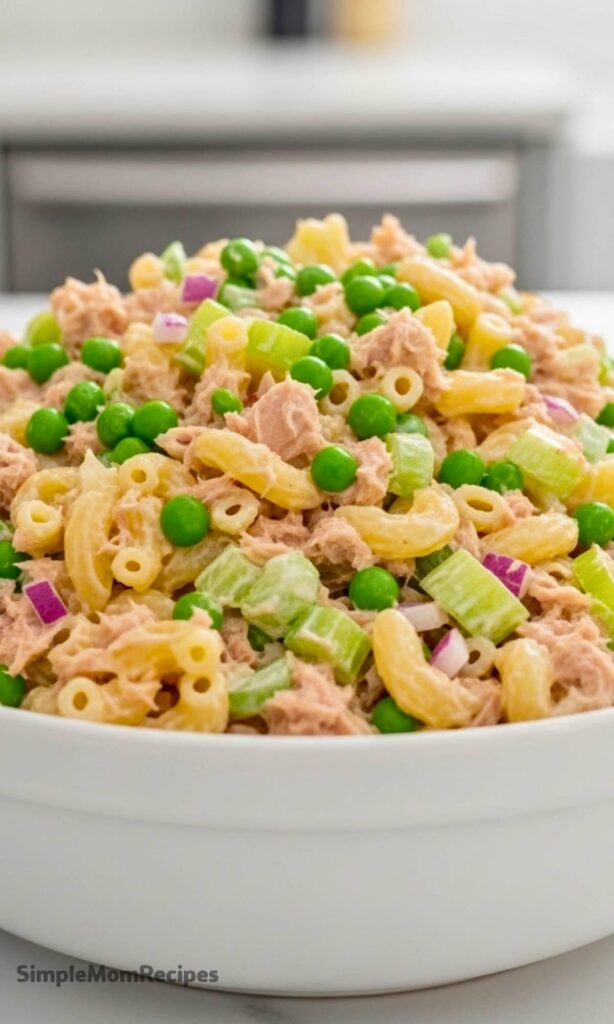
- 1 pound elbow macaroni – The base of the salad. I cook it a little softer than usual so it stays tender after chilling.
- 4 (5-ounce) cans tuna packed in water, drained – The main protein. Clean flavor and not overly heavy.
- 1 cup mayonnaise (start with less if you want) – This is what makes everything creamy and classic.
- 1/3 cup finely chopped celery – Adds crunch so the salad doesn’t feel flat.
- 2 tablespoons minced red onion – A little sharpness to balance the richness.
- 2 tablespoons sweet pickle relish – That tiny bit of sweetness makes a huge difference.
- 1 tablespoon fresh lemon juice – Wakes everything up and keeps it from tasting heavy.
- 1 clove garlic, minced – Just enough depth without making it garlicky.
- 1 cup frozen peas, thawed – For color, texture, and a subtle sweetness.
- Salt and freshly ground black pepper to taste – Essential for pulling it all together.
How to make Tuna Pasta Salad Recipe?

Step 1 – Boil the Pasta Until Soft
I bring a big pot of salted water to a boil, then add the macaroni. This is one of the few times I do not cook pasta al dente. I let it go until it’s fully tender.
If the pasta is too firm, it gets chewy once chilled. Learned that the hard way.
Step 2 – Drain and Rinse to Cool It Down
After draining, I rinse the pasta under cold water. This stops the cooking and keeps the noodles from sticking together.
Some people skip rinsing pasta, but for cold salads it actually matters. Otherwise you end up with one giant clump.
Step 3 – Mix the Tuna Base
In a separate bowl, I combine the drained tuna, mayonnaise, celery, red onion, relish, lemon juice, and garlic.
I stir it like I’m making tuna salad for sandwiches. Because that’s basically what this starts as.
Step 4 – Season It Properly
I add salt and pepper here, not at the end. This helps the flavor soak into the mixture instead of just sitting on top.
Taste it. Adjust it. This is where the personality of the dish really forms.
Step 5 – Combine Everything
Once the pasta is cool, I fold it into the tuna mixture along with the peas. I try not to mash anything while stirring.
It should look creamy but not overloaded. Every noodle should be coated, not drowning.
Step 6 – Chill Before Serving
This part is important. I cover the bowl and let it chill in the fridge for at least an hour.
The pasta absorbs the dressing, and suddenly it tastes like it’s been planned instead of thrown together.
Little Things That Matter More Than You Think
I used to rush recipes like this. Now I know the small choices are what make it actually good.
Salting the pasta water matters. A lot. It’s your only chance to season the noodles themselves.
Letting the pasta cool before adding mayo is another big one. If it’s hot, the dressing can get weird and oily. I’ve done that. It’s not great.
I also start with less mayonnaise sometimes and add more later. You can always add. You can’t take it out.
If you want a lighter version, swapping part of the mayo with plain Greek yogurt works surprisingly well. It still stays creamy but feels less heavy.
This salad actually tastes better after sitting for a while. I often make it the night before because the flavor settles in and everything blends together.
It keeps in the fridge for about four days. Just give it a stir before eating because a little separation is totally normal.
And don’t skip the peas. I thought they were optional once. They’re not. They bring balance and keep the whole thing from feeling beige.
When I Serve This and Why I Keep Coming Back to It
I make this when I don’t want to think too hard but still want something homemade. It’s my go-to for packed lunches because it holds up well and doesn’t need reheating.
It’s also one of those dishes that works for groups without trying to impress anyone. People recognize it. They trust it. Then they go back for seconds.
There’s something nice about a recipe that doesn’t ask for much. No fancy steps. No special equipment. Just a bowl, a spoon, and a little patience while it chills.
I’ve tweaked it over time, like adding extra lemon when I want it brighter or more celery when I’m craving crunch. But the core stays the same because it already works.
That’s why this tuna pasta salad sticks around in my kitchen. It’s reliable. It’s flexible. And honestly, it just tastes like something you want to eat straight from the container while standing at the fridge.
No ceremony. Just good food that does its job every single time.
Tuna Pasta Salad Recipe
Description
This easy Tuna Pasta Salad tastes exactly like the one you had growing up, maybe even better! It combines a creamy, mayo-forward tuna salad with soft elbow macaroni and sweet peas. Perfect for potlucks, summer parties, or a quick, satisfying lunch that can be made days in advance.
ingredients
Instructions
- In a large pot, bring 4 quarts of water and 1 tablespoon of salt to a boil.
- Add the pasta and cook until soft (not al dente), about 12 minutes. It is important to overcook slightly so it remains soft when chilled.
- Drain the pasta well, rinse thoroughly with cold water to stop cooking, and drain again.
- Meanwhile, in a medium bowl, combine the drained tuna, mayonnaise, celery, red onion, relish, lemon juice, and minced garlic.
- Season the tuna mixture to taste with salt and pepper (start with ½ teaspoon salt and ¼ teaspoon pepper).
- In a large bowl, add the cooled noodles, the tuna salad mixture, and the thawed peas.
- Stir gently to combine all ingredients evenly.
- Cover and chill in the refrigerator for at least 30 minutes before serving to allow flavors to meld.
Nutrition Facts
Servings 8
- Amount Per Serving
- Calories 485kcal
- % Daily Value *
- Total Fat 27gg42%
- Saturated Fat 4.2gg22%
- Trans Fat 0gg
- Cholesterol 35mgmg12%
- Sodium 680mgmg29%
- Potassium 320mgmg10%
- Total Carbohydrate 42gg15%
- Dietary Fiber 3gg12%
- Sugars 4gg
- Protein 22gg44%
- Calcium 4% mg
- Iron 10% mg
* Percent Daily Values are based on a 2,000 calorie diet. Your daily value may be higher or lower depending on your calorie needs.
Note
- Pasta Texture: Be sure to overcook the pasta slightly. If cooked al dente, it will become too hard and chewy once chilled.
- Make Ahead: This salad tastes even better the next day! It can be prepared up to 4 days in advance. Stir well before serving if separation occurs.
- Healthy Swap: To reduce calories or if you prefer less mayo, substitute half or all of the mayonnaise with plain Greek yogurt.
- Tuna Choice: While water-packed tuna is standard, you can use oil-packed tuna for richer flavor; just reduce the added mayonnaise slightly.
