I’ve always had a soft spot for desserts that look a little fancy but secretly take very little effort. This Strawberry Pudding Poke Cake falls right into that category. It starts with a simple cake mix, but once the pudding seeps into those little holes, the whole thing transforms into something ridiculously soft and creamy.
The first time I made it, I honestly didn’t expect much. I thought it would taste like a regular boxed cake with some pudding on top. I was wrong. After chilling in the fridge for a while, every bite turned light, fluffy, and almost melt-in-your-mouth.
Now it’s one of those desserts I make when I want something sweet but don’t feel like dealing with complicated steps or a mountain of dishes. It’s also one of the few cakes I actually prefer cold.
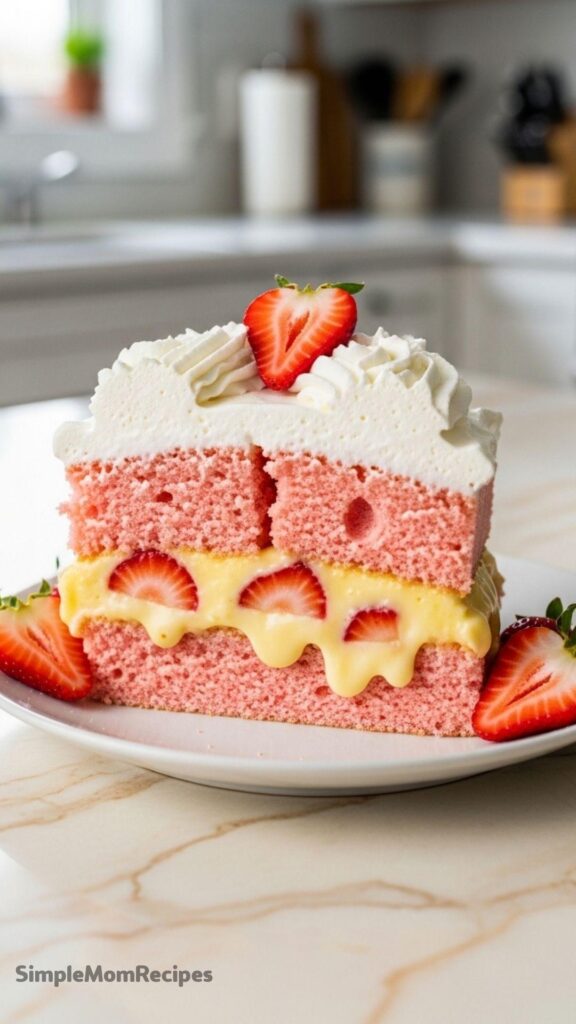
The strawberry flavor comes through gently, not overpowering. Then the vanilla pudding adds this creamy layer that soaks right into the cake. And once you add whipped topping and fresh strawberries… well, it suddenly feels like something you’d bring to a party.
I’ve served this at birthdays, casual dinners, and one random Tuesday night when I just wanted cake. Nobody ever complains.
Ingredients I Used for the Recipe
1 box strawberry cake mix - this forms the base of the cake and gives it that soft pink strawberry flavor.
1 cup water - helps bring the cake batter together. Sometimes I swap it with milk if I want a slightly richer taste.
½ cup vegetable oil - keeps the cake moist and tender. Melted butter can work too.
3 large eggs - gives the cake structure and helps everything bake up fluffy.
1 (5.1 ounce) box instant vanilla pudding mix - this is the magic part. It fills the holes in the cake and makes every bite creamy.
3 cups cold whole milk - used to mix the pudding. Cold milk helps it set properly.
8 ounce tub whipped topping - spread on top for a light creamy finish.
Fresh strawberries, sliced - optional but I always add them because the cake looks prettier and tastes fresher.
How to make Strawberry Pudding Poke Cake?
Step 1 - Prepare the baking dish and oven
I start by preheating the oven to 350°F and lightly spraying a 9×13 inch baking pan with nonstick spray. I learned the hard way once that skipping this step makes the cake stick badly, and I had to scrape half of it out with a spatula.
Now I never skip it. Two seconds of spray saves a lot of frustration later.
Step 2 - Mix the cake batter
In a large bowl, I combine the strawberry cake mix, water, vegetable oil, and eggs. I stir everything together until the batter looks smooth.
I try not to overmix here. Just enough so the dry bits disappear. The batter usually turns this cheerful pink color that always makes me smile a little.
Step 3 - Bake the cake
I pour the batter into the prepared baking dish and spread it evenly. Then the pan goes right into the oven.
The cake usually takes around 30 minutes. I check it with a toothpick in the center. If it comes out clean, it’s done. If it’s wet, I give it a few more minutes.
One time I pulled it out too early and the middle sank slightly. Still tasted good, just looked a little sad.
Step 4 - Let the cake cool
Once baked, I let the cake sit on the counter for about 20 minutes. It needs time to settle before poking holes into it.
After that, I move it into the fridge for another 40 minutes so it cools completely. Cold cake works much better for the pudding step.
Step 5 - Poke the holes
This is the fun part. I take the handle of a wooden spoon and poke holes all over the cake.
I space them about half an inch apart. Not perfect. Just evenly scattered across the whole cake. The holes should be big enough for pudding to sink down inside.
I tried using a fork once and the holes were way too small. The pudding mostly stayed on top.
Step 6 - Make the pudding mixture
In another bowl, I whisk together the instant vanilla pudding mix and cold milk.
The key thing here is using instant pudding. I once accidentally grabbed cook-and-serve pudding and it turned into a weird mess that never set properly.
Now I always double check the box before opening it.
Step 7 - Pour pudding into the cake
Before the pudding thickens too much, I pour it slowly over the cake.
I try to aim it directly into the holes so it fills them up. Any extra pudding just spreads over the top of the cake.
This step feels a little messy but that’s kind of the point.
Step 8 - Chill the cake again
Once the pudding is in place, the cake goes back into the refrigerator for at least one hour.
This gives the pudding time to settle into the cake and firm up. Skipping this part makes the dessert too soft and loose.
I usually forget about it for longer than an hour, which honestly makes it even better.
Step 9 - Add the topping
After the cake has chilled, I spread whipped topping evenly across the surface.
Then I scatter sliced strawberries on top. Sometimes I line them up neatly, sometimes I just toss them on.
Either way, once you slice the cake it looks bright and inviting.
Little Things I Learned After Making This Cake Too Many Times
After making this dessert over and over, I picked up a few small tricks that make it turn out better.
Use instant pudding only
This one matters a lot. Instant pudding sets without heat, which is exactly what this cake needs.
If you accidentally grab cook-and-serve pudding, the texture will be completely wrong.
Make bigger holes
A wooden spoon handle works perfectly. The holes need space for the pudding to sink in.
Too small and the pudding just sits on top.
Let the cake cool properly
If the cake is still warm, the pudding melts and turns watery. I rushed this once and regretted it.
Cooling first makes a big difference.
Whole milk makes better pudding
I tried this with lower fat milk once and the pudding felt thinner.
Whole milk gives a thicker, creamier filling.
Keep the cake refrigerated
This cake definitely belongs in the fridge. Between the pudding and whipped topping, it stays freshest when cold.
Plus, it honestly tastes better chilled.
Why This Cake Always Disappears Fast in My House
I think the biggest reason people love this cake is the texture. It’s not just cake. The pudding softens everything so each bite feels creamy and light.
The whipped topping adds another soft layer, and the strawberries give it a fresh pop that keeps it from tasting too sweet.
I also like that it doesn’t pretend to be fancy. It’s simple. A cake mix, pudding, whipped topping. Somehow those easy ingredients still turn into something people ask for again.
I’ve even had friends request this cake for birthdays instead of traditional frosted cakes. That surprised me the first time.
But once you try it, you understand why. It’s cold, creamy, fluffy, and just a little nostalgic.
And honestly, those are the desserts I end up making the most.
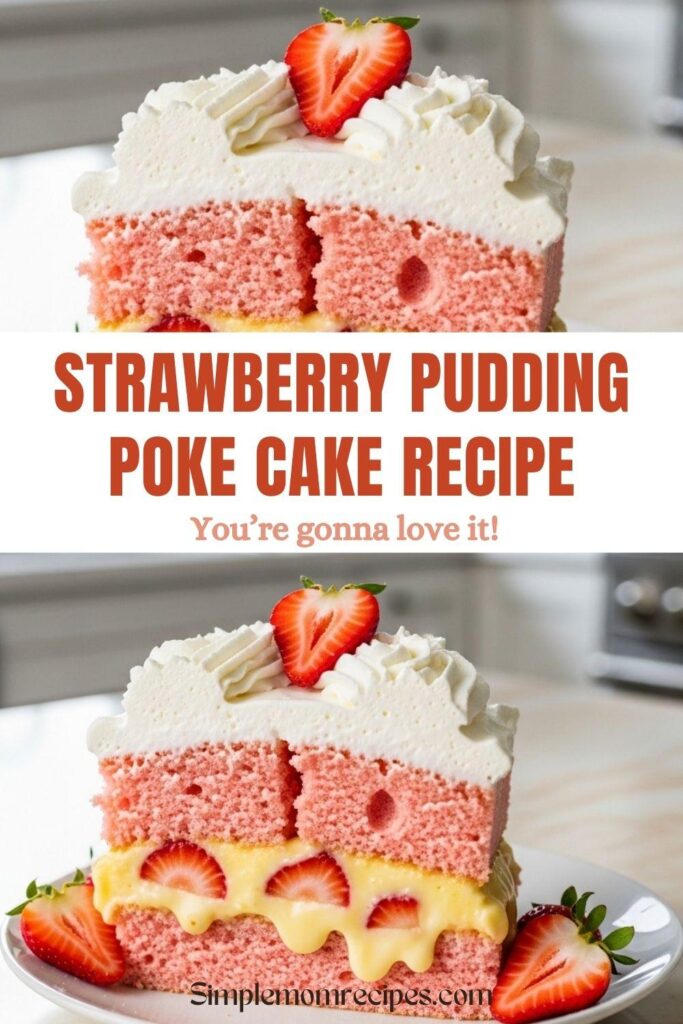
Turn a basic cake mix into a soft, light, melt in your mouth Strawberry Pudding Poke Cake in no time with only a few staple ingredients! This easy dessert is packed with fruity flavor, moist cake, and creamy pudding that soaks into every bite. Topped with whipped cream and fresh strawberries, it’s a fruity and sweet treat perfect for any occasion and it’s easy to whip up! It’s a versatile dessert that can feel fancy while being simple and basic to make.
1box instant vanilla pudding mix (5.1 oz large box, MUST be instant)
3cups cold whole milk
For the Topping
1tub whipped topping (8 oz, like Cool Whip, thawed)
sliced fresh strawberries (for garnish)
Instructions
Bake the Cake
1
Preheat and PreparePreheat your oven to 350°F (175°C). Spray a 9x13-inch baking pan with nonstick cooking spray.
2
Mix Cake BatterIn a large bowl, combine the strawberry cake mix, water, vegetable oil, and eggs. Mix according to package directions until smooth. Pour the batter into the prepared baking dish.
3
BakeBake on the middle rack for about 28-32 minutes, or until a toothpick inserted into the center comes out clean.
4
Cool the CakeLet the cake cool at room temperature for about 20 minutes, then move it to the refrigerator to finish cooling for another 40 minutes. The cake should be completely cool.
Assemble the Poke Cake
5
Poke the HolesOnce cooled, use the round handle of a wooden spoon or a straw to poke holes all over the cake. Space the holes about ½ inch apart.
Bigger holes are better for pudding, unlike the small holes needed for Jell-O.
6
Make the PuddingIn a medium bowl, whisk together the instant vanilla pudding mix and the cold milk. Whisk until smooth, but do not let it thicken completely.
7
Pour Pudding Over CakeImmediately pour the pudding mixture over the cake, ensuring it fills the holes. Use a spatula to spread any remaining pudding evenly over the top.
8
Chill to SetRefrigerate the cake for at least 1 hour, or until the pudding is completely set.
9
Add Topping and ServeSpread the thawed whipped topping evenly over the chilled cake. Garnish with sliced fresh strawberries just before serving. Slice, enjoy, and keep leftovers refrigerated.
Nutrition Facts
Servings 12
Amount Per Serving
Calories380kcal
% Daily Value *
Total Fat17gg27%
Saturated Fat6gg30%
Trans Fat0gg
Cholesterol45mgmg15%
Sodium420mgmg18%
Potassium150mgmg5%
Total Carbohydrate54gg18%
Dietary Fiber1gg4%
Sugars38gg
Protein5gg10%
Calcium 120 mg
Iron 1 mg
* Percent Daily Values are based on a 2,000 calorie diet. Your daily value may be higher or lower depending on your calorie needs.
Note
CRITICAL: You MUST use INSTANT pudding mix, not cook and serve. Using cook and serve will result in a soupy, unset mess.
Large Box Required: Be sure to use the large 5.1-ounce box of instant pudding, not the small 3.4-ounce box, to get the correct consistency with 3 cups of milk.
Cake Mix Size: This recipe is designed for the standard 15.25 oz cake mix. If your brand is smaller (13.25 oz), the recipe will still work, but avoid using Jiffy mixes as they are too small.
Make it Sugar-Free: You can easily make this dessert sugar-free by using a sugar-free cake mix, sugar-free instant pudding, and sugar-free whipped topping.
Storage: Store leftovers covered in the refrigerator for up to 2-3 days. This cake can also be frozen.
I’m a London-based food writer, recipe developer, and home cook who has been passionate about cooking for over 15 years. What started as a way to recreate my mother’s traditional dishes turned into a lifelong love for experimenting with flavors, writing about food, and helping others feel more confident in the kitchen.