Every year when St. Patrick’s Day gets close, I get this sudden urge to bake something cheerful. Not fancy. Not complicated. Just fun. These cookie bars have turned into my go-to because they feel festive without requiring a full day in the kitchen.
I started making them on a random weeknight a few years ago when I didn’t feel like scooping individual cookies. I wanted chocolate chip cookies, but I also wanted shortcuts. Press it in a pan, bake once, done. That decision accidentally created a tradition.
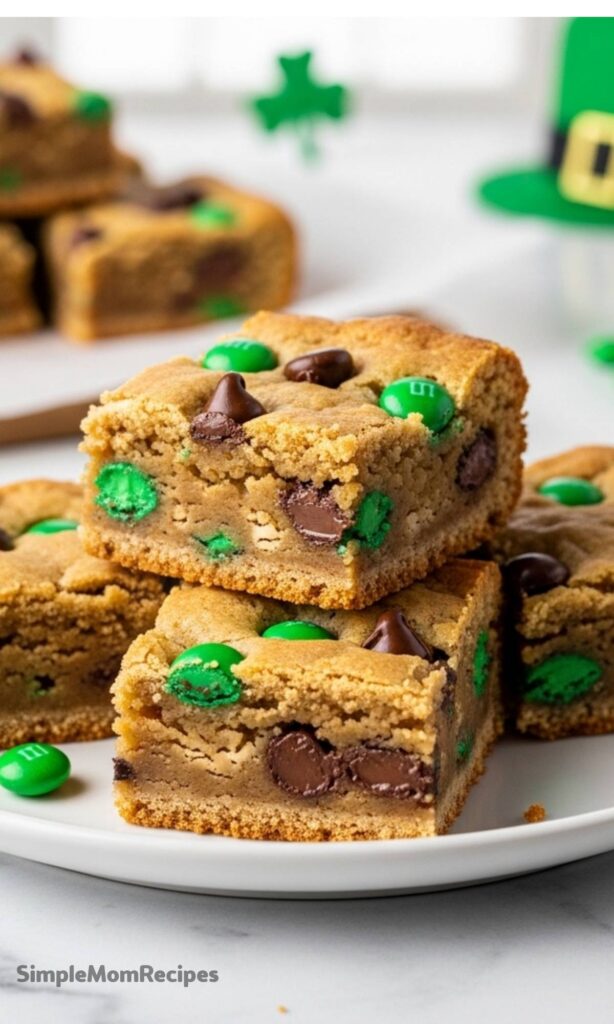
They’ve got that soft, buttery center, slightly crisp edges, and pops of green candy that make people smile before they even take a bite. Honestly, anything with colorful candy baked into it just feels like a celebration.
You don’t have to be Irish to enjoy them. I’m definitely not baking them for authenticity. I’m baking them because they’re easy, nostalgic, and disappear faster than I expect every single time.
Ingredients I Used for the Recipe
- ½ cup unsalted sweet cream butter, softened – This gives the bars that rich, classic cookie flavor and soft texture.
- ½ cup light brown sugar, packed – Adds moisture and that slight caramel taste that makes them chewy.
- ¼ cup granulated sugar – Helps balance sweetness and gives the edges a little structure.
- 1 large egg – Holds everything together and keeps the bars tender.
- ½ teaspoon pure vanilla extract – Just enough to round out the flavor without overpowering.
- 1½ cups all-purpose flour – The base that turns this into a sturdy bar instead of a gooey mess.
- ½ teaspoon baking soda – Helps the bars rise slightly and stay soft.
- ¼ teaspoon baking powder – Adds a little lift so they don’t feel dense.
- ¼ teaspoon kosher salt – Balances the sweetness and makes the chocolate taste better.
- ¾ cup green M&M’s – The festive part. These make it St. Patrick’s Day instead of just Tuesday dessert.
- ¾ cup semi-sweet chocolate chips – Because one kind of chocolate never feels like enough.
How to make St Patrick’s Day Cookie Bars?

Step 1 – Preheat and Prepare the Pan
Set your oven to 350°F and line a 9×9 baking dish with parchment paper. I leave a little overhang so I can lift the whole thing out later. It makes cutting way easier and saves me from fighting with the pan.
Step 2 – Cream the Butter and Sugars
In a mixing bowl, beat the softened butter, brown sugar, and granulated sugar together until it looks light and fluffy. This step matters more than people think. If I rush it, the texture is never quite the same.
Step 3 – Add the Egg and Vanilla
Mix in the egg and vanilla extract until everything is smooth. At this point it already smells like cookie dough, and I have to remind myself not to snack on it too much.
Step 4 – Combine the Dry Ingredients Separately
In another bowl, whisk together the flour, baking soda, baking powder, and salt. I used to skip mixing this separately and paid for it with uneven bites. Now I take the extra minute.
Step 5 – Bring Wet and Dry Together
Gradually add the dry mixture into the wet ingredients. Stir just until combined. Overmixing makes the bars tough, and nobody wants that. The dough should be thick but easy to press.
Step 6 – Fold in the Chocolate Chips and M&M’s
Gently fold in the chocolate chips and green M&M’s. I always toss in a few extra because somehow they vanish into the dough while mixing.
Step 7 – Press the Dough Into the Pan
Spread the dough evenly into your lined baking dish. I use my hands or the back of a spoon. It doesn’t need to look perfect. Rustic works here.
Step 8 – Add a Few Pieces on Top
Press a handful of extra M&M’s and chocolate chips onto the surface. This makes the finished bars look bakery-worthy without any actual effort.
Step 9 – Bake Until Lightly Golden
Bake for 20 to 25 minutes, just until the top is lightly browned. The center may look slightly soft, and that’s exactly what you want. They firm up as they cool.
Step 10 – Let Them Cool Completely Before Cutting
This is the hardest step. If you cut them too early, they fall apart. I’ve done it. Many times. Waiting gives you clean slices and the perfect chewy texture.
The Little Things I’ve Learned From Making These Over and Over
These bars taught me that simple recipes are usually the ones people love most. I’ve brought them to gatherings where there were elaborate desserts, and somehow this pan of cookie bars was the first thing gone.
I used to think holiday baking had to be complicated to feel special. Now I know better. A colorful candy swap can change the whole mood of a dessert without changing the recipe at all.
Sometimes I make them the night before, cut them into squares, and stack them on a plate like they came from a bakery. No one needs to know how easy they were.
And yes, I’ve absolutely used them as “leprechaun bait” for kids. It works every time. Leave a bar out, scatter a few candies around, and suddenly there’s magic in the kitchen the next morning.
Tips
If your butter is too cold, the dough won’t mix smoothly. Let it sit out until it’s soft but not melted. I’ve tried microwaving before and regretted it.
Don’t overbake. The biggest mistake is waiting until they look fully done. Pull them when the center is still slightly soft. That’s how you get chewy bars instead of dry ones.
Line the pan with parchment paper. Not greasing. Not foil. Parchment. It makes removal effortless and cleanup almost nonexistent.
If you want to add frosting, you can. A simple cream cheese frosting tinted green works. Personally, I skip it most of the time because these are already plenty sweet.
Use a plastic knife or a very sharp knife for cutting once they cool. It gives cleaner edges and keeps the layers from crumbling.
Serving and Storing Them Without Overthinking It
I usually leave these out on the counter in an airtight container, and they stay soft for a couple of days. No refrigeration needed. In fact, the fridge tends to dry them out.
If I’m making them ahead for a party, I bake them the night before and cut them the next day. The flavor actually settles in more, which is a nice bonus.
You can freeze them too. Just wrap the bars tightly and thaw at room temperature when you need a quick dessert. I like knowing there’s a stash ready for sudden sweet cravings.
Whether you’re making them for a holiday gathering or just because you want something cheerful in the kitchen, these cookie bars deliver. They’re low effort, high reward, and honestly kind of hard to mess up. That’s my favorite kind of recipe.
St Patrick’s Day Cookie Bars Recipe
Description
These easy-to-make St. Patrick's Day Cookie Bars bring festive fun to any celebration. Made with green M&Ms and semi-sweet chocolate chips, these classic chocolate chip cookie bars are soft, chewy, and perfectly sweet. Whether you're hosting a party or just treating the family, these bars are a delightful way to celebrate the luck of the Irish.
ingredients
Instructions
- Preheat the oven to 350°F (175°C) and line a 9x9 inch baking dish with parchment paper.
- Using a standing mixer, cream together the softened butter, brown sugar, sugar, egg, and vanilla extract until well combined and fluffy.
- In a separate large bowl, whisk together the flour, baking soda, baking powder, and kosher salt until evenly combined.
- Gradually add the dry ingredients to the wet mixture, mixing on low speed until just combined. Do not overmix.
- Gently fold in the green M&Ms and semi-sweet chocolate chips until evenly distributed throughout the dough.
- Press the cookie dough evenly into the prepared baking dish, smoothing the top with a spatula.
- Top with a few extra green M&Ms and chocolate chips for a festive finish.
- Bake for 20-25 minutes, or until the edges are lightly golden and the center is set.
- Remove from the oven and allow to cool completely in the pan before cutting into 12 bars.
Nutrition Facts
Servings 12
- Amount Per Serving
- Calories 295kcal
- % Daily Value *
- Total Fat 12gg19%
- Saturated Fat 7.5gg38%
- Trans Fat 0gg
- Cholesterol 35mgmg12%
- Sodium 125mgmg6%
- Potassium 50mgmg2%
- Total Carbohydrate 40gg14%
- Dietary Fiber 1gg4%
- Sugars 26gg
- Protein 3gg6%
- Calcium 2% mg
- Iron 4% mg
* Percent Daily Values are based on a 2,000 calorie diet. Your daily value may be higher or lower depending on your calorie needs.
Note
Frosting option: For extra festivity, top cooled bars with green-tinted cream cheese frosting.
Storage: Keep in an airtight container at room temperature for up to 5 days, or freeze for up to 1 month.
Customize: Swap green M&Ms for shamrock sprinkles or add white chocolate chips for variety.
- Make ahead: These bars can be baked 1-2 days in advance and stored in an airtight container at room temperature.
- Frosting option: For extra festivity, top cooled bars with green-tinted cream cheese frosting.
- Storage: Keep in an airtight container at room temperature for up to 5 days, or freeze for up to 1 month.
- Customize: Swap green M&Ms for shamrock sprinkles or add white chocolate chips for variety.
