There’s something truly magical about a treat that’s both delicious and delightfully spooky. These cookies capture that perfect Halloween spirit, offering a rich, fudgy base for a web that looks intricate but is surprisingly simple to create.
Forget the fuss of royal icing or sticky marshmallows; this method is clean, fun, and utterly satisfying. You end up with a cookie that’s a joy to make and an even bigger joy to present to friends and family.
A Halloween Treat That’s Actually Fun to Make
Let’s be honest, some spooky recipes can feel more like a chore than a celebration. The goal here was to create something that feels festive from start to finish, without any of the stressful parts.
The process of dragging the toothpick through the white chocolate is almost hypnotic, and watching the web appear never gets old. It’s the kind of kitchen activity that invites helpers, big and small, to join in on the fun.
Ingredients Needed for the Recipe
Gathering your ingredients is the first step toward cookie bliss. Using standard pantry staples, this recipe comes together without any hard-to-find items.
- Salted Butter: 1 cup (226 g), softened. I find salted butter gives a better flavor balance than unsalted.
- Sugars: 1 cup (225 g) light brown sugar and 1 cup (225 g) granulated white sugar for the perfect chewy texture.
- Eggs: 2 large eggs, which act as the binder and add fluffiness.
- Vanilla Extract: 2 teaspoons for that warm, classic cookie aroma.
- Cocoa Powder: ¾ cup (68 g) of dark cocoa powder. Hershey’s Special Dark is fantastic for a deeper color, but regular works too.
- Leaveners & Salt: 1 ½ teaspoons baking soda and ½ teaspoon salt to lift and balance the flavors.
- All-Purpose Flour: 3 cups (420 g) for the structure of our fudgy cookies.
- Chocolate Chips: 1 ½ cups (250 g) semi-sweet chips for the dough and ¾ cup (135 g) white chocolate chips for the dazzling webs.
The Secret to the Perfect Cookie Base
The foundation of a great spider web cookie is, without a doubt, the cookie itself. You want something dark, chewy, and sturdy enough to hold the design.
This double chocolate chip base is exactly that—intensely chocolatey and soft, yet it bakes up with a smooth enough surface for your web to shine. It’s the ideal canvas for your edible art.
How to make Spider Web Cookies?

Step 1: Creaming the Butter and Sugars
In a large mixing bowl, combine your softened butter with the brown and white sugars. Using an electric mixer on medium-high speed, beat them together for a good 3 minutes.
Don’t rush this step! You’ll know it’s ready when the mixture becomes noticeably lighter in color and has a fluffy, almost whipped consistency.
Step 2: Incorporating the Eggs and Vanilla
Add the two eggs and the vanilla extract to the fluffy butter mixture. Mix on medium speed for another minute or two, just until the eggs are fully incorporated.
The mixture might look a bit curdled at first, but it will come together beautifully into a smooth, pale batter once you keep mixing.
Step 3: Adding the Dry Ingredients
Now, it’s time for the cocoa powder, baking soda, and salt. Sprinkle them over the wet ingredients and mix on low speed until just combined.
The dark cocoa will instantly transform the color of your dough, giving you a sneak peek of the spooky goodness to come.
Step 4: Bringing in the Flour
Gradually add the all-purpose flour to the bowl, mixing on low speed. Be patient here, mixing for 1-2 minutes until no pockets of dry flour remain.
You’ll have a thick, beautiful dough forming, and the kitchen will smell amazing.
Step 5: The Chocolate Chip Finale
This is the best part. Pour in the semi-sweet chocolate chips and mix on the lowest setting until they are evenly distributed throughout the dough.
Every bite will be packed with melty chocolate, a wonderful contrast to the dark cookie base.
Step 6: Scooping and Baking
Preheat your oven to 350°F (175°C) and line your baking sheets with parchment paper. Using a cookie scoop (about 1.5 tablespoons), portion out the dough onto the sheets, 12 per pan.
Bake for 8-10 minutes. Remember, it’s always better to underbake slightly than to overbake—this keeps them wonderfully chewy.
Step 7: Creating the White Chocolate Spiral
Let the cookies cool for at least 10 minutes. While they’re cooling, place the white chocolate chips in a plastic zip-top bag or piping bag.
Microwave for 15-30 seconds, squish the bag to melt any remaining chunks, and then snip a tiny hole in one corner. Pipe a spiral onto each cookie, starting with a little dollop in the center first.
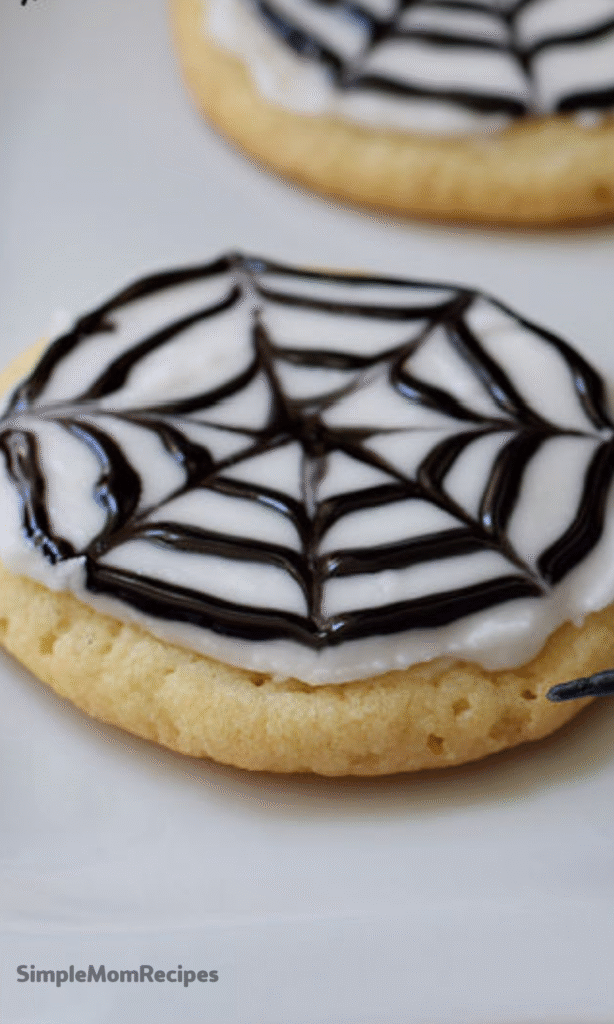
Step 8: Weaving the Web
Take a toothpick and, starting from the very center of the cookie, drag a straight line out to the edge. Repeat this, spacing your lines evenly, to create about 6-8 “spokes.”
Do this in small batches of 5-6 cookies so the chocolate doesn’t set before you finish the design. It’s that simple!
Getting Your Webs Just Right
The magic of the web is in the technique, not in complicated tools. The key is a smooth, fluid motion with the toothpick.
If your first few attempts aren’t perfect, don’t worry. The beauty of these cookies is that even a slightly wobbly web still looks wonderfully spooky and completely intentional.
Tips
White Chocolate Care: Be very careful not to overheat the white chocolate. Microwave in short bursts and knead the bag. If it seizes and becomes clumpy, you’ll need to start over with new chips.
Smooth Cookie Tops: For the most pristine webs, roll your cookie dough balls in your hands before baking to create a smoother surface. This gives the white chocolate a perfect, even canvas to glide on.
Work in Batches: The white chocolate sets quickly. Decorating 5-6 cookies at a time ensures you can create the web effect before the chocolate hardens, making the process much less stressful.
How to Make This Recipe Your Own
This recipe is wonderfully adaptable. Feel free to swap the semi-sweet chocolate chips for milk chocolate or even dark chocolate, depending on your preference.
You can also use coconut sugar instead of granulated for a deeper, caramel-like flavor. The possibilities for personalization are endless, which makes it a recipe you can return to year after year.
Serving and Storage Suggestions
Once the white chocolate has set (about 15-20 minutes), these cookies are ready to devour. They’re fantastic on their own or paired with a savory Halloween snack like a spider web taco dip for a balanced party spread.
Store any leftovers—if there are any!—in an airtight container at room temperature for up to 3 days. For longer storage, you can freeze the baked, undecorated cookies for up to 3 months and add the webs the day you plan to serve them.
The Joy of a Shared Kitchen
Recipes like this are about more than just the final product. They’re about the laughter that happens when a web goes a little wonky, and the pride a child feels when they create their own edible masterpiece.
It’s a reminder that the best Halloween memories are often the ones you make together, covered in a little bit of flour and a whole lot of love.

Spider Web Cookies Recipe
Description
Chocolate Spider Web Cookies are a super fun Halloween cookie recipe that are fudgy, filled with chocolate chips, and decorated with easy white chocolate spider webs! Perfect for parties, these double chocolate cookies are simple to make and delightfully spooky.
ingredients
For the Cookies
For the Spider Webs
Instructions
-
Preheat oven to 350°F (177°C). Line two baking sheets with parchment paper or spray with baking spray.
-
In a large mixing bowl, cream together softened butter, brown sugar, and granulated sugar using an electric mixer on medium-high speed for 3 minutes until light and fluffy.
-
Add eggs and vanilla extract. Mix on medium speed for 1–2 minutes until fully incorporated and fluffy.
-
Add cocoa powder, baking soda, and salt. Mix until combined.
-
Gradually add flour, mixing on low speed until just combined and no dry streaks remain.
-
Fold in semi-sweet chocolate chips until evenly distributed.
-
Scoop dough using a 1.5-tablespoon cookie scoop (or roll into 2-inch balls). Place 12 cookies per baking sheet, spaced 2 inches apart.
-
Bake for 8–10 minutes. Cookies will look slightly underbaked—that’s perfect! They’ll firm up as they cool.
-
Let cookies cool on the baking sheet for 10 minutes, then transfer to a wire rack.
-
Melt white chocolate chips in a microwave-safe plastic bag in 15–30 second intervals, squishing between bursts until smooth. Do not overheat or it will seize.
-
Snip a tiny hole in one corner of the bag. Pipe a small dollop in the center of a cookie, then spiral outward to the edge.
-
Immediately use a toothpick to drag lines from the center to the outer edge (6–8 lines per cookie) to create a spider web. Work in small batches so the chocolate doesn’t harden before you feather it.
-
Let cookies sit for 15–20 minutes until the white chocolate sets. Optional: add plastic spiders or Halloween sprinkles for extra spookiness!
Nutrition Facts
Servings 24
- Amount Per Serving
- Calories 180kcal
- % Daily Value *
- Total Fat 9g14%
- Saturated Fat 5.5g28%
- Cholesterol 35mg12%
- Sodium 140mg6%
- Potassium 120mg4%
- Total Carbohydrate 25g9%
- Dietary Fiber 1.5g6%
- Sugars 16g
- Protein 2g4%
- Calcium 30 mg
- Iron 1 mg
* Percent Daily Values are based on a 2,000 calorie diet. Your daily value may be higher or lower depending on your calorie needs.
Note
- Smooth tops = better webs: Roll dough into smooth balls before baking for cleaner web designs.
- Don’t overheat white chocolate: It seizes easily—microwave in short bursts and stop when almost melted; residual heat will finish the job.
- Make ahead: Bake cookies 1–2 days ahead; add webs just before serving.
- Freezing: Freeze unbaked dough balls for up to 3 months. Bake from frozen, adding 1–2 minutes to cook time.