Do you ever look at that jar of sourdough discard and see more than just leftovers? I do. To me, it’s the secret to the most interesting pie crust you’ll ever make.
This recipe turns that tangy starter into something truly special, a base with real character. It’s flaky, buttery, and works for absolutely anything you can dream up.
Why Your Discard Belongs in Pie Dough
Using sourdough discard here isn’t just about avoiding waste, though that’s a wonderful bonus. It’s a flavor and texture power move.
The natural acidity adds a subtle, complex background note that makes both sweet and savory fillings sing. More importantly, it actively promotes tenderness.
It helps inhibit too much gluten formation, which is the enemy of a flaky crust. You get all the structure you need, but with a beautiful, delicate crumb.
Ingredients Needed for the Recipe
You likely have everything you need already. The magic is in how you bring these simple ingredients together.
- All-Purpose Flour: The reliable backbone of our crust, providing just the right structure.
- Granulated Sugar: Just a touch for balancing flavors in a sweet crust; omit it completely for savory bakes.
- Fine Sea Salt: Crucial for enhancing all the other flavors in the dough.
- Unsalted Butter, Cold: The key to flakiness. Keep it very cold to create those perfect, steam-releasing pockets.
- Ripe Sourdough Starter Discard: Your secret weapon for flavor and tenderness. Cold from the fridge is perfectly fine.
- Cold Water: To bind everything. I often pop a small bowl of water in the freezer while I gather my other ingredients.
How to make Flaky Sourdough Discard Pie Crust (Sweet or Savory)?
This process is a gentle one. We’re not kneading bread, we’re coaxing a tender crust into being. Patience and cold ingredients are your best friends here.

Step 1 – Combine Dry Ingredients & Cut in Butter
Whisk the flour, sugar (if using), and salt together in a large bowl. Cut your very cold butter into small cubes and add them to the flour.
Toss the butter to coat it in flour, then use a pastry blender or two forks to cut it in. You’re aiming for pieces about the size of small peas, with some larger flat shards—this variety creates fantastic flakiness.
Step 2 – Bring the Dough Together
Add the cold sourdough discard and most of the cold water to the bowl. Gently stir with a spatula or your hands just until a shaggy dough forms.
If it seems dry and won’t hold together, add the remaining water a tablespoon at a time. The dough should be cohesive but not wet or sticky.
Step 3 – Form and Chill the Dough
Dump the mixture onto a clean counter and gently press it together into a ball. Divide the ball in half and shape each half into a flat disc, about an inch thick.
Wrap each disc tightly in plastic wrap. This chilling stage is non-negotiable—it relaxes the gluten and re-solidifies the butter. Refrigerate for at least 2 hours, or ideally overnight.
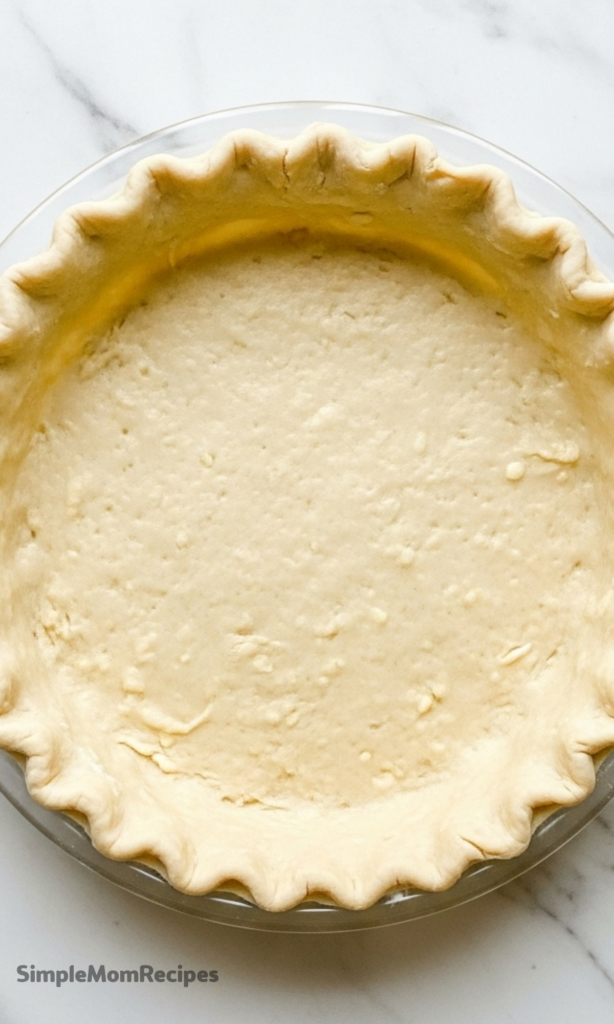
Step 4 – Roll and Shape
When you’re ready to bake, take one disc from the fridge. Let it sit for 5-10 minutes to become just pliable enough to roll.
On a lightly floured surface, roll the dough from the center out, turning it occasionally, until you have a round about 12 inches across. Use it to line your pie dish or create a free-form galette.
Tips
- Keep everything cold. I even chill my mixing bowl sometimes. Warm butter makes a greasy, tough crust.
- Handle the dough as little as possible with your warm hands. Use tools and a light touch to keep the butter pieces intact.
- After shaping your pie or galette, chill it again for 15 minutes before baking. This gives the butter one more firm-up, guaranteeing maximum flake.
- For a shiny, golden finish, brush the top crust with an egg wash (a beaten egg with a splash of water or milk) before it goes in the oven.
Endless Ways to Use Your Masterpiece
This crust is your blank canvas. For a sweet treat, fill it with spiced apples, summer berries, or a rich chocolate cream.
Go savory with a herby quiche, a potato and onion galette, or spiced mushroom tarts. The slight tang plays so nicely with cheeses, roasted vegetables, and hearty meats.
Don’t feel confined to a pie plate. This dough makes exceptional hand pies, rustic crostatas, and even cheesy crackers. Once you start, you’ll find reasons to make it all the time.
So, grab that jar of discard from the fridge. You’re not about to make just a pie crust. You’re about to give your favorite fillings a delicious new home, with layers of flavor and texture in every single bite.

Sourdough Discard Pie Crust Recipe
Description
This crust blends sourdough tang with classic ingredients, resulting in a flaky and flavorful base suitable for sweet and savory pies. It offers a unique twist on traditional pie crusts and is made with flour, butter, and sourdough discard.
The recipe makes two sourdough pie crusts suitable for the bottom pie crust and top (for something like apple pie). If you only need a bottom crust (or you’re making a galette or crostata), halve all the ingredients.
Ingredients
Instructions
-
In a large bowl, whisk together the flour, sugar, and salt. Cut the butter into small cubes. Add the butter and lightly toss to coat with flour.
-
Using a pastry blender or the back of a fork, cut the butter into the flour until the butter is the size of small peas.
-
Add the sourdough starter and cold water. Stir with a spatula until well combined. The dough should just come together; add more water, one tablespoon at a time, only if needed.
-
Scrape the dough onto a clean work surface and knead it gently until it comes together into a cohesive mass.
-
Form the dough into a disc, then using a bench scraper, divide it directly in half. Shape each half into a disc.
-
Tightly wrap each disc in plastic wrap and refrigerate for at least 2 hours or overnight.
-
To use, remove one disc from the fridge, unwrap it, and place it on a lightly floured surface. Roll out to a 12-inch round. Fit into a pie dish or use for galette/crostata as desired.
-
For best results, chill the shaped crust for 15 minutes before baking.
Nutrition Facts
Servings 8
- Amount Per Serving
- Calories 225kcal
- % Daily Value *
- Total Fat 13gg20%
- Saturated Fat 8gg40%
- Trans Fat 0gg
- Cholesterol 34mgmg12%
- Sodium 180mgmg8%
- Potassium 35mgmg1%
- Total Carbohydrate 24gg8%
- Dietary Fiber 1gg4%
- Sugars 1gg
- Protein 3gg6%
- Calcium 15 mg
- Iron 1 mg
* Percent Daily Values are based on a 2,000 calorie diet. Your daily value may be higher or lower depending on your calorie needs.
Note
- For a savory crust: omit the sugar.
- Single crust? Halve all ingredients.
- Chill before baking: Refrigerate filled pie or galette for at least 15 minutes before baking for a flakier result.
- Freezer-friendly: Wrap well in plastic and place in a freezer bag. Keeps up to 6 months. Thaw overnight in fridge before use.