Let’s turn that jar of sourdough discard into your new favorite bread, shall we?
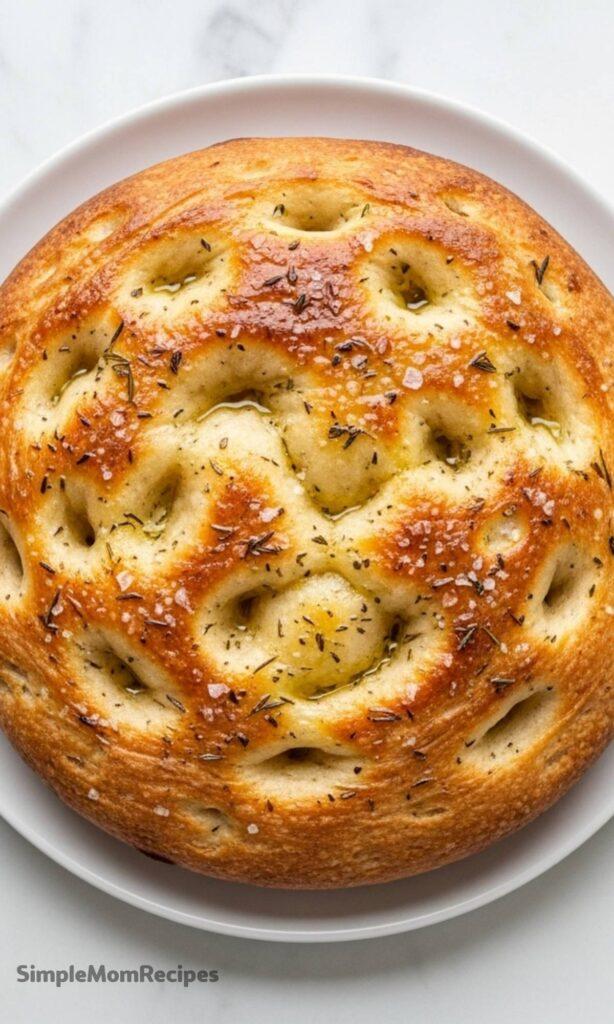
This focaccia is a fluffy, bubbly masterpiece with a crisp, golden crust, and it asks for just five simple ingredients.
Why This Recipe is a Game-Changer
If the idea of baking a sourdough loaf feels intimidating, this focaccia is your perfect starting point.
It’s wonderfully forgiving, requires no tricky shaping, and you get to choose your own timeline for baking.
Ingredients Needed for the Recipe
Here’s what you’ll need to gather. Each one plays a specific, important role.
Sourdough Starter Discard: This is your flavor foundation. Use discard that’s less than a week old for the best rise, though active starter works beautifully too.
Bread Flour: Its high protein content builds a strong, chewy texture and those lovely, airy pockets we all love.
Water: We use a lot of it! This high hydration creates a batter-like dough that transforms into a light, open crumb.
Olive Oil: It adds rich flavor and ensures your bread won’t stick. A good extra virgin olive oil makes all the difference here.
Kosher Salt & Herbs: Salt deepens all the flavors, while herbs like rosemary provide that classic, aromatic finish.
Choosing Your Perfect Pan
The pan you choose directly shapes your focaccia’s personality, and it’s a fun decision to make.
A standard 9x13 inch pan gives you a thicker, fluffier bread with soft insides and crispy edges.
For a thinner, crisper focaccia that’s ideal for sandwiches, use a large half sheet pan (18x13 inches).
You can even use two 8x8 square pans to bake two smaller loaves, maybe with different toppings on each.
How to make Sourdough Discard Focaccia (Same Day or Overnight)?
Make this recipe yours—just save it to your Pinterest board!"
Step 1- Mix the Dough
In a large bowl, combine the bread flour, warm water, sourdough discard, and salt.
Mix until everything is just incorporated—the dough will be shaggy and quite wet, almost like a thick batter.
Step 2- Build Strength with Folds
Here’s the secret to structure without kneading. Wet your hand, grab an edge of the dough, and stretch it up and over itself.
Rotate the bowl a quarter turn and repeat, working your way around the bowl about 16 times total.
Step 3- The Rest and Repeat
Cover the bowl and let the dough rest for 15 minutes. Then, perform another set of stretches and folds.
You’ll do this six times in total, every 15 minutes. You’ll feel the dough become smoother and stronger with each set.
Step 4- The First Rise
Coat a clean bowl with 2 tablespoons of olive oil. Gently transfer your dough into it, rolling it to coat in the oil.
Cover it and let it rise at room temperature until roughly doubled in size, which takes about 4 hours in a warm kitchen.
Step 5- Shape in the Pan
Line your chosen baking pan with parchment paper and drizzle 2 more tablespoons of olive oil over it.
Transfer the dough to the pan and use oiled fingertips to gently coax it toward the edges. If it resists, let it rest for 10 minutes and try again.
Step 6- The Final Proof
This is your decision point. For same-day bread, cover the pan and let the dough proof until puffy, about 2 hours.
For a deeper, tangier flavor, cover the pan and slide it into the refrigerator right away for an overnight rest.
Step 7- Dimple and Top
About 20 minutes before baking, preheat your oven to 375°F. Oil your fingertips and press them deep into the dough, creating dimples all over.
Drizzle the final 2 tablespoons of olive oil over the top, letting it pool in the dimples, then sprinkle generously with salt and herbs.
Step 8- Bake and Enjoy
Bake for 25-30 minutes, until the top is a deep, glorious golden brown.
Let it cool in the pan for just 10 minutes before transferring it to a wire rack. Tear into it while it’s still warm.
Tips
Keep a small bowl of water nearby when handling the dough. Wet hands are your best tool against stickiness.
An aluminum baking pan promotes the most even baking and the crispiest bottom crust.
Don’t rush the stretching and folding steps. They are quietly building the gluten network for your beautiful crumb.
Go wild with toppings after the final dimpling. Sliced garlic, cherry tomatoes, or even a sprinkle of cheese are all fantastic.
If you proofed overnight, let the cold pan sit on the counter for an hour or two before baking to take the chill off.
Storing Your Homemade Focaccia
Once completely cool, store leftovers in an airtight container at room temperature for up to two days.
For longer storage, wrap pieces tightly and freeze for up to three months.
To bring back that just-baked warmth and crispness, wrap leftover focaccia in foil and warm it in a 350°F oven for about 10 minutes.
Serving Ideas Beyond the Bread Basket
This focaccia is far more than a sidekick. It’s a versatile star that loves company.
It’s the perfect tool for sopping up soups and stews, or served alongside a big, vibrant salad.
Turn it into a meal by using slices as a base for open-faced sandwiches, or cut it into strips for dipping into whipped ricotta or olive oil.
Honestly, a simple slab of this bread, still warm from the oven, is a celebration all on its own.
This Sourdough Discard Focaccia is light and fluffy with big beautiful bubbles and a crispy, golden brown crust. Made with just five ingredients, it can be prepared the same day or fermented overnight for a tangier flavor. If you're new to sourdough and feeling a bit intimidated by baking a loaf of sourdough bread, sourdough focaccia is a great place to start. Its fermentation is more forgiving than traditional sourdough, and you don’t need to worry about any complex shaping techniques.
Ingredients
For the Focaccia Dough
500grams bread flour ((4 cups + 3 tablespoons))
450grams warm water ((1¾ cups + 2 tbsp; 80–90°F))
100grams sourdough starter discard ((or active starter; less than 1 week old))
10grams kosher salt ((2½ tsp; plus more for topping))
6tablespoons extra virgin olive oil ((divided))
fresh or dried herbs ((e.g., rosemary, thyme, or oregano for topping))
Instructions
Same Day or Overnight Focaccia
1
Mix the DoughIn a large mixing bowl, combine the bread flour, warm water, sourdough starter discard, and kosher salt until well mixed. The dough will have a batter-like consistency. Cover and let it rest for 15 minutes.
2
Stretch and FoldsWet your hand and grab one edge of the dough. Pull it up and over itself. Rotate the bowl 90 degrees and repeat up to 16 times around the bowl. Cover and rest for 15 minutes. Repeat this process 5 more times (6 sets total) every 15 minutes. Alternatively, use a stand mixer with a dough hook for 10–15 minutes on medium-low speed.
3
Bulk FermentationAdd 2 tablespoons of olive oil to a clean bowl. Transfer the dough to the oiled bowl, ensuring it doesn’t stick. Brush oil on top of the dough. Cover and let it rise at room temperature (75°F) until doubled—about 4 hours.
4
Transfer to Baking PanLine a 9"x13" aluminum baking pan (or two 8"x8" pans) with parchment paper and oil with 2 tablespoons of olive oil. Transfer the dough and gently spread it. If it springs back, let it rest for 10 minutes and try again.
5
ProofCover and let proof until puffy—about 2 hours for same-day bake. For tangier flavor, refrigerate overnight, then bring to room temperature and proof 2–4 hours before baking.
6
Preheat and PokeAbout 20 minutes before baking, preheat oven to 375°F. Lightly oil your hands and poke dimples all over the dough to redistribute air bubbles.
7
Top and BakeDrizzle remaining 2 tablespoons of olive oil over the dough. Sprinkle with kosher salt and herbs. Bake 25–30 minutes until golden brown and crisp.
8
Cool and ServeLet cool in the pan for 10 minutes before slicing. Serve warm.
Nutrition Facts
Servings 12
Amount Per Serving
Calories210kcal
% Daily Value *
Total Fat8gg13%
Saturated Fat1gg5%
Trans Fat0gg
Cholesterol0mgmg0%
Sodium260mgmg11%
Potassium55mgmg2%
Total Carbohydrate29gg10%
Dietary Fiber1gg4%
Sugars0gg
Protein5gg10%
Calcium 10 mg
Iron 1.2 mg
* Percent Daily Values are based on a 2,000 calorie diet. Your daily value may be higher or lower depending on your calorie needs.
Note
Use fresh discard: For best rise, use discard less than 7 days old.
Wet hands: Keep hands wet to handle sticky, high-hydration dough.
Pan options: 9"x13" for fluffy bread, half sheet for thin crust, or two 8"x8" pans for portion control.
Storage: Store cooled focaccia in an airtight container at room temp for up to 2 days or freeze for 3 months.
Reheat: Wrap in foil and warm at 350°F for 10 minutes.
I’m a London-based food writer, recipe developer, and home cook who has been passionate about cooking for over 15 years. What started as a way to recreate my mother’s traditional dishes turned into a lifelong love for experimenting with flavors, writing about food, and helping others feel more confident in the kitchen.