
Let’s be honest, that jar of sourdough discard on your counter has been giving you a hopeful little look. It doesn’t want to be wasted, and honestly, it deserves a grand finale. What if I told you its finest hour could involve a golden fry and a sweet, glossy glaze?
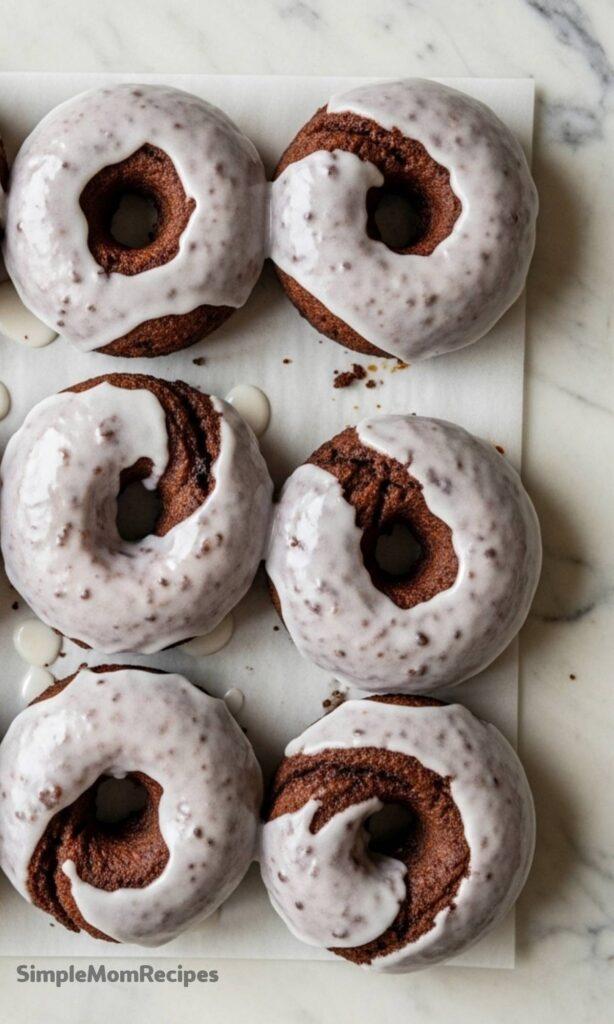
These sourdough discard donuts are a quiet revelation, transforming your leftover starter into something truly spectacular. My neighbors declared them the best they’d ever tasted, and I’m inclined to agree. The texture is impossibly light, with just the faintest whisper of tang that makes each bite utterly captivating.
The Magic of Using Your Discard
Using sourdough discard in sweet recipes is a small act of kitchen genius. It’s not just about avoiding waste, though that’s a wonderful bonus. That unfed starter brings a subtle complexity to the table, a gentle tang that perfectly balances the sweetness of the glaze.
It cuts through the richness in the most delightful way, making these donuts taste sophisticated, not cloying. You get all the comfort of a classic glazed donut, but with a little extra character that makes people pause and ask, “What is that delicious secret?” It’s your clever little secret, of course.
And for those morning dreams, this recipe is your best friend. You can absolutely mix the dough the night before and let it rise slowly in the fridge.
Waking up to donuts that are just an hour from fryer to plate feels nothing short of miraculous. It turns a weekend treat into a completely manageable, utterly impressive brunch centerpiece.
The dough becomes more flavorful, and your morning becomes wonderfully calm.
Ingredients Needed for the Recipe
Gathering these simple ingredients is the first step toward donut bliss. Each one plays a specific role in creating that perfect, airy texture and flavor.
- Sourdough Discard (1/2 cup / 6 oz): The star of the show! Use it straight from the fridge. Its acidity adds flavor and helps tenderize the dough.
- Whole Milk (3/4 cup / 6 oz): Warm milk activates the yeast and enriches the dough for a softer crumb.
- Granulated Sugar (1/4 cup): Feeds the yeast and provides a touch of sweetness to the dough itself.
- Active Dry Yeast (2 1/4 tsp): Our leavening agent, responsible for those beautiful air pockets and rise.
- Large Eggs (2): They bind the dough and contribute to its rich, tender structure.
- Unsalted Butter (8 tbsp, melted): Butter makes everything better, giving the donuts incredible flavor and a melt-in-your-mouth quality.
- All-Purpose Flour (3 1/3 cups / 15 oz): The foundation. Measuring by weight with a kitchen scale is best for consistent results.
- Kosher Salt (1 tsp): Essential for balancing and enhancing all the other flavors in the dough.
For the Vanilla Glaze:
- Powdered Sugar (3 cups, sifted): Creates the smooth, sweet base of our glaze. Sifting is non-negotiable for a lump-free finish.
- Heavy Cream (1/2 cup): Thins the sugar into a luxurious, creamy glaze that sets beautifully.
- Vanilla Extract (1 tbsp): Use the good stuff! It provides the classic, warm aroma we all love.
- Pinch of Salt: A tiny pinch here makes the vanilla flavor pop and prevents the glaze from being overly sweet.
How to make Sourdough Discard Donuts Recipe?
The process is a gentle, rewarding rhythm. Just follow these steps, and you’ll be a donut-making pro in no time.

Step 1 – Wake Up the Yeast
Gently warm the milk until it’s just pleasantly warm to the touch, not hot. Pour it into your mixing bowl and stir in the sugar. Sprinkle the yeast over the top and let it sit for about five minutes. You’ll see it get foamy and active, which means it’s ready to get to work.
Step 2 – Combine the Wet Ingredients
Melt your butter and let it cool slightly so it doesn’t cook the eggs. To the yeasty milk, add the sourdough discard, lightly beaten eggs, cooled melted butter, and salt. Stir everything together until it’s a homogenous, slightly sloppy mixture.
Step 3 – Form the Dough
Add the flour in two or three additions, mixing well after each. If using a stand mixer with a dough hook, knead on low for 4-5 minutes until smooth. By hand, just knead it in the bowl until it comes together. The dough will be soft and a bit tacky, but it shouldn’t stick to your fingers.
Step 4 – The First Rise (Choose Your Path!)
Place the dough in a lightly oiled bowl, cover it, and pop it in the refrigerator. Here’s your choice: let it chill for just 1-2 hours until cold, or let it have a slow, overnight rise for 8-10 hours. The overnight option develops fantastic flavor and makes morning preparation a breeze.
Step 5 – Cut the Donuts
On a lightly floured surface, roll the cold dough out to about half an inch thick. Use a 3-inch donut cutter, or a round cutter and a smaller one for the hole. Transfer the cut donuts and holes to parchment-lined baking sheets, giving them room to grow. Cover them loosely and let them rise at room temperature for 45-60 minutes. They’ll look puffy and adorable.
Step 6 – Fry to Golden Perfection
While the donuts rise, heat 2-3 inches of neutral oil in a heavy pot to 350°F. A thermometer is key here. Prepare a draining station with paper towels and a landing station with parchment paper. Fry the donuts in batches for about 1 minute per side, until they’re a deep, golden brown. The holes will cook faster, so keep a close eye on them.
Step 7 – Glaze While Warm
Whisk together the sifted powdered sugar, heavy cream, vanilla, and salt to make a smooth glaze. Dip each warm donut into the glaze, flipping to coat completely. Let the excess drip off before setting them on the parchment paper. The glaze will set into a beautiful, crackly shell.
Frying Essentials & Setup
Frying can feel intimidating, but a good setup makes it simple and mess-free. Choose a heavy, deep pot like a Dutch oven—it maintains a steady temperature. Fill it with about 3 inches of a neutral, high-heat oil like vegetable, canola, or peanut oil.
The most important tool is a reliable deep-fry or candy thermometer. Keeping your oil at a consistent 350°F is what guarantees a crisp exterior without a greasy interior.
Set up a workstation next to your pot. You’ll need a slotted spoon or spider for lowering and retrieving donuts, a baking sheet lined with a double layer of paper towels for draining, and another sheet with parchment paper for the glazed donuts to set.
Having everything ready before the first donut hits the oil is the secret to a calm, enjoyable frying session. You’ve got this.
Tips
- No donut cutter? No problem. A wide-mouth glass or jar lid works for the outer circle. A shot glass or bottle cap is perfect for cutting the center hole.
- For filled donuts, simply skip cutting the center hole. Fry them for a touch longer, about 90 seconds per side, to ensure the center is fully cooked.
- The glaze is intentionally thick. The heat from the freshly fried donut will slightly melt it as you dip, allowing it to coat perfectly and then set. If it seems too thick, add cream a teaspoon at a time.
- Resist the urge to overcrowd the pot. Fry in small batches to maintain the oil temperature and ensure even, beautiful coloring on every donut.
- These are best enjoyed the day they are made. Store any leftovers (unlikely!) loosely covered at room temperature, not in an airtight container where they can become soggy.
Delicious Variations to Try
Once you’ve mastered the classic vanilla glaze, a world of flavor awaits. For a chocolate glaze, whisk 1/3 cup of cocoa powder into the powdered sugar before adding the cream.
A citrus twist is wonderful, too; replace the vanilla with lemon or orange extract and add a bit of zest to the glaze. You could even roll the warm, unglazed donuts in a cinnamon-sugar mixture for a simpler, spiced treat.
Consider adding flavors directly to the dough itself. A teaspoon of cinnamon or nutmeg whisked into the flour adds a warm note. For a fun confetti effect, fold in a handful of rainbow sprinkles after kneading.
The dough is a wonderfully forgiving canvas. Let your mood and pantry guide you toward your next perfect batch.


Sourdough Discard Donuts Recipe
Description
Light, fluffy, and perfectly chocolaty, these chocolate sourdough discard donuts taste like they came from a corner bakery! This is a great, unique recipe to use sourdough discard and get your chocolate doughnut fix. If you don’t have any sourdough, don’t fret—measurements are included for sourdough starter-less donuts in the recipe notes.
ingredients
Donut Dough
Glaze
Instructions
-
Warm the milk in a microwave-safe measuring cup for about 20 seconds. It should be warm but not hot (under 110°F/43°C).
-
Pour the milk into the bowl of a stand mixer fitted with a dough hook (or a large mixing bowl). Stir in the sugar, then sprinkle the yeast on top. Let sit for 5 minutes until foamy.
-
Add the sourdough discard, eggs, melted butter, cocoa powder, instant espresso powder (if using), and salt. Mix to combine.
-
Add the flour in 3 batches, mixing until just combined. Knead with the dough hook for 4–5 minutes (or by hand) until smooth. The dough should be soft and slightly wet but not sticky.
-
Place dough in a lightly oiled bowl, cover, and refrigerate for 1–2 hours or overnight (8–10 hours).
-
Remove dough from fridge. On a lightly floured surface, roll to ½-inch thickness. Cut with a 3-inch donut cutter (and smaller cutter for holes).
-
Place cut donuts on parchment-lined baking sheets. Spray lightly with nonstick spray, cover with plastic wrap, and let rise for 45–60 minutes until puffy.
-
Heat frying oil to 350°F (177°C). Line two baking sheets—one with parchment, one with paper towels for draining.
-
Prepare glaze: sift powdered sugar into a bowl. Warm heavy cream 10 seconds in microwave. Stir cream, vanilla, and salt into sugar until smooth.
-
Fry donuts 1–2 minutes total (1 minute per side), turning once. Donut holes take ~1.5 minutes total. Drain briefly on paper towels.
-
While next batch fries, dip warm donuts into glaze, coating fully. Place on parchment to set.
-
Repeat until all donuts and holes are fried and glazed. Best served fresh or within 1–2 days stored at room temperature in a cake box.
Nutrition Facts
Servings 16
- Amount Per Serving
- Calories 320kcal
- % Daily Value *
- Total Fat 16gg25%
- Saturated Fat 9gg45%
- Trans Fat 0gg
- Cholesterol 55mgmg19%
- Sodium 190mgmg8%
- Potassium 180mgmg6%
- Total Carbohydrate 42gg15%
- Dietary Fiber 3gg12%
- Sugars 22gg
- Protein 5gg10%
- Calcium 60 mg
- Iron 2 mg
* Percent Daily Values are based on a 2,000 calorie diet. Your daily value may be higher or lower depending on your calorie needs.
Note
- If making without sourdough starter, substitute with ¼ cup all-purpose flour + ¼ cup water.
- The espresso powder is optional but deepens chocolate flavor—no coffee taste remains.
- For espresso glaze, dissolve 1 tsp instant espresso powder in the warm cream before mixing into powdered sugar.
- Donuts are best the day they’re made but stay good for 1–2 days covered lightly at room temperature.
- Use a thermometer for oil—it’s crucial for perfect frying at 350°F.