
That jar of sourdough discard sitting on your counter is about to become your secret weapon. Seriously, don’t pour it out.
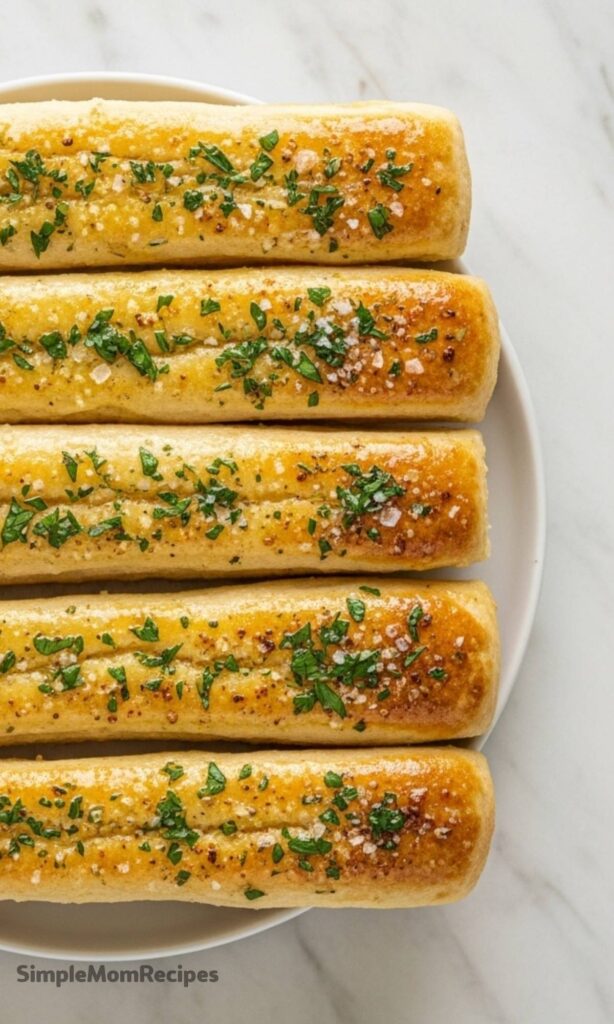
These soft, buttery, and garlicky breadsticks are the perfect way to give that tangy starter a delicious second life. They’re about to become your new favorite side dish.
More Than Just a Sidekick
We’ve all been there, staring at a bowl of soup or a plate of pasta and thinking it needs a little something extra. A humble breadstick can absolutely be that something.
But when it’s made with sourdough discard, it transforms from a simple carb into a complex, flavorful experience with a delightful, subtle tang. It’s a small upgrade that makes the whole meal feel special.
Ingredients Needed for the Recipe
Gather these simple ingredients, and you’re most of the way there. The magic is in how they come together.
- Sourdough Discard: Use it unfed and at room temperature for the best texture and a gentle tang.
- All-Purpose Flour: The reliable backbone that gives our breadsticks their soft, fluffy structure.
- Instant Yeast: This works alongside your discard to guarantee a good, predictable rise every single time.
- Warm Water & Sugar: A tiny bit of sugar wakes up the yeast, and warm water helps everything blend smoothly into a dough.
- Unsalted Butter: Used in the dough and for brushing, it creates an incredibly tender crumb and that irresistible, rich flavor.
- Garlic Powder & Dried Parsley: The classic, aromatic duo for the finishing butter glaze. Simple, and always perfect.
- Kosher Salt: A pinch in the dough and a sprinkle in the topping balances all the flavors beautifully.
How to make Sourdough Discard Breadsticks?
The process is wonderfully straightforward, with most of the time being hands-off while the dough rises. Let’s get started.

Step 1 – Mix the Dough
Combine your water, yeast, sugar, flour, discard, and salt in a large bowl. Start mixing, and slowly drizzle in that first portion of melted butter.
Keep going until a shaggy, ragged dough forms. Then, turn it out and knead by hand for just a few minutes until it feels smooth and just slightly tacky.
Step 2 – The First Rise
Place your smooth dough ball into a lightly oiled bowl. Cover it snugly with plastic wrap.
Now, walk away. Let it rest in a warm spot for about 90 minutes, or until it happily doubles in size. This is when the flavor starts to develop.
Step 3 – Shape the Sticks
Gently deflate the risen dough and turn it onto a clean surface. Divide it into ten equal pieces.
Roll each piece into a long, thin rope about ten inches long. They will look skinny, and that’s exactly right. Trust the process here.
Step 4 – The Final Proof
Place your shaped ropes on parchment-lined baking sheets, giving them a couple inches of space to grow. Cover them again with plastic wrap.
Let them proof for another hour. You’ll be amazed at how puffy and promising they become during this second wait.
Step 5 – Bake and Glaze
Preheat your oven. Just before baking, brush the breadsticks lightly with one tablespoon of melted butter.
Bake them until they’re puffed and just barely starting to turn golden, about 18 to 20 minutes. Meanwhile, mix the remaining butter with garlic, parsley, and salt.
Step 6 – The Flavor Finish
The moment they come out of the oven, brush them generously with that garlic-herb butter. Do it while they’re piping hot.
The warm bread will soak up all that glorious flavor. Serve them immediately, when they are at their absolute best.
Getting Your Texture Just Right
The feel of your dough is your best guide. After kneading, it should be smooth and only a little tacky to the touch, not overly sticky.
If it sticks persistently to your hands, work in an extra tablespoon of flour. If it feels too dry or shaggy, add a tablespoon of water. Small adjustments make perfect dough.
Tips
A few simple pointers can make your baking session even smoother, and your results even better.
- Don’t stress about making each breadstick perfectly identical. Rustic, hand-shaped sticks have so much more character.
- That garlic-herb butter? Don’t be shy with it. Brushing it on while the breadsticks are still warm is non-negotiable for maximum flavor absorption.
- If you want a crispier texture, try rolling your dough ropes a bit thinner. They’ll bake up with a delightful, pretzel-like crunch.
- You can absolutely use active, bubbly starter instead of discard. Just omit the yeast from the recipe and plan for slightly longer rise times.
Storing for Later Enjoyment
These breadsticks are truly best the day they’re made, fresh and warm. But if you have leftovers, they store beautifully.
Let them cool completely, then store in an airtight bag at room temperature for a day or two. To bring them back to life, a quick 30-second zap in the microwave works wonders.
For longer storage, the freezer is your friend. Wrap cooled breadsticks tightly and freeze for up to three months.
Reheat them straight from the freezer in the microwave or a warm oven. It’s like having fresh breadsticks on demand, a little secret stash for any meal.


Sourdough Discard Breadsticks Recipe
Description
These soft Sourdough Discard Breadsticks pair perfectly with a bowl of chili, tomato soup, or as a pasta side dish. They are soft, buttery, and garlicky, with a hint of sourdough tang—and they come together with just a few easy steps! Perfect for using up sourdough discard while your starter matures, these breadsticks require less than 30 minutes of hands-on time and deliver bakery-quality results at home.
ingredients
For the Breadsticks
For Topping
Instructions
-
Combine warm water, instant yeast, sugar, flour, sourdough discard, and salt in the bowl of a stand mixer or large mixing bowl.
-
With the mixer on low, slowly pour in 2 tablespoons of melted butter. Increase speed to medium and mix until a shaggy dough forms.
-
Transfer the dough to a smooth work surface and knead for 2–3 minutes until smooth and slightly tacky (not sticky). Adjust with small amounts of flour or water if needed.
-
Place the dough in a large greased bowl, cover with plastic wrap, and let rise for 90 minutes or until doubled in size.
-
Line two half-sheet baking pans with parchment paper. Divide the dough into 10 equal pieces (use a kitchen scale for accuracy if desired). Roll each piece into a 10-inch rope and place on the baking sheets with space between.
-
Cover with plastic wrap and let rise for 60 minutes until puffy and nearly doubled.
-
Preheat oven to 375°F (190°C). Brush breadsticks with 1 tablespoon melted butter and bake for 18–20 minutes until just golden.
-
While baking, melt remaining 3 tablespoons butter. Stir in parsley, garlic powder, and salt. Immediately after removing breadsticks from the oven, brush generously with the herb butter. Serve warm.
Nutrition Facts
Servings 10
- Amount Per Serving
- Calories 180kcal
- % Daily Value *
- Total Fat 8gg13%
- Saturated Fat 5gg25%
- Trans Fat 0gg
- Cholesterol 20mgmg7%
- Sodium 290mgmg13%
- Potassium 55mgmg2%
- Total Carbohydrate 24gg8%
- Dietary Fiber 1gg4%
- Sugars 2gg
- Protein 4gg8%
- Calcium 15 mg
- Iron 1 mg
* Percent Daily Values are based on a 2,000 calorie diet. Your daily value may be higher or lower depending on your calorie needs.
Note
- Active starter option: Replace discard with 200g active sourdough starter and omit yeast. Extend rise times as needed (usually 3–5 hours for bulk rise).
- Herb swaps: Use fresh herbs (1 Tbsp per 1 tsp dried) or Italian seasoning for variety.
- Crunchy version: Roll thinner and bake 2–3 minutes longer for crispier sticks.
- Storage: Keep at room temp for 1–2 days or freeze up to 3 months. Reheat in microwave 30–60 seconds.