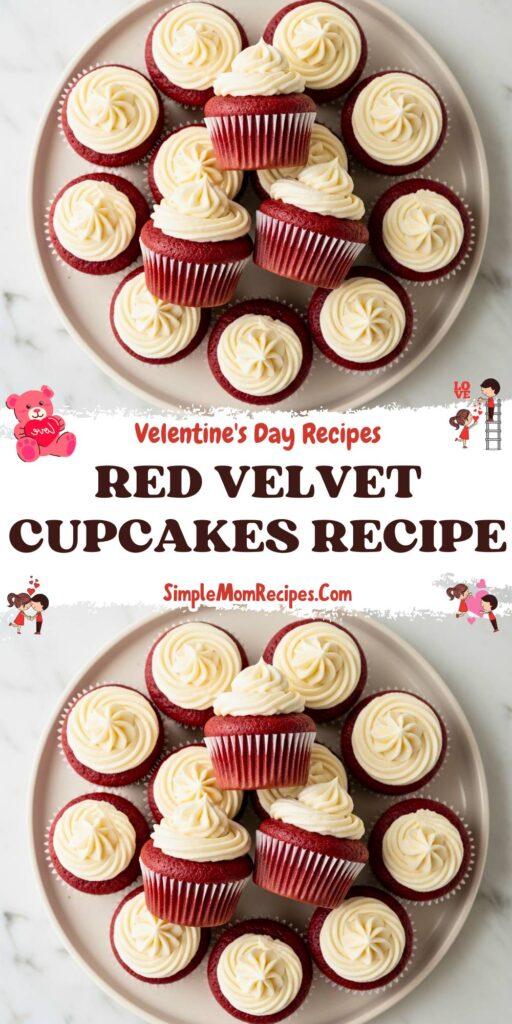
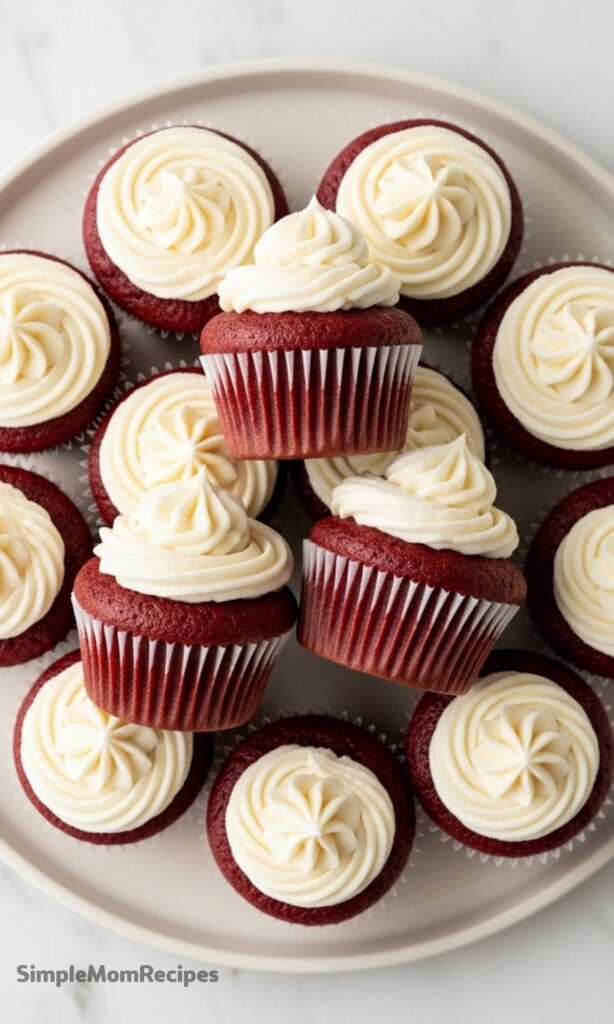
Fluffy, moist, buttery, and just dramatic enough, these red velvet cupcakes are the ones I reach for when I want something that feels a little special without being fussy. They sit right in that sweet spot between chocolate and vanilla, with a soft crumb and a subtle cocoa note that never overwhelms.
I will admit something here. For years, red velvet confused me. It never felt chocolatey enough, and it definitely was not vanilla. I kept wondering why people loved it so much, and honestly, I avoided baking it altogether.
That changed after one unforgettable slice at a wedding. It was rich but light, buttery but balanced, and finished with tangy cream cheese frosting that tied everything together. That bite stuck with me, and I knew I had some unfinished business.
These red velvet cupcakes are my answer to that moment. They are soft without being fragile, moist without tasting oily, and flavorful in a way that finally makes sense. Once I nailed the balance, there was no going back.
What I love most is how approachable this recipe feels. There is a little baking science happening, sure, but nothing intimidating. Just smart choices that lead to cupcakes you will actually want to make again.
Ingredients Needed for the Recipe
- Eggs – Separated eggs give structure and lightness, making the cupcakes airy instead of dense.
- All-purpose flour – Forms the base of the batter and keeps the crumb tender when measured properly.
- Cornstarch – Mixed with flour to mimic cake flour for a softer, lighter texture.
- Baking soda – Helps the cupcakes rise and react with acidic ingredients.
- Cocoa powder – Adds a subtle chocolate note without overpowering the vanilla.
- Salt – Balances sweetness and sharpens the overall flavor.
- Unsalted butter – Brings richness and that classic buttery taste red velvet needs.
- Granulated sugar – Sweetens while keeping the flavor clean and neutral.
- Oil – Locks in moisture so the cupcakes stay soft for days.
- Vanilla extract – Gives warmth and depth to the batter.
- White vinegar – Enhances color and reacts with baking soda for lift.
- Red food coloring – Creates the signature red velvet look.
- Buttermilk – Adds tang, moisture, and tenderness.
- Cream cheese frosting – The tangy, creamy finish that makes these cupcakes shine.
Before getting into the steps, it helps to understand why these ingredients work together so well. This recipe does not rely on a single trick. It layers small choices that quietly make a big difference.
Using both butter and oil might sound excessive, but each has a role. Butter gives flavor, while oil keeps the crumb soft even after chilling. Together, they create balance instead of compromise.
How to make Red Velvet Cupcakes?
Step 1 – Prep the Oven and Pan
Start by preheating the oven to 350°F and lining a muffin pan with cupcake liners. This recipe makes fourteen cupcakes, so plan for a second small batch or an extra pan.
Getting everything ready first makes the mixing process calmer and more enjoyable. Baking always feels smoother when nothing is rushed.
Step 2 – Whip the Egg Whites
Beat the egg whites until soft peaks form, then set them aside. This step adds air and gives the cupcakes their light, fluffy structure.
It may seem optional, but this is one of those small steps that pays off in texture.
Step 3 – Mix the Dry Ingredients
Sift the flour and cornstarch together, then whisk in the cocoa powder, baking soda, and salt. This ensures everything is evenly distributed.
Skipping this step can lead to uneven pockets of cocoa or leavening, and nobody wants that.
Step 4 – Cream Butter and Sugar
Beat the butter until smooth, then add the sugar and mix until light and creamy. This builds the base flavor and starts the structure.
Take a moment to scrape down the bowl. Little pauses like this matter more than people think.
Step 5 – Add Oil, Yolks, and Flavorings
Mix in the oil, egg yolks, vanilla, vinegar, and food coloring. The batter may look slightly uneven at this stage, and that is completely fine.
Those tiny butter bits melt during baking and actually make the cupcakes more tender.
Step 6 – Combine Wet and Dry Ingredients
Add the dry ingredients in stages, alternating with the buttermilk. Keep the mixer on low and stop as soon as everything is combined.
Overmixing here can undo all the softness you worked for earlier.
Step 7 – Fold in Egg Whites
Gently fold the whipped egg whites into the batter using a spatula. The batter should look smooth, silky, and slightly thick.
This step brings everything together without deflating the air you added earlier.
Step 8 – Bake
Fill the liners halfway to two-thirds full and bake for about twenty minutes. The tops should spring back lightly when touched.
Let them cool briefly in the pan, then transfer to a rack to cool completely before frosting.
While the cupcakes cool, it is the perfect time to prepare the cream cheese frosting. I always wait until the cupcakes are fully cool so the frosting stays fluffy.
Why Cream Cheese Frosting Works So Well
Red velvet without cream cheese frosting just feels unfinished. The tang cuts through the sweetness and balances the buttery crumb underneath.
This frosting is smooth, creamy, and light, not overly stiff or sugary. It spreads easily and pipes beautifully without feeling heavy.
I prefer a simple round piping tip here. Star tips look pretty, but they can overpower the cupcake with too much frosting.
Tips
- Use room temperature ingredients so everything blends smoothly.
- Measure flour carefully to avoid dry cupcakes.
- Do not skip the vinegar, you will not taste it.
- Stop mixing as soon as the batter comes together.
- Cool cupcakes completely before frosting.
- Add food coloring gradually until the color feels right to you.
Variations You Can Try
If you want a slightly deeper cocoa flavor, you can add an extra teaspoon of cocoa powder without changing the texture. I do this sometimes when baking for chocolate lovers.
For mini cupcakes, simply adjust the bake time and keep an eye on them. They cook faster and are perfect for parties or dessert tables.
You can also skip the food coloring entirely if you prefer. The cupcakes will taste exactly the same, just without the bold red hue.
Storage and Make-Ahead Notes
Unfrosted cupcakes can be made a day ahead and stored at room temperature, tightly covered. This actually helps the flavors settle.
Frosting can be prepared ahead and kept refrigerated. Let it come to room temperature and give it a quick stir before using.
Once frosted, the cupcakes keep well for up to three days when covered. They stay moist, tender, and just as enjoyable.
These red velvet cupcakes took time, patience, and more test batches than I want to admit. But every bite reminds me why it was worth it.
They are comforting, celebratory, and quietly confident. The kind of cupcake that does not need to shout, because it knows it is good.
If red velvet has ever left you unsure, these might change your mind. They certainly changed mine, and that feels like a small baking victory worth sharing.

Red Velvet Cupcakes Recipe
Description
Fluffy and moist, these buttery red velvet cupcakes are my favorite. The tangy cream cheese frosting puts them over the top! A perfect balance of subtle cocoa, rich vanilla, and a hint of tang from buttermilk and vinegar—these cupcakes deliver the classic red velvet experience in every bite.
ingredients
Cupcakes
Frosting
Instructions
-
Preheat and Prep
Preheat oven to 350°F (177°C). Line a 12-count muffin pan with cupcake liners. This recipe makes 14 cupcakes. -
Whip Egg Whites
In a medium bowl, beat egg whites on high speed until soft peaks form, about 2–3 minutes. Set aside. -
Mix Dry Ingredients
Sift together all-purpose flour and cornstarch. Whisk in baking soda, cocoa powder, and salt. Set aside. -
Cream Butter and Sugar
Using a mixer, beat butter on high until creamy (~1 min). Add granulated sugar and beat for 2 minutes. Add oil and beat another 2 minutes. -
Add Wet Ingredients
Add egg yolks and vanilla; mix until combined. Beat in vinegar and red food coloring until desired color is reached. -
Combine Dry and Wet
On low speed, add dry ingredients in three parts alternating with buttermilk, starting and ending with dry. Mix just until incorporated. -
Fold in Egg Whites
Gently fold whipped egg whites into batter using a spatula until fully incorporated. Do not overmix. -
Fill and Bake
Spoon batter into liners, filling halfway to two-thirds full. Bake 20–21 minutes or until a toothpick comes out clean. Cool in pan 5 minutes, then transfer to rack. -
Make Frosting
Beat cream cheese and butter until smooth. Gradually add powdered sugar and vanilla. Beat until fluffy. -
Frost and Serve
Once cupcakes are completely cool, frost with cream cheese frosting using a piping bag or knife. Serve immediately or store covered.
Nutrition Facts
Servings 14
- Amount Per Serving
- Calories 320kcal
- % Daily Value *
- Total Fat 16g25%
- Saturated Fat 7g35%
- Cholesterol 55mg19%
- Sodium 220mg10%
- Potassium 90mg3%
- Total Carbohydrate 42g15%
- Sugars 32g
- Protein 3g6%
- Calcium 4 mg
- Iron 4 mg
* Percent Daily Values are based on a 2,000 calorie diet. Your daily value may be higher or lower depending on your calorie needs.
Note
- Make Ahead: Unfrosted cupcakes can be stored at room temperature for 1 day or frozen up to 3 months. Frosting can be refrigerated for 1 day before use.
- Food Coloring: Use 2 Tbsp liquid red food coloring for vibrant red. Gel may require less. Natural alternatives like beet juice haven’t been tested.
- Buttermilk Substitute: Mix ½ tsp vinegar or lemon juice with enough milk to make ½ cup. Let sit 5 minutes before using.
- Mini Cupcakes: Bake for 12–13 minutes for ~36 mini cupcakes.
