I have a real soft spot for cinnamon rolls, that much is clear. But there’s something about a red velvet version that feels like a party on a plate.
These rolls are my little love letter to that classic Southern cake, transformed into a soft, swirled breakfast treat. They’re not just for Valentine’s Day, either.
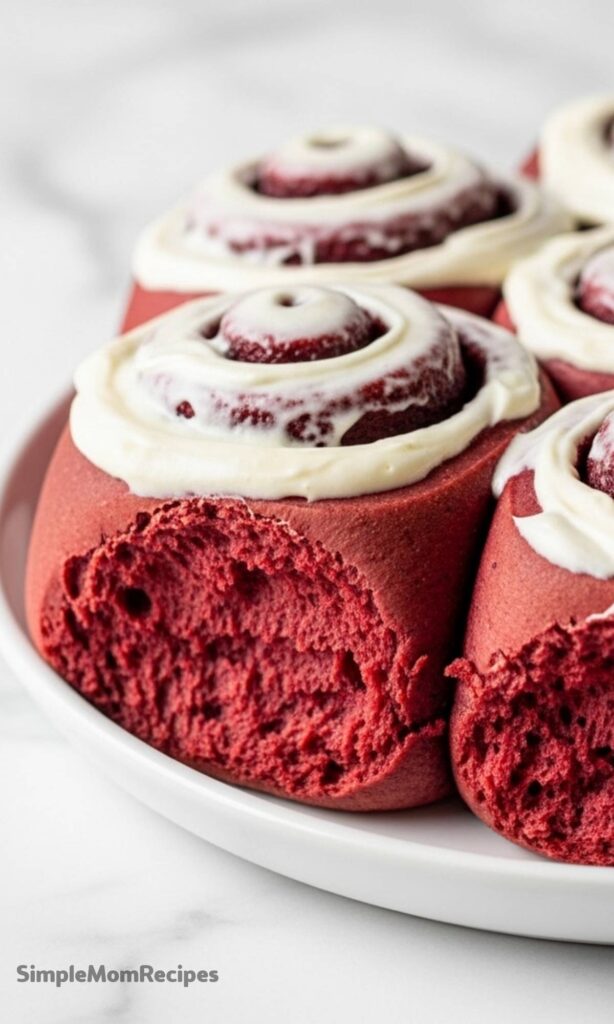
Any morning feels a bit more special when you’re pulling a pan of these vibrant, cocoa-kissed spirals from the oven. The best part? No cake mix in sight, this is all from scratch.
And that vanilla-speckled cream cheese icing? It’s the non-negotiable, tangy-sweet finale that makes everything sing. Let’s bake some magic.
What Makes These Rolls Special
If you’ve ever had a proper slice of red velvet cake, you know the deal. It’s not just a chocolate cake dyed red. There’s a subtle, almost earthy note from the cocoa, a hint of tang, and an incredible tenderness.
I wanted to capture all of that in a cinnamon roll. The result is a dough that’s remarkably soft and flavorful, with a deep crimson color that just makes you smile. It’s a fun project, but don’t let that intimidate you.
The process is straightforward, especially if you break it up over two days. Waking up to rolls ready for the oven is one of life’s simple joys, trust me.
Ingredients Needed for the Recipe
Gathering everything before you start is the best tip I can give you. It makes the whole process so much smoother. Here’s what you’ll need, and why each piece matters.
- Yeast: The life of the party. This is what gives our dough its rise and fluffy texture. Active dry works perfectly here.
- Granulated Sugar & Dark Brown Sugar: White sugar sweetens the dough, while the molasses-rich brown sugar creates that gooey, caramel-like filling we all crave.
- Whole Milk & Butter: For richness and tenderness. Warm milk activates the yeast, and melted butter in the dough ensures a soft crumb.
- Eggs: They provide structure and help create a beautifully tender, bakery-style roll.
- All-Purpose Flour, Cocoa Powder & Milk Powder: The flour is our base. Dutch-process cocoa gives that distinct red velvet flavor, and the milk powder is a secret weapon for added depth and a subtle umami richness.
- Red Food Coloring: This is for that signature vibrant hue. Gel coloring gives a deep color without adding liquid.
- Cinnamon & Salt: Cinnamon is the star of the filling, of course. Salt balances all the sweetness in both the dough and the filling.
- Cream Cheese & Vanilla Bean Paste: For the icing. The tang of cream cheese is classic with red velvet, and vanilla bean paste gives incredible flavor with those lovely little specks.
A Quick Word on Yeast
I get questions about yeast all the time. For this recipe, I use active dry yeast. You’ll start by “blooming” it in warm milk with a bit of sugar.
After about ten minutes, it should look foamy and smell, well, yeasty. That’s how you know it’s alive and ready to work its magic. If you don’t see those bubbles, your yeast might be old.
Starting over is better than ending up with dense rolls. Instant yeast works too, you can just mix it right in with the dry ingredients.
How to make Red Velvet Cinnamon Rolls?
Here’s the step-by-step journey to cinnamon roll bliss. Take your time, enjoy the process, and don’t worry about perfection. Homemade always has charm.

Step 1 – Activate the Yeast and Make the Dough
First, warm your milk to about 110°F. It should feel warm to the touch, not hot. Combine it with the yeast and a pinch of sugar in your mixer’s bowl and let it sit.
Once it’s frothy, add the melted butter, eggs, flour, cocoa, milk powder, salt, and food coloring. Fit the dough hook on and knead on medium until the dough is smooth and elastic, pulling away from the sides.
This takes about 8 minutes. The dough will be a stunning red color and slightly tacky, but not overly sticky.
Step 2 – Let the Dough Rise
Shape the dough into a ball and place it in a lightly greased bowl. Cover the bowl tightly with plastic wrap and a clean kitchen towel.
Find a warm, draft-free spot for it to rest. I sometimes use my oven with just the light on. Let it rise until it’s nearly doubled in size, which usually takes about an hour and a half.
This slow rise is building all the flavor and texture, so be patient.
Step 3 – Roll Out and Add the Filling
Punch the risen dough down to release the air. Turn it out onto a lightly floured surface and roll it into a roughly 15×10 inch rectangle.
Spread the softened butter all over the surface, leaving a small border. Then, evenly sprinkle and press in the dark brown sugar, cinnamon, and salt mixture.
Using your hands to pat it in works wonders and ensures every bite is packed with flavor.
Step 4 – Roll, Cut, and Proof Again
Starting from the long edge, tightly roll the dough into a log. Pinch the seam to seal it. For clean cuts, I swear by unflavored dental floss.
Slide it under the log, cross the ends over the top, and pull. You’ll get twelve beautiful, mess-free swirls. Place them in a parchment-lined baking dish.
Cover and let them rise again until puffy, about an hour. For an overnight option, cover and refrigerate them at this stage, then let them warm up for two hours before baking.
Step 5 – Bake to Golden Perfection
Toward the end of the second rise, preheat your oven to 350°F. Bake the rolls for about 30 minutes, until they’re set and lightly golden on top.
Your kitchen will smell absolutely incredible. Let them cool in the pan for just five minutes before icing. They need to be warm, but not piping hot, so the icing doesn’t just melt into a puddle.
Step 6 – Whip Up the Icing and Serve
While the rolls bake, make the icing. Beat the softened butter and cream cheese together until completely smooth and creamy.
Gradually add the powdered sugar, then the vanilla bean paste. Beat it all until it’s fluffy and dreamy. Drizzle and spread this luscious icing over the warm rolls.
Watching it melt into all the nooks and crannies is the final, satisfying step. Dig in immediately.
The Magic of Milk Powder
You might be curious about the milk powder. I learned this trick from bakers who swear by it for adding a deeper, almost toasty richness to baked goods.
It doesn’t make things taste like powdered milk. Instead, it amplifies the dairy notes and adds a wonderful tenderness to the crumb.
Think of it as a flavor booster. It’s a small ingredient that makes a noticeable difference, giving these rolls a more complex, professional quality.
Serving and Storing Your Creations
These rolls are best served the day they’re made, ideally still slightly warm. A cold glass of milk or a hot cup of coffee is the perfect partner.
If you have leftovers, cover the pan tightly with foil or transfer rolls to an airtight container. They’ll keep at room temperature for a day.
You can also refrigerate them for up to three days. Gently rewarm individual rolls in the microwave for about 15 seconds to bring back that fresh-baked softness.
They also freeze beautifully. Wrap cooled, un-iced rolls individually and freeze for up to a month. Thaw overnight and warm before icing.
Tips
A few lessons from my kitchen to yours, to guarantee your success.
- Room temperature ingredients are key. Cold eggs or cream cheese won’t incorporate smoothly. Take them out about an hour before you start.
- When warming the milk for the yeast, use a thermometer if you’re unsure. Too hot will kill the yeast, too cold won’t activate it.
- Don’t skimp on the kneading time. This develops the gluten, giving your rolls structure so they don’t spread into a pancake.
- For cutting, dental floss truly gives the cleanest spirals. Just slide it under, cross, and pull. A sharp knife works too, but saw gently.
- If you’re making these ahead, the overnight refrigerator proof is a lifesaver. It also makes the flavor even better.
- Let the baked rolls cool just slightly before icing. A five minute wait ensures the icing will glaze beautifully instead of melting away.
Making Them Your Own
This recipe is wonderfully adaptable. If you don’t have vanilla bean paste, two teaspoons of a good vanilla extract works just fine.
For a different twist, you could add a handful of finely chopped pecans or walnuts to the cinnamon sugar filling for a little crunch.
If you love orange with chocolate, a bit of orange zest in the icing is a bright, lovely complement. The base is perfect as is, but feel free to play around once you’ve tried it.
Baking is about joy, after all. However you make them, I hope these vibrant, tender rolls bring a little extra sweetness to your table.
Red Velvet Cinnamon Rolls Recipe
Description
Let’s get into these red velvet cinnamon rolls, y’all. No special holiday or occasion needed to devour these extra tender, festive, and delicious rolls. You’ll love that these cinnamon rolls are scratch-made with not a boxed cake mix in sight. A creamy, tangy, and sultry vanilla bean cream cheese icing is the sweet finale here!
ingredients
For the dough
For the filling
For the vanilla bean cream cheese icing
Instructions
Make the dough
In a stand mixer bowl, combine yeast, sugar, and warmed milk. Let sit 7–10 minutes until bubbly. Add melted butter, eggs, flour, cocoa powder, milk powder, salt, and 2 teaspoons red food coloring. Knead with dough hook for 6–8 minutes until smooth and elastic. Add more food coloring if desired.First rise
Shape dough into a ball and place in a greased bowl. Cover with plastic wrap and a towel. Let rise in a warm place until doubled, about 1.5 hours.Roll out and fill
Punch down dough and roll out on a floured surface to a 15×10-inch rectangle. Spread softened butter over dough, leaving a small border. Sprinkle with brown sugar, cinnamon, and salt; gently press to adhere.Roll and cut
Roll tightly from the long side into a log. Pinch seam to seal. Trim ends if needed. Cut into 12 even pieces using dental floss or a sharp knife.Second rise (overnight option)
Place rolls in a parchment-lined 13×9-inch baking dish. Cover tightly and refrigerate 8–10 hours. Alternatively, let rise at room temperature for 1–2 hours until puffy.Bake
Remove from fridge and let sit at room temperature until puffy (1–2 hours). Preheat oven to 350°F (177°C). Bake for 30 minutes until golden brown.Make the icing
Beat softened butter and cream cheese until fluffy. Add powdered sugar and vanilla bean paste; beat until smooth.Finish and serve
Let rolls cool 5 minutes. Spread icing over warm rolls. Serve immediately.
Nutrition Facts
Servings 12
- Amount Per Serving
- Calories 502kcal
- % Daily Value *
- Total Fat 23g36%
- Saturated Fat 14g70%
- Cholesterol 73mg25%
- Sodium 311mg13%
- Potassium 180mg6%
- Total Carbohydrate 75g25%
- Dietary Fiber 1g4%
- Sugars 41g
- Protein 5g10%
- Calcium 60 mg
- Iron 2 mg
* Percent Daily Values are based on a 2,000 calorie diet. Your daily value may be higher or lower depending on your calorie needs.
Note
- Room temperature ingredients: Ensure eggs, butter, and cream cheese are at room temp for best texture.
- Yeast tip: Don’t use milk hotter than 110°F—it can kill the yeast.
- Make-ahead: Refrigerate unbaked rolls up to 10 hours. Bring to room temp before baking.
- Substitution: Use 2 tsp vanilla extract if vanilla bean paste is unavailable.