I’ve made a lot of cheesecakes over the years, but this raspberry cheesecake always feels a little extra special to me. It’s rich without being heavy, bright without being sour, and honestly hard to stop slicing once it’s chilled.
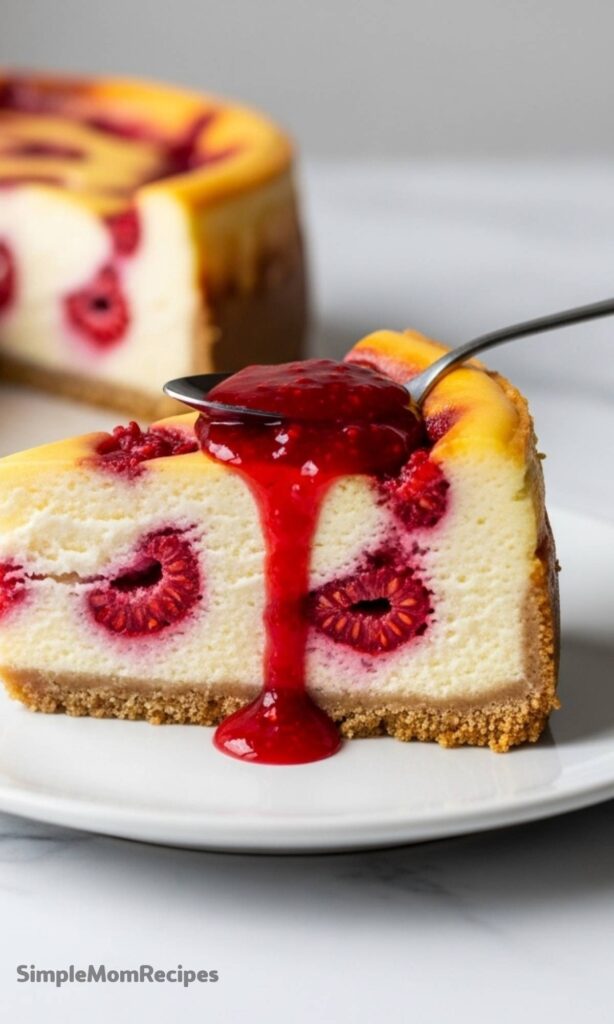
I wanted raspberry flavor to show up in every bite, not just sit on top and look pretty. That’s why I swirl a homemade raspberry sauce right into the batter, then again on top, then again at the table because why not.
The best part, at least for me, is that this cheesecake skips the water bath entirely. No foil-wrapping stress, no sloshing pans of hot water, just a calm bake and a slow cool that does the job.
This is the kind of dessert I make when I want people to pause mid-bite and look up. That quiet second tells me everything.
Why This Raspberry Cheesecake Works So Well
I’ve tried using whole raspberries before, and while it sounds good on paper, they tend to disappear into the batter or turn watery. Cooking them down first concentrates the flavor in a way fresh berries alone just can’t.
The sauce brings tartness that cuts through the cream cheese, which is exactly what cheesecake needs. Without it, things can feel flat after a few bites, no matter how creamy the texture is.
Swirling the sauce through the center and the top means you never hit a boring forkful. Every slice looks a little different too, which I secretly love.
Ingredients Needed for the Recipe
Raspberries – These are cooked down into a sauce for bold, concentrated flavor throughout the cheesecake.
Granulated sugar – Sweetens both the raspberry sauce and the cheesecake batter without overpowering the fruit.
Water – Helps the raspberries break down smoothly as the sauce cooks.
Lemon juice – Brightens the raspberry flavor and keeps the sauce tasting fresh.
Graham cracker crumbs – Form the base of the classic crust with a subtle crunch.
Light brown sugar – Adds depth and a hint of warmth to the crust.
Unsalted butter – Binds the crust and gives it that rich, buttery finish.
Cream cheese – The heart of the cheesecake, providing structure and that dense, creamy texture.
Sour cream – Balances the richness and gives the cheesecake a smoother, fuller flavor.
Vanilla extract – Rounds everything out and softens the tang from the cream cheese.
Eggs – Help the cheesecake set while keeping the interior tender and custard-like.
How to make Raspberry Cheesecake?
Step 1 - Make the Raspberry Sauce
I always start with the sauce so it has time to cool. Raspberries, sugar, water, and lemon juice go into a small saucepan over gentle heat.
As they cook, the berries soften and release their juices, turning glossy and fragrant. Stir often and don’t rush this part, it sets the tone for the whole dessert.
Once slightly thickened, I strain the sauce to remove most of the seeds, then stir a small spoonful back in. It gives just enough texture without being annoying.
Step 2 - Prepare the Graham Cracker Crust
The crust comes together quickly with crumbs, sugars, and melted butter. I make sure the butter isn’t piping hot, or the crust can turn greasy.
Press the mixture firmly into the bottom and up the sides of the pan. Going higher on the sides helps protect the cheesecake as it cools later.
I usually grab a glass to pack it down evenly. It’s simple, but it makes a difference.
Step 3 - Mix the Cheesecake Batter
Softened cream cheese and sugar get mixed until completely smooth. This is where patience pays off, because any lumps now will stay forever.
Sour cream and vanilla come next, stirred in gently. The batter should look creamy but not fluffy or airy.
I add the eggs one at a time, mixing just until combined. Overdoing it here can lead to cracks later, and nobody wants that.
Step 4 - Assemble the Cheesecake
Half of the batter goes into the crust first, followed by a drizzle of raspberry sauce. It doesn’t need to be perfect since it’s hidden inside.
The remaining batter gets dolloped gently on top, then smoothed out. I finish with another drizzle of sauce and swirl it carefully.
This top swirl is what people notice first, so I take my time and keep it loose and natural.
Step 5 - Bake and Cool Slowly
The cheesecake bakes until the edges are set and the center still jiggles slightly. That wobble means it’ll finish setting as it cools.
Once the oven is off, I crack the door and let it rest inside. This slow cooldown helps prevent dramatic temperature shock.
After that, it cools completely at room temperature, then chills overnight. Waiting is hard, but it’s worth it.
Serving Ideas
I usually serve this raspberry cheesecake chilled with extra raspberry sauce on the side. That way everyone can add as much or as little as they want.
For something simple, a few fresh raspberries scattered on the plate look lovely and add a pop of freshness.
If I’m feeling a bit indulgent, I’ll add a small dollop of lightly whipped cream. Nothing fancy, just enough to soften each bite.
Tips
Use room temperature ingredients so the batter mixes smoothly and evenly.
Mix on low speed and stop as soon as everything is combined.
Press the crust higher up the sides to help prevent cracks.
Let the cheesecake cool slowly before refrigerating.
Chill overnight for the cleanest slices and best texture.
Storing and Freezing
This raspberry cheesecake keeps well in the fridge for several days when tightly wrapped. I like to store the extra sauce separately so it stays fresh.
Freezing also works surprisingly well. Once fully chilled, I wrap individual slices or the whole cheesecake tightly before freezing.
To serve, I thaw it overnight in the fridge. Sometimes I even enjoy a slice slightly frozen, especially on warmer days.
This cheesecake has a way of disappearing fast, but if it doesn’t, it holds up beautifully.
If you try it and end up sneaking an extra slice late at night, I won’t tell. I’ve been there more times than I can count.
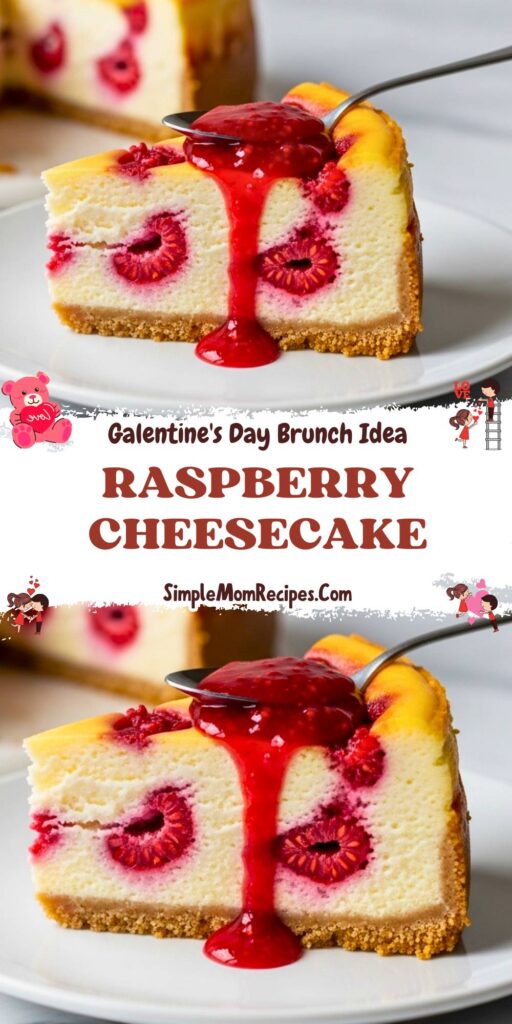
My raspberry cheesecake is swirled with fresh raspberry flavor throughout. It’s baked on a classic graham cracker crust and, of course, is made without a water bath! Recipe includes detailed step-by-step photos and instructions and a how-to video tutorial.
ingredients
Raspberry Sauce
12oz raspberries (fresh or frozen (about 2½ cups))
1/4cup granulated sugar
1/4cup water
1Tablespoon lemon juice
Crust
1 1/2cups graham cracker crumbs
2Tablespoons granulated sugar
1Tablespoon light brown sugar (firmly packed)
7Tablespoons unsalted butter (melted)
Cheesecake
24oz cream cheese (softened (use brick-style full fat cream cheese))
1cup granulated sugar
1/2cup sour cream
1teaspoon vanilla extract
3 large eggs (room temperature preferred)
Instructions
For the sauce
1
In a small saucepan, combine raspberries, sugar, water, and lemon juice over medium/low heat. Stir frequently, and cook until the berries release their juices.
Prepare the sauce first so it has time to cool while you prepare the cheesecake. Sauce may be prepared up to 3 days in advance.
2
Increase heat to medium and bring mixture to a simmer while stirring constantly. Cook for several minutes until the berries break down and the sauce deepens in color and is slightly thickened.
3
Remove from heat and pour through a fine mesh strainer into a heatproof bowl. Measure out 2 Tablespoons of your seeds left in the strainer and add them back to the sauce, discard the rest.
4
Allow the mixture to cool while you prepare the crust and the cheesecake.
For the crust
5
Preheat oven to 325°F (165°C).
6
In a medium-sized bowl, stir together the graham cracker crumbs, granulated sugar, and brown sugar. Add the melted butter until crumbs are all moistened.
7
Press the graham cracker mixture evenly into the bottom and up the sides of a 9” springform pan. Use the bottom of a glass or measuring cup to help you. Set crust aside as you prepare your cheesecake.
For the Cheesecake
8
Combine cream cheese and sugar in a large mixing bowl and use an electric mixer to stir together until smooth, creamy, and completely lump free.
9
Add sour cream and vanilla extract and stir on low speed until combined.
10
In a small bowl, lightly beat one egg and add it to the cheesecake batter, stirring on low speed until egg is just combined. Repeat with the remaining eggs, then scrape the sides and bottom of bowl to ensure all ingredients are thoroughly combined.
Assembly
11
Pour half of the cheesecake batter evenly over the prepared crust. Take about ⅓ cup (80ml) of the cooled raspberry sauce and pour evenly over the batter.
12
Gently dollop the remaining cheesecake batter evenly over the raspberry sauce and smooth it with a spatula.
13
Drizzle with another ⅓ cup of raspberry sauce over the surface and use a toothpick or knife to swirl over the cheesecake. Reserve the rest of the sauce for serving (store covered in the refrigerator).
14
Transfer to center rack of 325°F (165°C) preheated oven for 45–55 minutes. The center of the cheesecake will be jiggly but the cheesecake should be mostly set.
15
When cheesecake is finished baking, turn off the oven, crack the door open a few inches and let cheesecake cool in the oven for 1 hour (this will help prevent cracks).
16
After 1 hour, remove from the oven and allow to cool at room temperature for an hour or until no longer warm. Once cooled, transfer to refrigerator to chill for at least 6 hours, preferably overnight.
17
Serve, topped with reserved raspberry sauce (we serve the raspberry sauce on the side so people can add as much or as little as they’d like).
Nutrition Facts
Servings 12
Amount Per Serving
Calories350kcal
% Daily Value *
Total Fat25g39%
Saturated Fat15g75%
Cholesterol95mg32%
Sodium280mg12%
Potassium180mg6%
Total Carbohydrate28g10%
Dietary Fiber1g4%
Sugars22g
Protein6g12%
Calcium 6 mg
Iron 4 mg
* Percent Daily Values are based on a 2,000 calorie diet. Your daily value may be higher or lower depending on your calorie needs.
Note
No water bath needed! Just follow tips to avoid cracks.
Bursting with raspberry flavor throughout! Swirl in the middle, on top, and drizzle extra sauce before serving.
No need to pre-bake the crust.
Can be made year-round! Works equally well with frozen or fresh raspberries.
Keywords:
raspberry cheesecake, no water bath cheesecake, baked cheesecake, raspberry swirl, graham cracker crust
Kelsey Perez
Food & Lifestyle Blogger
I’m a London-based food writer, recipe developer, and home cook who has been passionate about cooking for over 15 years. What started as a way to recreate my mother’s traditional dishes turned into a lifelong love for experimenting with flavors, writing about food, and helping others feel more confident in the kitchen.