I’ll be honest, this whole thing started because I needed a fun baking project in March when everything still felt gray and boring. St. Patrick’s Day kind of sneaks up every year, and I never know how to explain it or celebrate it in a way that actually feels exciting. But cookies. Cookies always work.
The first time I made these, I didn’t expect them to turn into such a thing. I just wanted bright green frosting, a little sparkle, and something playful. What I got was a kitchen covered in powdered sugar, way too many sprinkles on the floor, and cookies that looked like tiny treasure chests.
That was it. I was hooked.
These Pot o’ Gold Cookies aren’t quick. They’re not the kind you throw together in 20 minutes. They take time, chilling, patience, and a little willingness to redo one or two when the icing goes rogue. But that’s part of why I keep making them. They feel like an event, not just dessert.
Ingredients I Used for the Recipe
- ¾ cup unsalted butter, room temperature – This makes the cookies rich and soft. Let it sit out so it creams easily.
- ¾ cup sugar – Adds sweetness and helps create that classic sugar cookie texture.
- 1 large egg – Binds everything together so the dough isn’t crumbly.
- 2 teaspoons vanilla – Gives that warm bakery flavor that makes these smell amazing.
- 2 ¼ cups all purpose flour – The structure of the cookie. I add it gradually so the dough doesn’t get tough.
- ½ teaspoon baking powder – Just enough lift to keep the cookies from being dense.
- 4 cups powdered sugar – The base for the royal icing. This is what creates that smooth finish.
- 2 tablespoons meringue powder – Helps the icing set firm so the designs hold.
- About 5 tablespoons water – Adjusted slowly to get the icing just right.
- Green food coloring – For those bold, festive shades.
- Gold or copper food coloring – Gives the “pot of gold” effect.
- Gold sprinkles – The part that makes people smile immediately.
How to make Pot o’ Gold Cookies?

Step 1 – Cream the butter and sugar
I beat the butter first until it’s fluffy. Then I add the sugar and keep mixing until it looks light and soft. This step matters more than people think. If I rush it, the cookies bake up flat and sad.
Step 2 – Add the egg and vanilla
Once the mixture looks creamy, I mix in the egg and vanilla. I scrape the bowl because there’s always a stubborn patch hiding at the bottom.
Step 3 – Work in the dry ingredients
I add the baking powder and some of the flour first, mixing slowly so it doesn’t puff everywhere. Then I add the rest in batches. If the dough feels sticky, I sprinkle in a little extra flour until it’s soft but not clingy.
Step 4 – Chill the dough
I divide the dough into two disks, wrap them, and refrigerate for at least 2 hours. Overnight is even better. This is one of those waiting games that pays off later when the cookies keep their shape.
Step 5 – Roll before cutting
I roll the dough out on lightly floured parchment to about ⅛ to ¼ inch thick. Then I slide the whole sheet into the freezer for 15 minutes. This quick chill keeps everything neat.
Step 6 – Cut the shapes
After chilling, I cut out my cookie shapes and place them on a lined baking sheet. Then they go back into the freezer again for about 20 minutes. Yes, more chilling. This roll-chill-cut-chill routine is the secret to cookies that don’t spread.
Step 7 – Bake just until set
I bake them at 350°F for about 9 to 10 minutes, rotating the pan halfway through. They should stay light in color. If they start browning, they’ve gone too far.
Step 8 – Let them cool completely
I leave them on the pan for a bit, then transfer to a rack. Decorating warm cookies is a disaster. I learned that the hard way once and ended up with a melted green mess.
Step 9 – Make the royal icing
I mix powdered sugar, meringue powder, and water on low speed until it looks smooth and slightly matte. It takes a few minutes. I try not to rush this because good icing texture makes decorating so much easier.
Step 10 – Color the icing
I divide the icing into bowls and tint different shades of green, plus a gold tone. I keep bowls covered with a damp cloth so they don’t dry out while I work.
Step 11 – Outline the cookies
I pipe a border around each cookie first. This creates a little wall so the icing doesn’t spill over. It’s oddly relaxing once you get into the rhythm.
Step 12 – Flood with color
I thin the icing with tiny amounts of water until it flows off a spoon. Then I fill in the cookies and use a toothpick to nudge icing into corners.
Step 13 – Add the gold details
I decorate the top portion with the gold icing and immediately sprinkle the gold sprinkles before it sets. Waiting even a minute too long means the sprinkles won’t stick.
Step 14 – Let the icing set
I leave the cookies out until the icing is fully firm. This can take a few hours, but once they’re dry, they stack beautifully.
The part that surprised me the most
I expected these to be all about looks. Bright colors, cute theme, done. But the flavor is what made me keep the recipe. The cookies are buttery without being heavy, and the icing adds just enough sweetness without turning everything into sugar overload.
I also realized these are not a rush job. Every time I tried to hurry, something went sideways. The dough stuck. The shapes warped. The icing misbehaved. Once I slowed down and treated it like a weekend project, everything got easier.
Now I actually like the pacing. Roll the dough, clean up a little, make coffee, come back and decorate. It feels less like baking and more like puttering around the kitchen.
Tips
Give yourself more time than you think you need
The chilling steps are non negotiable. Skipping them leads to spreading cookies, and there’s no fixing that afterward.
Don’t over flour the dough
Too much flour makes the cookies lose that soft bite. I add just enough so it’s workable.
Use a toothpick when decorating
This tiny tool saves everything. It smooths icing, pops air bubbles, and fixes mistakes before they set.
Decorate a few at a time
If I try to flood a whole tray at once, the icing starts drying before I add sprinkles. Working in small batches keeps things neat.
Let the icing dry overnight if you can
They’ll look finished earlier, but giving them extra time makes stacking and storing stress free.
These cookies always end up feeling a little magical to me, even if they’re not perfect circles or the icing lines wobble. They’re bright, cheerful, and just a little over the top. Which honestly is exactly what I want from a St. Patrick’s Day dessert.
And every time I make them, I still find gold sprinkles in random places days later. Totally worth it.
Pot of Gold Cookies Recipe
Description
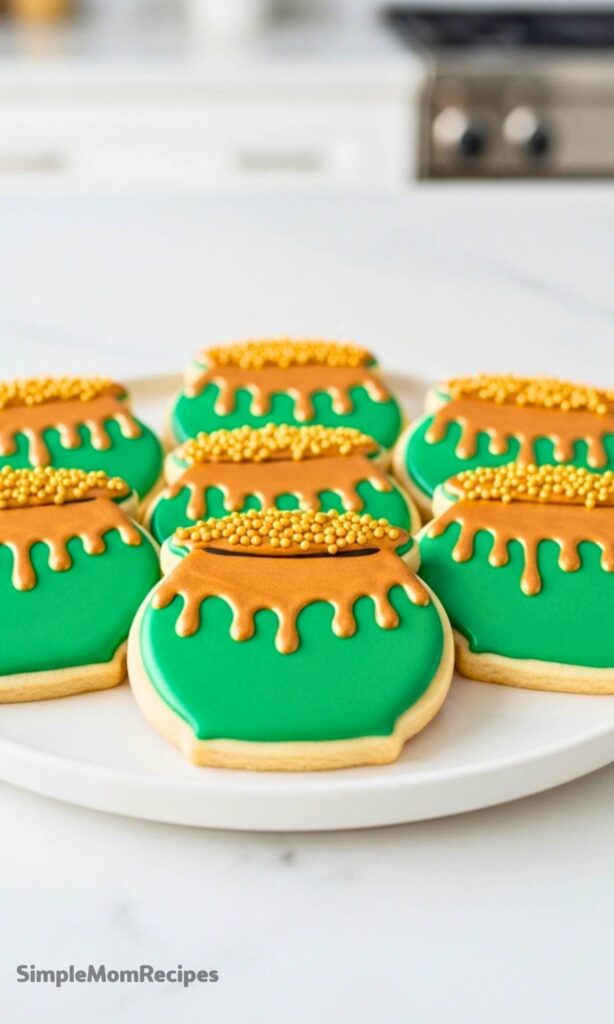
These festive Pot o' Gold Cookies are perfect for St. Patrick's Day celebrations! Soft sugar cookies decorated with vibrant green and shimmering gold royal icing create an adorable pot of gold treat. With a buttery, tender crumb and sweet decorative finish, these cookies are as fun to make as they are to eat. Follow the roll-chill-cut-chill-bake method for perfectly shaped cookies that hold their form.
ingredients
COOKIES
Royal Icing
Instructions
COOKIES
- In a mixing bowl beat the butter until it's fluffy using an electric mixer. Add in the sugar and beat until it's combined with the butter, it will be fluffy.
- Add the egg and vanilla, beat until combined again, 1-2 minutes.
- Add in the baking powder and about 1/3 of the flour. Mix slowly until the flour is just combined. Continue adding the flour until it's all incorporated. If the dough seems too sticky, add 1 Tbsp of flour at a time until the dough isn't overly sticky to the touch.
- Divide the dough into 2 equal balls. Flatten them into disks and wrap in plastic wrap. Refrigerate for at least 2 hours or overnight.
- Once the dough is done chilling, begin to roll one disk of dough out. On a lightly floured silicone baking mat or piece of parchment paper roll the dough out to about 1/8 to 1/4 of an inch thick, depending on your preference.
- Place the rolled dough in the freezer for 15 minutes.
- Preheat the oven to 350 F degrees (175°C).
- After 15 minutes, remove the dough from the freezer and begin to cut out your shapes using a cookie cutter. Place the cut out cookies on a silicone baking mat or parchment paper and chill in the freezer for 20 minutes.
- Bake the cookies for 9-10 minutes, rotating the pan half way through. The cookies should be light in color and on the edges when you pull them out of the oven.
- Allow the cookies to cool on the baking pan for 10 minutes. Then transfer them to a cooling rack.
- Repeat this process with the remaining dough, including the scraps of the first batch.
Royal Icing
- Combine the powdered sugar, meringue powder, and water in a mixing bowl and mix on low speed until the icing has a matte appearance, about 5-8 minutes.
- Evenly divide the icing into 4 small bowls. Begin to add the food coloring, you should have 4 different colors – light green, medium green, and kelly green and then a goldish brown color. Note: Cover up the bowls of icing with a wet cloth when you're not using them to keep the icing from drying out.
- I find that it is easiest to transfer the icing to a small squeeze bottle to decorate. Transfer a small amount of each color green into 3 different squeeze bottles.
- Begin to outline the edge of the cookies. If you choose, you can add various details like stripes or shamrocks as well. Once you are done outlining the cookies, it's time to flood them.
- In order to do that, you will need to add more water to the icing so the consistency is thinner. Add 1 tsp of water at a time, stirring by hand, until the icing runs off the back of a spoon. Do this for each green color. Continue to keep the goldish brown color covered up with a wet cloth.
- Using either a squeeze bottle or a spoon, begin to flood the cookies with icing. I like to use a tooth pick to help spread the icing to the edges. You don't want to add too much icing, as this could cause the icing to overflow beyond the edges. Practice until you know how much icing you need.
- Once the green portion of the cookies are finished, move onto doing the gold tops.
- Transfer some of the goldish brown icing to a squeeze bottle and outline the top of the cookie where the gold will be.
- Once the outlining is done, use the remaining goldish brown icing to flood in the top area.
- In order to do that, you will need to add more water to the icing so the consistency is thinner. Add 1 tsp of water at a time, stirring by hand, until the icing runs off the back of a spoon.
- Flood in the gold portion by either transferring the icing to a squeeze bottle or using a spoon. Again, use a toothpick to help get the icing filled in.
- I like to flood one cookie with the gold icing at a time and then add the sprinkles. Be sure to add the sprinkles to the cookie before the icing sets.
- Continue this process until all of the cookies have gold tops and sprinkles.
- Allow the icing to set completely before serving or storing them in an air tight container.
Nutrition Facts
Servings 24
- Amount Per Serving
- Calories 245kcal
- % Daily Value *
- Total Fat 12gg19%
- Saturated Fat 7gg35%
- Trans Fat 0gg
- Cholesterol 35mgmg12%
- Sodium 45mgmg2%
- Potassium 25mgmg1%
- Total Carbohydrate 36gg12%
- Dietary Fiber 0.5gg2%
- Sugars 25gg
- Protein 2gg4%
- Calcium 1% mg
- Iron 2% mg
* Percent Daily Values are based on a 2,000 calorie diet. Your daily value may be higher or lower depending on your calorie needs.
Note
- Chilling is key: Don't skip the chill steps! This roll-chill-cut-chill-bake method ensures your cookies hold their shape perfectly.
- Icing consistency: For outlining, keep icing thick. For flooding, thin with water 1 tsp at a time until it flows smoothly off a spoon.
- Keep icing moist: Always cover bowls of icing with a damp cloth when not in use to prevent crusting.
- Make ahead: Cookie dough can be made up to 3 days ahead and refrigerated, or frozen for up to 1 month.
