
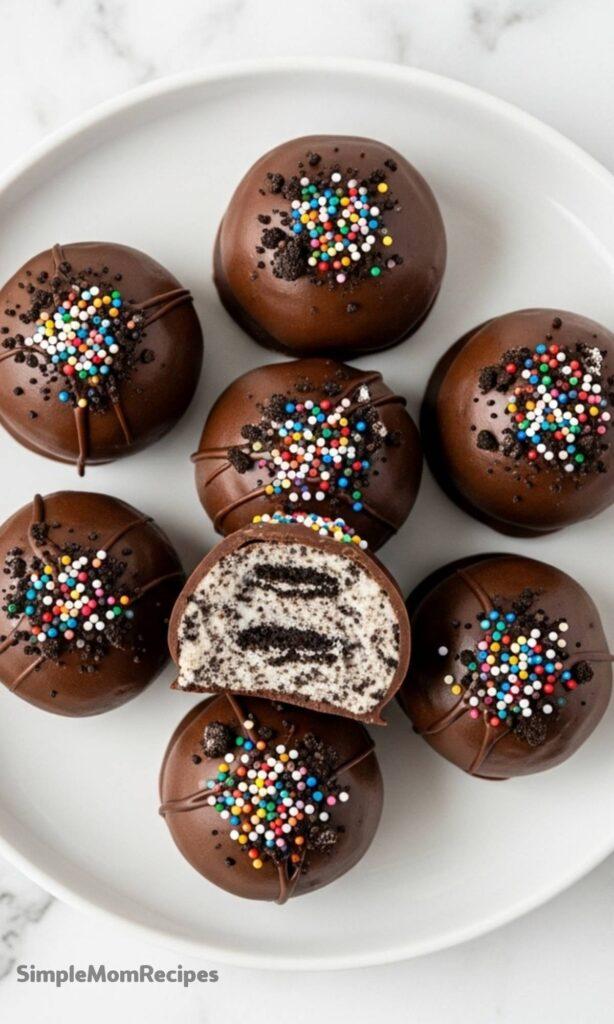
Let’s talk about a dessert that feels like a little secret, a magical trick you can pull off with barely any effort. These Oreo balls are that trick.
With just three simple ingredients and no oven required, they transform into rich, decadent bites that always, always impress.
Why This Recipe Is a Keeper
I’m Kelsey, and I have a serious soft spot for no-bake treats that look far fancier than they are. This recipe is the ultimate example.
It’s the one my family requests for every holiday gathering, and the one that vanishes fastest from the cookie tray, every single time.
Ingredients Needed for the Recipe
That’s the whole list, right there. The beauty is in its simplicity, but each ingredient plays a starring role.
- Oreo Cookies: The star of the show. You’ll need about one standard package. I use the whole cookie, cream filling and all, for that iconic flavor.
- Cream Cheese: This is the magic binder. It adds a slight tang and a wonderfully smooth, firm texture that holds everything together.
- Chocolate for Dipping: This is your edible shell and canvas. Use melting wafers for the smoothest finish, or any baking chocolate you love best.
Essential Tools for Success
You don’t need much, but a couple of key items make the process so much smoother. A food processor or blender is the quickest route to perfect Oreo crumbs.
A small cookie scoop ensures every ball is the same charming size, and a simple fork is your best tool for a clean chocolate dip.
How to make Oreo Balls (Only 3 Ingredients)?
The process is straightforward, almost meditative. Just follow these steps, and you’ll have a plate of gorgeous truffles before you know it.

Step 1- Crush and Combine
First, turn those Oreos into fine, dark crumbs. A food processor does this in seconds, but a zip-top bag and a rolling pin work just fine, honestly.
Then, in a bowl, mix the crumbs thoroughly with your softened cream cheese. A hand mixer is great, but don’t be afraid to use your hands to bring it all together.
Step 2- Scoop and Chill
Use that small scoop to portion the dough, then roll each one gently between your palms to form a neat ball. Place them on a parchment-lined baking sheet.
Now, the brief but crucial freeze. Ten to fifteen minutes is perfect—it firms them up just enough for dipping without making them rock-hard.
Step 3- Melt and Dip
While the balls chill, melt your chocolate carefully. Use short bursts in the microwave, stirring well between each, until it’s perfectly smooth.
Let it cool for a minute so it’s not scorching hot. Then, dip each ball using a fork, tap off the excess, and slide it back onto the parchment.
Step 4- Decorate and Set
This is the fun part. Add sprinkles, a drizzle of contrasting chocolate, or a tiny pinch of sea salt immediately after dipping, before the shell sets.
Then, just walk away. Let the chocolate harden completely into a beautiful, glossy coating. The anticipation is part of the joy.
Tips
- Room temperature cream cheese is non-negotiable. It blends seamlessly with the crumbs, creating a uniform dough without any lumps.
- If your dipped balls have a little chocolate “foot,” use a toothpick to neatly disconnect it from the parchment after about a minute of setting.
- For holiday flair, match your sprinkles to the occasion. Crushed candy canes, pastel nonpareils, or even edible glitter make them festive.
- If the dough feels too soft after mixing, pop the whole bowl in the fridge for 15 minutes. It will be much easier to handle.
Creative Variations to Try
The basic formula is a perfect launchpad for creativity. Swap classic Oreos for Golden Oreos and dip them in white chocolate for a blonde version.
Use Mint Oreos for a cool, refreshing twist, or fold a handful of mini chocolate chips into the dough for extra texture. The possibilities are genuinely endless.
Storing and Serving Your Masterpiece
Keep these delights in a sealed container in the refrigerator; they’re best enjoyed cold. They’ll stay perfect for up to a week, though they rarely last that long.
For serving, arrange them on a beautiful platter. They’re rich, so one or two make a perfect little sweet ending to any meal or a delightful gift for a friend.


Oreo Balls Recipe (Only 3 Ingredients)
Description
These Oreo balls are an easy no-bake treat with 3 simple ingredients. All you need are crushed Oreo cookies, cream cheese and chocolate for this favorite Oreo ball recipe!
ingredients
Instructions
-
Line a baking sheet with parchment paper.
-
In a blender or food processor, pulse the Oreos (with or without some filling) into fine crumbs. Alternatively, place Oreos in a zip-top bag and crush with a rolling pin.
-
In a large bowl, mix the Oreo crumbs and softened cream cheese using an electric mixer or by hand until well combined.
-
Using a small cookie scoop, portion the mixture and roll into 1-inch balls. Place on the prepared baking sheet.
-
Freeze the balls for 10–15 minutes or until slightly firm (not fully frozen).
-
Melt the chocolate in a microwave-safe bowl in 30-second intervals, stirring between each, until smooth.
-
Dip each Oreo ball into the melted chocolate using a fork. Tap the fork on the bowl edge to remove excess chocolate, then slide the ball onto the parchment paper using a toothpick.
-
Immediately add sprinkles or other decorations before the chocolate sets. Let harden completely at room temperature or in the fridge.
-
Store in an airtight container in the refrigerator for up to 1 week or freeze for up to 2 months.
Nutrition Facts
Servings 40
- Amount Per Serving
- Calories 98kcal
- % Daily Value *
- Total Fat 7g11%
- Saturated Fat 4g20%
- Trans Fat 0.01g
- Cholesterol 6mg2%
- Sodium 61mg3%
- Potassium 80mg3%
- Total Carbohydrate 10g4%
- Dietary Fiber 1g4%
- Sugars 5g
- Protein 2g4%
- Calcium 13 mg
- Iron 2 mg
* Percent Daily Values are based on a 2,000 calorie diet. Your daily value may be higher or lower depending on your calorie needs.
Note
- Oreos: You’ll need about 1 package of Oreos for this recipe. You don’t have to remove the filling, however I like to remove the filling from about 15 or so to make them less rich.
- Variation: You can use different flavor of Oreos. The peppermint or golden Oreos also taste great. You can also use milk, dark, or white chocolate.
- Storage: For best results, store in an airtight container in the refrigerator up to 1 week or in the freezer up to 2 months.