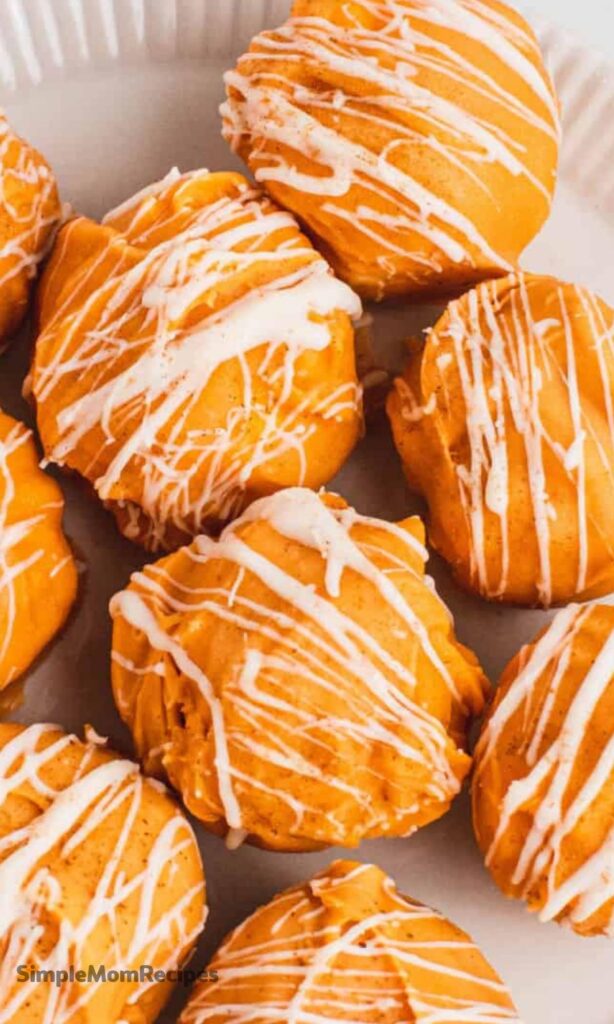
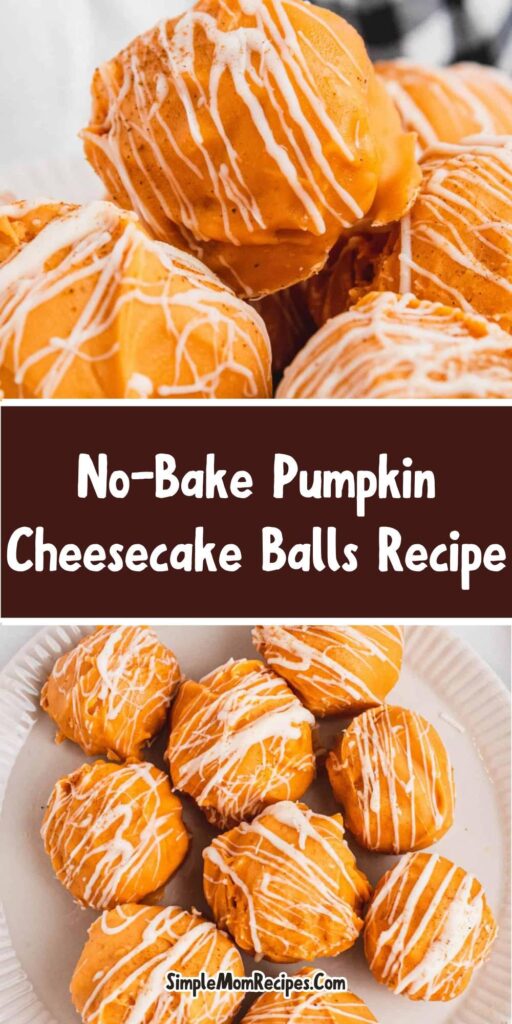
Imagine all the cozy, comforting flavors of a pumpkin cheesecake, but transformed into a delightful, pop-able treat that requires exactly zero oven time. That's the magic of No Bake Pumpkin Cheesecake Balls. They’re a fun, modern twist on classic autumn desserts, perfect for when you're craving something special without the fuss.
These little spheres of joy are a total crowd-pleaser. They combine a creamy, spiced pumpkin center with a sweet, crisp white chocolate shell for a textural experience that’s simply unforgettable. Seriously, bring these to your next gathering and just watch them disappear—you might just become forever known as the dessert hero.
Why You'll Fall in Love With This Recipe
What’s not to love about a dessert that comes together with such incredible ease? The simplicity here is a true gift, especially during the busy holiday season when your oven is in high demand. You can whip these up in moments, with minimal cleanup, and the result is impressively elegant.
They’re also wonderfully portable. While they do need to stay chilled, they travel like a dream to potlucks, parties, or even just to a friend's house for a cozy fall visit. And let's be honest, their single-serving, bite-sized nature makes them incredibly easy to eat—maybe a little too easy!
It’s a genuine pleasure to serve something that feels new and exciting. While we all adore a classic pumpkin pie, these cheesecake balls offer a delightful departure from tradition, a little surprise that will have everyone asking for the recipe.
Ingredients Needed for the Recipe
Gathering your ingredients is the first simple step. You'll be amazed at how a short list of items creates such a complex and delicious flavor.
2 1/2 cups White Chocolate, divided: This acts as both a binder for the creamy filling and the glorious, crackly coating. Using chips or a baking bar broken into pieces works perfectly.
3/4 cup Vanilla Wafer Crumbs: These provide the essential "crust" element, adding structure and a lovely, subtle vanilla flavor that complements the pumpkin beautifully.
1/2 cup Pumpkin Puree: Be sure to use plain, pure pumpkin puree, not pumpkin pie filling, which is pre-sweetened and spiced. This is the heart of our autumnal flavor.
6 ounces Cream Cheese, softened: The "cheesecake" star of the show! Full-fat cream cheese will give you the richest, creamiest texture and best results.
1/4 cup Powdered Sugar: This sweetens the filling gently without any graininess. Its fine texture blends seamlessly into the mixture.
1 1/2 teaspoons Pumpkin Pie Spice: This warm blend of cinnamon, ginger, nutmeg, and allspice is what gives the balls their signature, cozy autumn aroma and taste.
How to make No Bake Pumpkin Cheesecake Balls?
Make this recipe yours—just save it to your Pinterest board!"
Step 1: Begin Melting the First Portion of Chocolate
Start by taking that 1/2 cup of white chocolate and melting it slowly. You can do this in a microwave-safe bowl in 20-second bursts, stirring vigorously between each, or use a double boiler on the stove.
The key here is patience; white chocolate is notoriously delicate and can scorch in an instant if you rush it. You want it smooth and fluid, ready to be folded into your filling.
Step 2: Combine the Filling Ingredients
While the chocolate is gently melting, it's time to create the cheesecake base. In the bowl of a food processor, combine the vanilla wafer crumbs, pumpkin puree, softened cream cheese, powdered sugar, and pumpkin pie spice.
Pulse everything together until the mixture is completely smooth and uniform. If you don't have a food processor, a stand mixer with a paddle attachment or a good old-fashioned hand mixer and some elbow grease will work just fine.
Step 3: Incorporate the Melted Chocolate
Now, pour that beautifully melted white chocolate right into the food processor with your other ingredients. Blend everything again, letting the processor run for a solid two to three minutes.
This extended mixing time is crucial—it ensures the chocolate is fully emulsified into the cream cheese and pumpkin, creating a cohesive, firm mixture that will be much easier to roll later on.
Step 4: Taste and Adjust Sweetness
This is the most important chef's prerogative. Stop, take a small spoonful, and taste your creation. Does it hit your personal sweet spot?
If you feel it needs a little more sweetness, now is the moment to add another tablespoon or two of powdered sugar and blend it in. Trust your own palate, it knows what you like.
Step 5: The First Chill
Transfer the pumpkin cheesecake mixture from the processor into a separate bowl. Cover it and place it in the refrigerator for at least 30 minutes.
This chilling period is non-negotiable; it firms up the fat in the cream cheese and solidifies the chocolate, making the dough manageable and far less sticky for the rolling stage. You can even leave it longer if your schedule demands.
Step 6: Assess the Dough Consistency
After its time in the fridge, check your dough. If it still feels a bit too soft or mushy to hold a shape, don't panic. Simply pop the bowl into the freezer for 15 to 30 minutes.
This quick freeze will get it to the perfect consistency. Remember, you'll need to work relatively quickly once you start rolling to prevent the dough from warming up too much in your hands.
Step 7: Adjust with More Crumbs if Needed
Here’s a pro tip for perfect texture. If after chilling, the dough still isn't firm enough for your liking, you can work in more vanilla wafer crumbs.
You can add up to another 3/4 cup (for a total of 1 1/2 cups) to achieve a dough that feels just right to you—one that holds a firm ball shape without being dry.
Step 8: Prepare Your Workspace
Line a standard baking sheet with a piece of wax paper or parchment paper. This will be your landing pad for the finished balls, preventing them from sticking and making cleanup an absolute breeze.
Having this ready before you start rolling keeps the process smooth and efficient, with no frantic searching for supplies with messy hands.
Step 9: Roll the Cheesecake Balls
Take the chilled dough out of the fridge. Using a tablespoon or a small cookie scoop, portion out a heaping spoonful of dough.
Then, roll it quickly and gently between the palms of your hands to form a neat, round ball. Place each finished ball onto your prepared baking sheet.
Step 10: Chill the Balls Again
Once all the balls are neatly rolled and arranged on the tray, slide the entire sheet back into the refrigerator. Let them chill for another 15-20 minutes.
This second chill is a secret weapon for a perfect chocolate coating, as very cold balls will help the melted chocolate set almost instantly upon contact.
Step 11: Melt the Remaining Chocolate
Now, melt the remaining 2 cups of white chocolate using the same gentle method you used before. Ensure it's completely smooth and fluid for easy dipping.
If you want an extra-smooth coating for professional-looking results, you can add a teaspoon of coconut oil to the chocolate as it melts—this helps thin it slightly.
Step 12: The Final Dip and Set
One by one, remove the balls from the fridge. Using a fork or a dipping tool, carefully lower each ball into the melted white chocolate, swirling to coat it completely.
Lift it out, let the excess chocolate drip off, and then return it to the wax-paper-lined sheet. Repeat with all the balls, then refrigerate one last time until the chocolate shell is firm and set.
Creative Flavor Variations to Try
While the original recipe is a masterpiece, don't be afraid to get creative and make it your own. The basic formula is wonderfully adaptable to all sorts of delicious twists and turns.
For a delightful crunch and a hit of salt, try rolling the finished, chocolate-dipped balls in a bowl of crushed pecans, walnuts, or even toffee bits before the final chocolate sets. The contrast is absolutely divine.
You could also play with the coating itself. While white chocolate is a classic pairing, a dark or semi-sweet chocolate shell creates a wonderfully rich and sophisticated contrast to the sweet, spiced pumpkin filling inside.
Tips
For the easiest, cleanest rolling process, lightly dampen your hands with cold water. This prevents the creamy dough from sticking to your palms as you work, giving you perfectly smooth spheres every single time.
When melting white chocolate, remember that low and slow is the only way to go. High heat is its enemy. If it seizes up and becomes grainy, you can sometimes save it by stirring in a tablespoon of vegetable oil or melted coconut oil until it smooths out again.
For a truly stunning presentation, consider drizzling a little melted dark chocolate over the finished, set balls. Or, a light dusting of cinnamon or extra pumpkin pie spice right after dipping adds a beautiful visual touch and a hint of extra flavor.
How to Store and Keep Them Fresh?
Due to the cream cheese and pumpkin content, these cheesecake balls must be stored in a sealed container in the refrigerator. They will keep beautifully this way for up to 5 days, making them a fantastic make-ahead dessert option.
For longer-term storage, they are also freezer-friendly. Arrange them in a single layer on a parchment-lined tray to freeze solid, then transfer them to a freezer bag or container. They can be frozen for up to 2 months.
Simply thaw them overnight in the refrigerator before you plan to serve them. This make-ahead magic is a true lifesaver during the hectic holiday entertaining season.
The Perfect Occasions for Serving
These No Bake Pumpkin Cheesecake Balls are incredibly versatile. They are, of course, a natural fit for Thanksgiving and Halloween, offering a handheld dessert option that's a welcome break from the pie routine.
But don't limit them just to the holidays! They make a fantastic sweet treat for a fall-themed birthday party, a cozy book club gathering, or even as a special after-school surprise. Their appeal is truly year-round for pumpkin lovers.
Consider presenting them in petite paper liners on a elegant platter for a party, or simply keeping them in a container in the fridge for a little sweet bite whenever the mood strikes. They are always the right answer.
No Bake Pumpkin Cheesecake Balls are a delicious, bite-sized alternative to traditional pumpkin pie. These creamy, spiced treats combine the flavors of cheesecake and pumpkin spice, rolled into balls and dipped in white chocolate for a festive fall dessert that’s easy to make and perfect for sharing!
ingredients
2 1/2cups white chocolate (chips or broken pieces, divided)
3/4cup vanilla wafer crumbs (may increase to 1 1/2 cups if needed for firmer texture)
1/2cup pumpkin puree (not pumpkin pie filling)
6ounces cream cheese (softened)
1/4cup powdered sugar (adjust to taste)
1 1/2teaspoons pumpkin pie spice
Instructions
1
Melt 1/2 cup of the white chocolate in a microwave-safe bowl in 30-second intervals, stirring between each, until smooth. Be careful not to overheat.
2
While the chocolate is melting, combine vanilla wafer crumbs, pumpkin puree, softened cream cheese, powdered sugar, and pumpkin pie spice in a food processor or mixing bowl. Blend until smooth and well combined.
3
Add the melted white chocolate to the mixture and blend again until fully incorporated. Taste and add more sugar if desired.
4
Transfer the mixture to a bowl, cover, and refrigerate for at least 30 minutes (or freeze for 15–30 minutes if too soft).
5
Line a baking sheet with wax or parchment paper. Scoop about 1 tablespoon of the chilled mixture and roll into balls. Place on the prepared sheet.
6
Melt the remaining 2 cups of white chocolate. Dip each ball into the melted chocolate using a fork or toothpick, tap off excess, and return to the lined sheet.
7
Refrigerate the dipped balls for 15–20 minutes, or until the chocolate is fully set.
8
Store in an airtight container in the refrigerator for up to 1 week. Serve chilled.
Nutrition Facts
Servings 24
Amount Per Serving
Calories120kcal
% Daily Value *
Total Fat8g13%
Saturated Fat5g25%
Cholesterol15mg5%
Sodium65mg3%
Potassium50mg2%
Total Carbohydrate12g4%
Sugars9g
Protein2g4%
Calcium 40 mg
* Percent Daily Values are based on a 2,000 calorie diet. Your daily value may be higher or lower depending on your calorie needs.
Note
Texture tip: If the dough is too soft to roll, freeze for 15–30 minutes before shaping.
Crumb adjustment: If the mixture feels too wet, add more vanilla wafer crumbs up to 1 1/2 cups total.
Make ahead: These keep well in the fridge for up to a week—perfect for holiday prep!
Serving idea: Arrange on a platter with mini spoons for a festive party dessert.
Keywords:
no bake pumpkin cheesecake balls, pumpkin dessert, fall treats, holiday dessert, pumpkin spice balls, easy no bake dessert
Kelsey Perez
Food & Lifestyle Blogger
I’m a London-based food writer, recipe developer, and home cook who has been passionate about cooking for over 15 years. What started as a way to recreate my mother’s traditional dishes turned into a lifelong love for experimenting with flavors, writing about food, and helping others feel more confident in the kitchen.