Is there any better morning treat than a warm, square donut, fried to golden perfection and buried under a blizzard of powdered sugar? I think you know the answer. Beignets, those iconic New Orleans delights, have a reputation for being pure magic, and I'm here to tell you a little secret. That magic isn't reserved for café trips. You can absolutely create it in your own kitchen.
For years, I thought making beignets at home was a task for professional bakers only. It felt intimidating. Then, after a lot of testing and a few happy accidents, I landed on a method that’s straightforward and incredibly rewarding. The result is everything you dream of: a crispy, delicate exterior that gives way to a soft, airy, and subtly sweet interior.
This recipe is my go-to, the one I make for lazy Sunday breakfasts or when friends come over for coffee. It walks you through each stage with clear steps and some helpful tips I’ve learned along the way. Trust me, pulling a batch of these from your own stove is a special kind of joy. Let’s get started.
Ingredients Needed for the Recipe
Warm Water & Active Dry Yeast: This is the life of the party. Warm water (not hot) wakes up the yeast, and that foamy reaction you'll see is what creates the beignet's incredible lift and airy texture. Always check your yeast's date.
All-Purpose Flour: Standard AP flour is perfect here. No need for anything fancy. It provides the structure while staying light enough for that classic chew.
Granulated Sugar: It sweetens the dough, of course, but it also feeds the yeast, helping it grow strong and active during the rise.
Whole Milk & Unsalted Butter: These are the enrichment team. They add fat and flavor, ensuring your beignets are tender, rich, and never dry. Room temperature is key for even mixing.
Egg & Vanilla Extract: The egg adds richness and helps with structure. Real vanilla extract, not imitation, gives that warm, bakery-quality flavor we all love.
Vegetable or Peanut Oil: A neutral oil with a high smoke point is best for frying. It won't impart any odd flavors, letting the beignet itself shine.
Powdered Sugar: This is non-negotiable. A heavy, snowy dusting of powdered sugar is the signature finish for an authentic beignet experience.
Planning Ahead and Dough Management
One of the best things about this dough is its flexibility. Life gets busy, and sometimes you want to spread the work across two days. I do this all the time, and it actually improves the flavor.
You can mix the dough and, instead of letting it rise on the counter, simply pop it into the refrigerator. It will slowly rise there over 24 to 48 hours. This slow fermentation develops a deeper, more complex taste.
When you're ready to fry, just pull the dough out and let it sit on the counter for about an hour to take the chill off. Then roll, cut, and fry. No extra proofing needed. You can also freeze the raw, cut squares for up to a month.
Lay them out on a tray to freeze individually first, then bag them up. Thaw them separately before frying. This means you're never more than 20 minutes away from a fresh beignet, which is a dangerous and wonderful fact.
How to make Beignets?
The process is a simple, satisfying rhythm. You'll activate the yeast, make a soft dough, let it rise, and fry. Have your tools ready: a stand mixer with a dough hook is helpful, but you can also mix by hand with a wooden spoon and some elbow grease. A deep pot and a candy thermometer are your best friends for frying.
Step 1 – Activate the Yeast
In the bowl of your stand mixer, combine the warm water (think bathwater temperature), the yeast, and a pinch of the sugar from your measured amount. Give it a quick stir and walk away for five minutes.
This is where the magic begins. When you come back, the surface should be foamy and frothy, like the head on a beer. If it's not, your yeast might be old, and it's best to start fresh. This foam is your guarantee of light, puffy beignets.
Step 2 – Combine the Wet Ingredients
To that lovely, foamy yeast mixture, add the room-temperature milk, the vanilla extract, the egg, and the rest of the granulated sugar. Whisk everything together until it's completely smooth and homogenous.
The mixture might look a bit curdled at first from the egg, but just keep whisking. It will come together into a smooth, liquid base for your dough. This is the foundation of your flavor.
Step 3 – Start the Dough
Now, add about half of your total flour to the wet ingredients. Use the whisk again to mix until you have a very thick, smooth batter. It will be sticky and shaggy, and that's exactly right.
This initial mixing with part of the flour helps develop gluten gradually, preventing you from overworking the dough later when you add the rest. Switch to the dough hook attachment on your mixer now.
Step 4 – Knead and Add Butter
Add the remaining flour and the salt to the bowl. Start mixing on a medium-low speed. Once the flour is mostly incorporated and a rough dough forms, it's time for the butter.
Add the soft, room-temperature butter one tablespoon at a time, letting each piece blend in before adding the next. The dough will be quite soft and sticky, and it will cling to the sides of the bowl. That's normal for an enriched dough like this.
Step 5 – First Rise
Keep the mixer running on low for about 4 to 5 minutes. The dough will start to become smoother and may begin to pull away from the sides a little. It won't form a perfect ball or clean the bowl completely.
Transfer this soft, sticky dough to a lightly oiled bowl. Turn it over once to coat it in oil, then cover the bowl with plastic wrap or a clean kitchen towel. Let it rest in a warm, draft-free spot until it doubles in size. This usually takes about 2 hours. Patience is key here.
Step 6 – Shape the Beignets
Once your dough is beautifully puffed, it's time to shape. Generously flour your work surface and your rolling pin. Gently deflate the dough and turn it out onto the floured surface.
Roll the dough out into a large rectangle, about half an inch thick. Don't worry about perfect edges. Using a pizza cutter or a sharp knife, cut the dough into roughly 2 to 2.5-inch squares. A little imperfection is part of the homemade charm.
Step 7 – Fry to Perfection
Pour about 3 inches of oil into a heavy-bottomed pot and attach your candy thermometer. Heat the oil over medium-high heat until it reaches 360°F. This precise temperature is crucial for even cooking.
Working in small batches of 3 or 4, gently lower the dough squares into the hot oil. Do not overcrowd the pot. They will sink, then quickly puff up and float. Fry for about 90 seconds per side, until they're a deep, golden brown.
Step 8 – Drain and Sugar
Use a spider strainer or slotted spoon to lift the finished beignets from the oil. Let the excess oil drip back into the pot, then transfer them to a cooling rack set over a baking sheet lined with paper towels.
While they are still very hot, dust them lavishly with powdered sugar. I mean, really go for it. The heat helps the sugar cling and creates that iconic snowy look. Serve immediately, with more sugar on the side for good measure.
Why Temperature is Your Secret Weapon
If I had to give one golden rule for beignet success, it would be to respect temperature. It touches every part of the process, and getting it right solves most common problems. Start with the water for the yeast; too hot and you kill it, too cold and it sleeps.
Your milk, egg, and butter should be at room temperature to mix smoothly into the dough without shocking the yeast. Finally, and most importantly, is the oil temperature. A candy thermometer isn't just a suggestion here.
If the oil is too cool, your beignets will absorb oil and become greasy. If it's too hot, the outside will burn before the inside cooks. Maintaining that steady 360°F gives you the perfect crispy exterior and fluffy, fully cooked center every single time.
Tips
Use a pizza cutter to cut your dough squares. It glides through the soft dough without dragging or sticking, making the job quick and clean.
Keep an eye on your oil temperature between batches. Let it come back up to 360°F before adding the next group of beignets. This consistency is what makes them perfect.
Don't skip the paper towel-lined rack for draining. It catches excess grease while the rack allows air to circulate, preventing the bottoms from getting soggy.
This dough is meant to be soft and a bit sticky. Resist the urge to add too much extra flour when rolling. Use just enough on your surface to prevent sticking.
For the fullest flavor, consider the overnight refrigerator rise. It fits into a busy schedule and makes the final beignets taste even better.
Serving Your Homemade Beignets
The classic and absolute best way to serve beignets is piled high on a plate, with a mountain of powdered sugar and a steaming cup of strong coffee or café au lait. The bitter coffee cuts through the sweet richness perfectly.
For a fun twist, you can offer a small bowl of chocolate sauce or a thin fruit jam for dipping. A simple ganache made with chocolate and cream is divine. But honestly, I usually find they disappear too quickly for any extra accompaniments.
The true goal is to enjoy them the moment they're cool enough to eat. That's when the texture is at its peak: hot, crisp, soft, and utterly irresistible. Share them with people you love, or keep the whole batch for yourself. I won't tell.
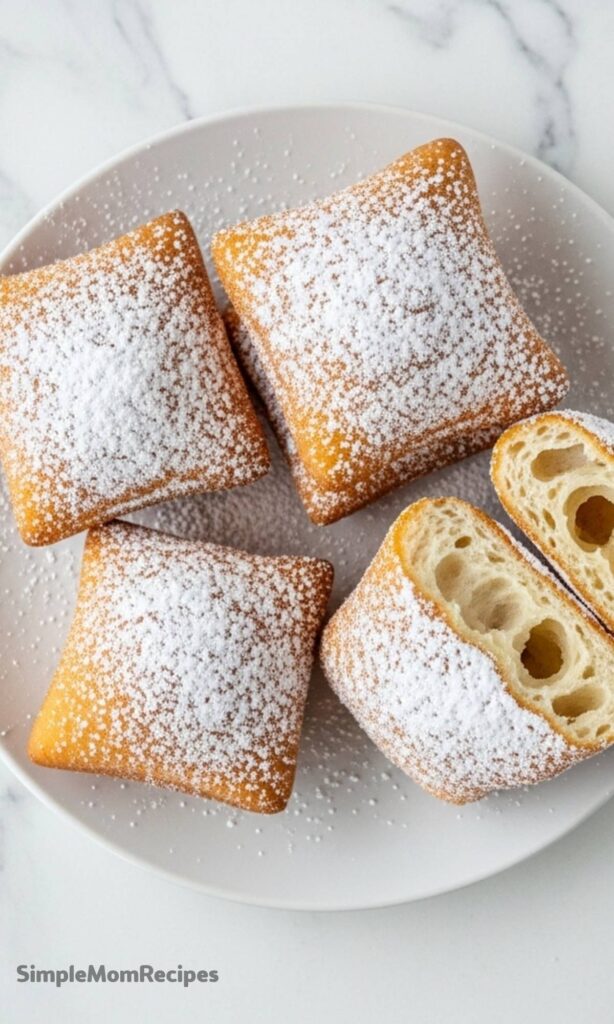
Beignets are soft, sweet square donuts that are insanely delicious and highly addictive. Freshly fried and dusted with powdered sugar, they’re best served warm with a cup of hot coffee. This easy homemade beignet recipe delivers light, airy interiors with a golden, crispy exterior—just like the famous ones from New Orleans!
ingredients
¾cup warm water (100–110°F (45–48°C))
½cup granulated sugar (divided)
2¼teaspoons active dry yeast (one 0.25-oz/7g packet)
1 large egg (room temperature)
½cup whole milk or evaporated milk (room temperature)
2teaspoons vanilla extract
3¾ to 4cups all-purpose flour (divided)
1teaspoon salt
3tablespoons unsalted butter (room temperature)
vegetable oil or peanut oil (for deep frying)
½cup powdered sugar (for dusting)
Instructions
1
In the bowl of a stand mixer, combine warm water, yeast, and half the granulated sugar. Let sit for 5 minutes until foamy.
2
Add the remaining sugar, milk, vanilla, and egg. Whisk to combine. Add 1¾ cups (210g) of flour and whisk until smooth.
3
Attach dough hook. Add remaining 2 cups (240g) flour and salt. Mix on medium speed until combined. Add butter, one tablespoon at a time, mixing until fully incorporated.
4
Continue mixing on low for about 4 minutes until dough is smooth and slightly sticky but not wet. Add up to ¼ cup more flour if needed.
5
Transfer dough to a lightly oiled bowl, cover, and let rise in a warm place for 2 hours or until doubled in size. Alternatively, refrigerate for up to 48 hours and bring to room temp 1 hour before frying.
6
Heat 3 inches of oil in a large pot to 360°F (182°C). Line a wire rack with paper towels.
7
On a well-floured surface, roll dough to ½-inch thickness. Cut into 2–2½-inch squares using a pizza cutter.
8
Fry 3–4 beignets at a time for 1–2 minutes per side until puffed and golden brown. Drain on paper towels.
9
Dust generously with powdered sugar while still warm. Serve immediately.
Nutrition Facts
Servings 5
Amount Per Serving
Calories290kcal
% Daily Value *
Total Fat10g16%
Saturated Fat4g20%
Cholesterol35mg12%
Sodium180mg8%
Potassium85mg3%
Total Carbohydrate45g15%
Dietary Fiber1g4%
Sugars18g
Protein5g10%
Calcium 40 mg
Iron 2 mg
* Percent Daily Values are based on a 2,000 calorie diet. Your daily value may be higher or lower depending on your calorie needs.
Note
Use a candy thermometer to maintain oil temperature at 360°F for even frying.
Don’t overcrowd the pot—fry in small batches to avoid lowering oil temperature.
Flour generously when rolling and cutting; it prevents sticking without affecting texture.
Make ahead tip: Refrigerate dough for up to 48 hours or freeze cut squares for up to 1 month.
I’m a London-based food writer, recipe developer, and home cook who has been passionate about cooking for over 15 years. What started as a way to recreate my mother’s traditional dishes turned into a lifelong love for experimenting with flavors, writing about food, and helping others feel more confident in the kitchen.