There’s something just so wonderfully spooky about these little guys. They’re not your average, everyday pastry, no, they’re a festive surprise, a tiny edible monster waiting to bring a smile to everyone’s face.
Honestly, they’re ridiculously easy to make, which is the best kind of recipe, especially when you’re already busy with costumes and decorations. With just a few simple ingredients, you can transform your kitchen into a mini bakery of Halloween horrors, the good kind, of course.
Why These Pies Are a Halloween Must-Make
Beyond their adorable, bandaged appearance, these hand pies are a dream for anyone hosting a party. They’re perfectly portable, meaning no need for plates or forks—just grab and go. This makes them ideal for a buffet table where little ghosts and goblins are constantly on the move.
They also offer a wonderful balance of flavors that both kids and adults will adore. The flaky, buttery crust, the sweet and slightly tart fruit filling, and that warm hint of cinnamon sugar create a combination that feels like a cozy autumn day, but dressed up for a spooky night. It’s a treat that feels special without being overly complicated or fussy.
Ingredients Needed for the Recipe
Gathering your ingredients is the first step, and you’ll be pleased to see how straightforward the list is. This is all about simplicity and fun, not a long grocery haul.
- Pie Dough: A 15-ounce package, enough for a double crust. Store-bought works beautifully here, making the whole process a breeze.
- Jam or Fruit Preserves: About ¾ cup of your favorite flavor. Raspberry, apricot, or even a spooky blackberry jam are all fantastic choices.
- Egg: Just one, which you’ll use to create a simple egg wash.
- Water: A tablespoon, to mix with the egg for the wash.
- Sugar & Cinnamon: ¼ cup of sugar mixed with 2 teaspoons of cinnamon for that classic, delicious sprinkle on top.
- Candy Eyes: 12 pairs, because a mummy just isn’t a mummy without its peepers!
The Best Fillings for Your Spooky Creations
While any jam will work, some fillings truly shine in this recipe. You want something with a bit of body, not too runny, so it doesn’t seep out during baking. A thick, chunky preserves or a firm jam is your best bet.
Think about flavors that evoke the season. A homemade apple pie jam, with its warm spices, is an incredible choice. Or, for a tangy surprise, try a sour cherry or a sharp apricot preserve. You can even get creative and mix a little cream cheese with the jam for a richer, cheesecake-like filling, just be sure not to overfill.
How to make Mummy Hand Pies?
Getting Your Dough and Ingredients Ready
First things first, take your pie dough out of the freezer and let it sit on the counter. Let it thaw according to the package instructions until it’s pliable and easy to roll out, this is crucial for avoiding cracks.
While you wait, preheat your oven to a nice, hot 400 degrees F. Then, in a small bowl, whisk that single egg with a tablespoon of water until it’s smooth—this is your egg wash. In another little bowl, mix together the sugar and cinnamon, and have your jam and candy eyes standing by. Getting everything ready now makes the assembly feel like a fun, fast-paced activity.
Shaping and Assembling Your Mummies
Once your dough is ready, roll out the first crust on a lightly floured surface. Don’t worry about a perfect circle; we’re going for rectangles. Cut off the curved edges about 2-3 inches deep (save these scraps!), so you’re left with a rough rectangle. Then, cut this rectangle into 6 smaller, equal-sized rectangles.
Place a heaping tablespoon of jam right in the center of one rectangle, spreading it out but leaving a good half-inch border all the way around. Brush that bare border with your egg wash—this acts like the glue. Now, for the fun part: take those reserved dough scraps and cut them into thin, uneven strips with a sharp knife or a pizza wheel. Drape these strips haphazardly over the jam filling to look like ancient, unraveling bandages.
Sealing, Baking, and The Final Touch
Once your mummy is bandaged, use the tines of a fork to press down firmly on the edges of the rectangle, sealing the filling inside. If any edges look too jagged, you can trim them lightly. Give the top of your mummy a gentle brush with more egg wash, then a generous sprinkle of that cinnamon sugar. Carefully transfer it to a parchment-lined baking sheet. Repeat this whole, delightful process until all your dough and jam are used up—you should get about 12 little mummies.
Pop the baking sheet into your preheated oven and bake for 15 to 18 minutes. You’re looking for a beautiful, golden brown color on the crust. When they’re done, take them out and let them cool for just a few minutes—they should still be warm, but not hot enough to melt the candy eyes. Then, the moment of truth: gently press two candy eyes onto each pie, bringing your mummies to life!
Tips
If your dough strips break while you’re placing them, don’t fret. Just patch them together on the pie; it will all bake into one delicious, flaky crust anyway. The imperfect, messy look just adds to the mummy’s charm.
For an even more defined “bandage” look, you can slightly twist the dough strips as you lay them down. This creates texture and shadows, making the final product even more impressive. And always, always use parchment paper on your baking sheet—it prevents sticking and makes cleanup an absolute dream.
If you find your dough getting too soft and warm while you work, don’t hesitate to pop the whole baking sheet with the unfinished mummies into the fridge for 10 minutes. A cooler dough is much easier to handle and will result in a flakier pastry.
How to Get the Kids Involved Safely
This is a fantastic recipe for little helpers, with a few simple precautions. They are absolute pros at placing the candy eyes, of course. They can also help with sprinkling the cinnamon sugar, which is a task kids seem to inherently love.
For older children, they can assist with brushing on the egg wash or even arranging the dough strips. The assembly is very forgiving, so there’s no “wrong” way to bandage a mummy. Just be sure an adult handles the sharp knife for cutting the dough and is responsible for moving the baking sheet in and out of the hot oven.
Storing and Making Ahead for a Stress-Free Party
These mummy hand pies are best enjoyed the day they are made, when the crust is at its peak flakiness. But if you have leftovers, you can store them in an airtight container at room temperature for up to two days. The crust will soften a bit, but they’ll still be delicious.
To get a head start on your Halloween party prep, you can assemble the pies completely, place them on the baking sheet, and then freeze them solid before baking. Once frozen, transfer them to a freezer bag. When you’re ready, bake them straight from the freezer, adding a few extra minutes to the baking time until they’re golden brown. It’s a fantastic trick for a stress-free celebration.
So there you have it. A treat that’s as fun to make as it is to eat. These mummy hand pies are guaranteed to be the hit of your Halloween spread, a little bit spooky and a whole lot of delicious.


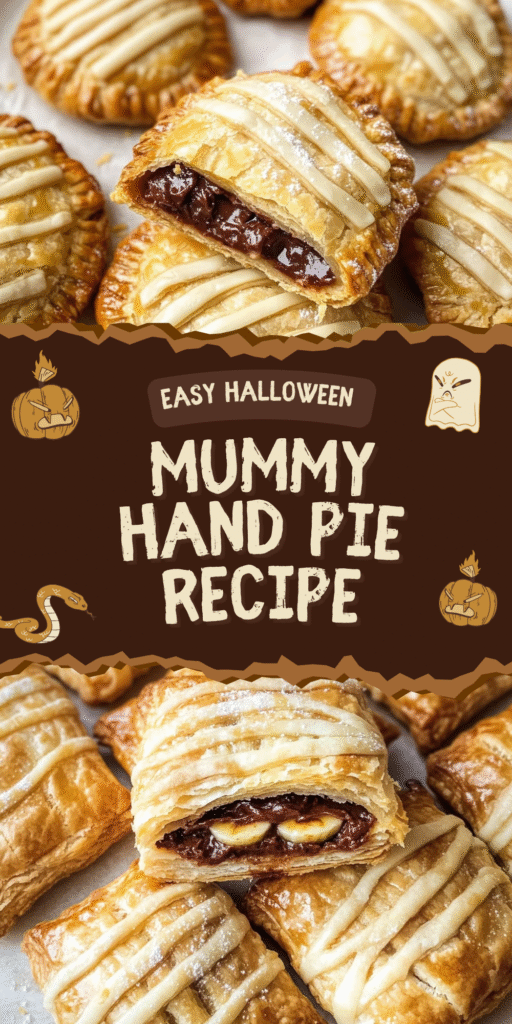
Mummy Hand Pie Recipe
Description
These fun and spooky Mummy Hand Pies are ridiculously easy to make and perfect for the Halloween season! With just a few simple ingredients—pie dough, fruit preserves, egg wash, and cinnamon sugar—they add a festive flair to any Halloween party or family gathering. Kids love helping assemble these adorable mummy-shaped treats!
ingredients
Instructions
-
Take pie dough out of the refrigerator or freezer and let soften according to package instructions (usually 10–15 minutes at room temperature).
-
Preheat oven to 400°F (204°C). Line a baking sheet with parchment paper.
-
In a small bowl, whisk together the egg and 1 tablespoon water to make an egg wash. Set aside.
-
In another small bowl, mix sugar and cinnamon to make cinnamon sugar. Set aside.
-
On a lightly floured surface, roll out one pie crust into a circle. Trim the outer 2–3 inches to form a rectangle; reserve trimmings for bandages.
-
Cut the rectangle into 6 equal smaller rectangles (about 3x4 inches each).
-
Place 1 heaping tablespoon of jam in the center of one rectangle, leaving a ½-inch border. Brush the border with egg wash.
-
Roll out reserved dough trimmings and cut into thin strips (¼-inch wide). Lay strips horizontally across the jam-filled rectangle to resemble mummy bandages, leaving small gaps for eyes.
-
Fold the bottom edge up over the filling, then fold the top down, and crimp the sides with a fork to seal. Trim any excess dough for a neat edge.
-
Brush the top lightly with egg wash (avoiding the jam gaps), then sprinkle with cinnamon sugar. Place on the prepared baking sheet.
-
Repeat with remaining dough and filling to make 12 hand pies total.
-
Bake for 15–18 minutes, or until golden brown and puffed.
-
Let cool for 5 minutes, then press a pair of candy eyes into the gaps between the bandages on each pie.
-
Serve warm or at room temperature. Enjoy your spooky, sweet mummy hand pies!
Nutrition Facts
Servings 12
- Amount Per Serving
- Calories 180kcal
- % Daily Value *
- Total Fat 8g13%
- Saturated Fat 3g15%
- Cholesterol 25mg9%
- Sodium 150mg7%
- Potassium 60mg2%
- Total Carbohydrate 25g9%
- Dietary Fiber 1g4%
- Sugars 12g
- Protein 2g4%
- Calcium 20 mg
- Iron 1 mg
* Percent Daily Values are based on a 2,000 calorie diet. Your daily value may be higher or lower depending on your calorie needs.
Note
- Gluten-free? Use certified gluten-free pie dough—many brands offer it!
- Other shapes? Use a pumpkin or ghost cookie cutter for festive variations.
- No egg wash? The pies will still bake, but won’t be as golden or shiny.
- Make ahead: Assemble unbaked pies and freeze on a tray. Bake from frozen, adding 2–3 minutes to cook time.