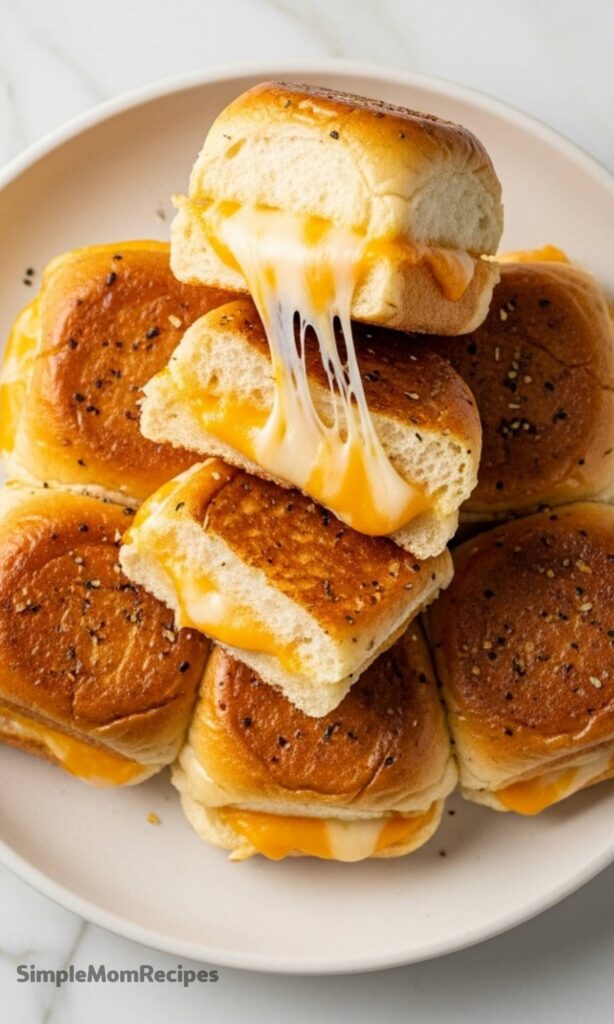
I’ve made a lot of grilled cheese in my life, but these mini versions hold a special place in my kitchen. They’re cozy, practical, and somehow feel more fun than a full-sized sandwich. Maybe it’s the size, or maybe it’s the buttery edges that get just a little crisp.
The idea came together on one of those quiet afternoons when lunch needed to happen fast. I opened the fridge, saw extra dinner rolls and a drawer full of cheese, and it clicked. That small moment turned into something we now make on purpose.
Mini grilled cheese feels friendly. They’re easier to flip, easier to share, and somehow less intimidating for kids and adults alike. I’ve served them as lunch, dinner, and even party food, and they always disappear.
What makes this version special isn’t fancy ingredients or complicated steps. It’s the method. Cooking them flat on a pan gives you that classic grilled cheese texture, just scaled down into perfect little bites.
I also love that they’re flexible. You can keep them simple, dress them up, or tweak them based on whatever cheese you have hiding in the fridge. There’s no wrong direction here, which makes the whole process feel relaxed.
If you’ve ever loved grilled cheese but wished it were easier to serve or share, this recipe answers that need. It’s familiar, but with a small twist that makes it feel fresh again.
Why Mini Grilled Cheese Just Works
There’s something oddly satisfying about food that’s smaller than expected. Mini grilled cheese hits that sweet spot between snack and meal without trying too hard. One turns into two, and suddenly everyone’s happy.
The smaller size also means better texture. More edges get golden, more butter touches the pan, and the cheese melts evenly instead of pooling in one spot. It’s a tiny detail that makes a big difference.
I’ve noticed kids especially love these. They’re easier to hold, less messy, and feel playful without being gimmicky. Adults appreciate them too, especially when paired with soup or served as a casual appetizer.
Using soft dinner rolls instead of regular sandwich bread adds a subtle sweetness and tenderness. When flattened and grilled, they behave beautifully, soaking up butter without falling apart.
It’s the kind of recipe that feels low-pressure but still delivers comfort. No stress, no overthinking, just good food made in a thoughtful way.
Ingredients Needed for the Recipe
King’s Hawaiian dinner rolls – these create the soft, slightly sweet base that turns crisp when grilled.
Sliced cheese – the star of the show, melted into gooey perfection inside each roll.
Butter – brushed on the bread to create that golden, flavorful crust.
Garlic powder – adds gentle savory depth without overpowering the cheese.
Italian seasoning – brings a subtle herb note that makes the sandwiches feel extra special.
The ingredient list stays intentionally simple. Each item plays a clear role, and none of them fight for attention. That balance is what keeps these mini grilled cheese so satisfying.
If you’re missing one seasoning, it’s okay. The heart of this recipe is bread, butter, and cheese, and those three alone already do a lot of heavy lifting.
How to make The Best Mini Grilled Cheese?
Make this recipe yours—just save it to your Pinterest board!"
Step 1 – Slice the Rolls
Start by slicing the dinner rolls in half horizontally using a serrated knife. Take your time here so the rolls stay intact and even. A clean cut helps everything cook more evenly later.
If the rolls are stuck together, you can cut them individually or in small sections. Both work, just choose whatever feels easiest in the moment.
Step 2 – Flatten the Rolls
Once sliced, gently flatten the tops and bottoms of each roll. You can use a rolling pin, a smooth glass, or even your hands. This step helps the rolls cook evenly and melt the cheese faster.
You don’t need to press hard. You’re just creating a flatter surface so the bread makes better contact with the pan.
Step 3 – Prepare the Butter
Melt the butter in a small bowl until just liquid. Stir in the garlic powder and Italian seasoning, mixing until everything is evenly combined.
This seasoned butter adds flavor in a subtle way. It’s not loud, but you’ll notice it in the final bite.
Step 4 – Butter the Rolls
Lay the rolls so the inside faces up. Brush the melted butter mixture generously over that surface, since this side will hit the pan.
This step matters more than it seems. Buttering the correct side is what gives you that classic grilled cheese finish.
Step 5 – Add Cheese and Cook
Place the buttered rolls butter-side down on a warm pan set to medium-low heat. Immediately add pieces of cheese to each roll, spreading them out so they melt evenly.
Top with the remaining roll halves, inside facing up, then brush the tops with more butter. Let them cook slowly so the bread turns golden without burning.
Step 6 – Flip Carefully
Once the bottom is golden brown, flip each mini grilled cheese gently. Use a spatula and take your time to keep the cheese inside.
Let the second side cook until it matches the first and the cheese is fully melted.
Step 7 – Cool and Cut
Transfer the cooked mini grilled cheese to a cutting board and let them rest briefly. This helps the cheese settle so it doesn’t spill out.
If cooked in sections, slice them into individual pieces using a serrated knife. Serve warm while the centers are still gooey.
Variations Worth Trying
One of my favorite things about this recipe is how easily it adapts. You can swap cheeses, add fillings, or tweak the seasoning without changing the method.
For a pizza-inspired version, use mozzarella and add a few pepperoni slices inside. Serve with warm dipping sauce on the side for an extra layer of comfort.
If you want something richer, adding cooked bacon brings a smoky contrast to the sweet rolls. It’s indulgent but still feels balanced in mini form.
You can also add thin slices of avocado after cooking for a creamy finish. The heat-softened cheese pairs beautifully with the cool, buttery avocado.
Cutting the sandwiches into even smaller pieces turns them into snackable bites. This works especially well for gatherings or picky eaters.
Tips
Cook on medium-low heat to avoid browning the bread before the cheese melts.
Flattening the rolls helps create a better crust and even cooking.
Slice cheese into smaller pieces so it melts quickly and evenly.
Let the sandwiches rest briefly before cutting to keep the cheese inside.
Use a serrated knife for clean cuts without squishing the rolls.
Serving Ideas That Make Them Shine
Mini grilled cheese pairs naturally with soup, especially tomato-based ones. Dipping feels intuitive and comforting, like something you’ve done forever.
They also work well alongside simple sides like fruit, veggies, or crispy potatoes. The balance keeps the meal satisfying without feeling heavy.
I’ve even served them with ketchup on the side, which feels nostalgic in the best way. Sometimes the simplest pairings are the most memorable.
For parties, arrange them on a platter with different dipping options. They’re easy to grab and always one of the first things to go.
Storing and Reheating Mini Grilled Cheese
If you have leftovers, they store surprisingly well. Keep them in an airtight container in the fridge for a few days without losing too much texture.
To reheat, a quick warm-up in a pan brings back some crispness. A microwave works too, especially when time is short.
They can also be frozen if needed, though they’re best enjoyed fresh. Let them thaw before reheating so the bread stays tender.
Having a few ready to go can make busy days easier. It’s comforting to know something familiar is waiting.
This recipe has become one of those quiet staples in my kitchen. It doesn’t ask for much, but it gives a lot back, and that’s what makes it worth keeping around.
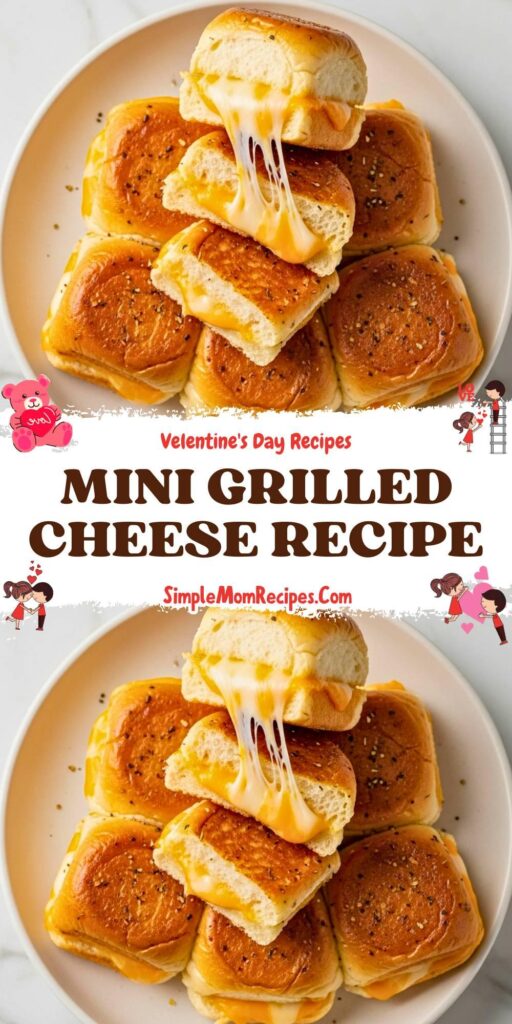
These mini grilled cheese sandwiches are the ultimate comfort food—perfectly golden, melty, and made with soft King’s Hawaiian rolls for a touch of sweetness. Ideal for kids, parties, or a quick lunch, they’re easy to make and endlessly customizable. Serve them with tomato soup or your favorite dipping sauce for a classic combo that never disappoints.
ingredients
1pack King's Hawaiian Dinner Rolls (12 rolls)
12slices cheese (cheddar, colby jack, or muenster)
4tbsp butter (unsalted, melted)
1tsp garlic powder
2tsp Italian seasoning
Instructions
1
Slice the dinner rolls in half using a serrated knife. You can separate them into individual rolls or keep them in two sections of 6 rolls each.
2
Flatten the top and bottom halves gently using a rolling pin, drinking glass, or your hands.
3
In a small microwave-safe bowl, melt the butter. Stir in garlic powder and Italian seasoning.
4
Using an oil brush, spread the seasoned butter on the inside (cut side) of each roll half—this will become the outer crust when cooked.
5
Cut each cheese slice into 4 small squares. Place one roll bottom, butter-side down, on a preheated griddle or frying pan over medium-low heat. Add 4 cheese pieces on top, then cover with the roll top (buttered side up).
6
Cook for 3–5 minutes until the bottom is golden brown, then carefully flip and cook the other side until golden and the cheese is fully melted.
7
If cooked in sections, let cool slightly before slicing into individual mini sandwiches to prevent cheese from oozing out.
Nutrition Facts
Servings 4
Amount Per Serving
Calories185kcal
% Daily Value *
Total Fat8.5g14%
Saturated Fat5.2g26%
Cholesterol25mg9%
Sodium425mg18%
Potassium90mg3%
Total Carbohydrate28g10%
Dietary Fiber1g4%
Sugars8g
Protein5g10%
Calcium 150 mg
Iron 1 mg
* Percent Daily Values are based on a 2,000 calorie diet. Your daily value may be higher or lower depending on your calorie needs.
Note
Make it fun: Cut into quarters for bite-sized “grilled cheese bites” perfect for little hands.
Add-ins: Try adding cooked bacon, avocado slices, or pepperoni for extra flavor.
Storage: Store in an airtight container in the fridge for 3–5 days or freeze for up to 6 months.
Reheat: Warm in a skillet for best texture, or microwave in 30-second intervals.
Keywords:
mini grilled cheese, Hawaiian roll grilled cheese, kid-friendly grilled cheese, easy grilled cheese, party appetizer
Kelsey Perez
Food & Lifestyle Blogger
I’m a London-based food writer, recipe developer, and home cook who has been passionate about cooking for over 15 years. What started as a way to recreate my mother’s traditional dishes turned into a lifelong love for experimenting with flavors, writing about food, and helping others feel more confident in the kitchen.