The first time I made this, I thought it was just about braiding dough and sticking an egg in the middle. Turns out… it’s a little mood-based. Some days the dough listens. Some days it fights back.
Also, nobody really says this clearly — the temperature of the milk matters more than you think. I once overheated it, didn’t even realize, and the bread came out dense. Not terrible, just… sad.
But when it works, it’s soft, slightly sweet, and honestly kind of comforting in a quiet way.
Ingredients I Used for the Recipe
- 1 ¼ cups milk – this keeps the bread soft and gives it that slightly rich feel
- ⅓ cup unsalted butter – adds moisture and a subtle buttery flavor
- 2 ¼ teaspoons instant yeast – the thing that makes everything rise without too much waiting
- ½ cup sugar – not overly sweet, just enough to balance everything
- ⅛ teaspoon salt – small amount, but it actually pulls all the flavors together
- 2 large eggs – makes the dough richer and softer
- 4 cups all-purpose flour – gives structure, but still keeps it tender
- 1 egg + 1 teaspoon water (for egg wash) – this is what gives that shiny golden top
- 3 dyed eggs – mostly for looks, but also kind of tradition
- Sprinkles – optional, but I always add them… makes it feel less serious
How to make Italian Easter Bread?

Step 1 – Warm things gently
I heat the milk and butter together until the butter melts. Not too hot. I usually test it with my finger — if it feels warm but not uncomfortable, I stop there.
I’ve messed this up before by rushing. Yeast doesn’t forgive that.
Step 2 – Start the base
In a big bowl, I mix yeast, sugar, salt, and eggs. Then I pour in the warm milk mixture and about half the flour.
It looks messy at this stage. I always think I did something wrong, but it comes together.
Step 3 – Bring it into a dough
I mix in the rest of the flour slowly. Sometimes I don’t even use all of it. Depends on how the dough feels.
Soft but not sticky is the goal… though mine usually leans a little sticky and I just accept it.
Step 4 – Knead (or try to)
I knead it for about 10–12 minutes. Not perfectly. I get distracted halfway sometimes.
But I’ve noticed even imperfect kneading still works if you give it time later.
Step 5 – Let it rest
I cover the dough and let it sit for about 10 minutes. This part feels small, but it actually makes shaping easier.
Before I started doing this, the dough kept snapping back. Annoying.
Step 6 – Roll and shape
I divide the dough into pieces and roll them into ropes. Then I twist two together and form a circle.
Sometimes they look uneven. I fix it. Or I don’t.
Both versions taste the same.
Step 7 – Let it rise
I leave the shaped dough in a warm spot for about 45–60 minutes. It should puff up nicely.
On colder days, this takes longer. I’ve learned not to rush this part anymore.
Step 8 – Finish and bake
I brush the egg wash, add sprinkles, and gently place the dyed egg in the center.
Then bake at 350°F for around 15–18 minutes until golden.
The smell at this point… yeah, that’s when it finally feels worth it.
Texture, taste, and what actually matters
The texture is soft, almost like a light brioche but not as rich. Slightly fluffy, slightly chewy.
The taste is mild. Not overly sweet. Which I didn’t expect the first time.
What actually matters though? Not overbaking it.
I’ve done that once. It goes from soft to dry faster than you think.
How I tweak this depending on mood
Sometimes I add a little vanilla or orange zest. Makes it smell better while baking.
Other times I throw in raisins… then regret it halfway through, then end up liking it anyway.
There was one time I added cinnamon. That one actually stayed.
It’s one of those recipes where small changes don’t break it.
How I serve this on lazy days
Honestly, I don’t do anything fancy most of the time.
I just slice it, maybe warm it a little, and eat it plain. Or with a bit of butter if I’m feeling extra.
Sometimes with tea. Sometimes straight from the tray. No plate.
Depends on the day.
What I figured out after making it more than once
- Warm milk matters more than exact measurements
- Don’t panic if the dough looks rough early on
- Letting it rise properly fixes a lot of mistakes
- Sprinkles make it look better than it tastes — but still worth it
- It doesn’t need to be perfectly shaped to feel special
Also… if I had to change one thing, I’d probably make smaller loaves next time. The big one looks nice, but smaller ones are easier to handle.

Italian Easter Bread Recipe
Description
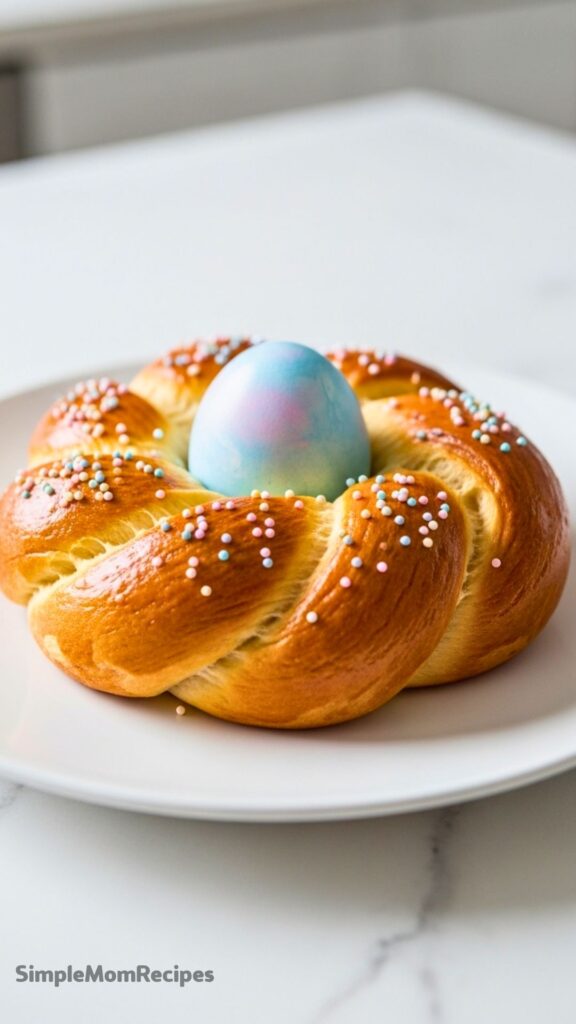
This traditional festive Italian Easter Bread recipe is easy to make and perfect for holiday celebrations! This beautiful holiday bread features a dyed egg nestled in the center and is fun to decorate with family. The slightly sweet, enriched dough yields soft, tender slices with colorful sprinkles on top.
ingredients
Instructions
-
Warm the Milk and Butter
In a small saucepan, add milk and butter. Heat over medium-low heat until it reaches 120 to 130°F (49 to 54°C), stirring until the butter melts. Do not allow the milk to exceed 130°F (54°C) to avoid killing the yeast. -
Make the Yeast Mixture
In a large mixing bowl, combine yeast, salt, and sugar. Add 2 whisked eggs and mix together. Pour in the warmed milk and butter mixture. Add 2 cups of flour and stir to combine. -
Mix the Dough
Attach a dough hook to a stand mixer and combine on medium speed until smooth, about 2 minutes. Scrape the sides with a spatula as needed to incorporate all flour. -
Add More Flour
Slowly add the remaining 2 cups of flour to the mixer on medium-low speed, scraping the sides as needed. Knead until the dough is stiff and slightly sticky, about 12 minutes. -
Knead the Dough by Hand
Place the dough on a lightly floured surface and hand knead for 3 to 4 minutes, adding minimal flour to prevent sticking. Do not use more than ¼ cup of additional flour. -
Rest the Dough
Shape dough into a ball, cover with a clean dish towel, and allow to rest for 10 minutes to relax the gluten. -
Roll the Dough
Divide the dough into 6 equal pieces. Roll each piece into a 1-inch wide rope, approximately 14 inches long. -
Shape the Dough
Twist two dough ropes together to create a braided effect, then pinch the ends firmly to secure. Form the twisted dough into a circle, ensuring ends are tightly joined. Place on a parchment-lined baking sheet. Repeat with remaining ropes, arranging only two loaves per baking sheet. -
Let the Dough Rise
Loosely cover the shaped dough with plastic wrap or a dish towel and place in a warm area. Let rise until doubled in size, about 45 to 60 minutes. -
Heat the Oven
Position oven rack in the middle. Preheat oven to 350°F (177°C). -
Brush with Egg Wash
Whisk together 1 egg and 1 teaspoon of water. Brush each braided bread with the egg wash. If desired, sprinkle with colored sprinkles. Gently place one dyed egg in the center of each braided ring without pressing into the dough. -
Bake
Bake one tray at a time until golden brown, approximately 15 to 18 minutes. Transfer baked bread immediately to a cooling rack to prevent sogginess.
Nutrition Facts
Servings 18
- Amount Per Serving
- Calories 303kcal
- % Daily Value *
- Total Fat 8g13%
- Saturated Fat 4g20%
- Cholesterol 80mg27%
- Sodium 300mg13%
- Potassium 220mg7%
- Total Carbohydrate 48g16%
- Dietary Fiber 2g8%
- Sugars 11g
- Protein 8g16%
- Calcium 60 mg
- Iron 6 mg
* Percent Daily Values are based on a 2,000 calorie diet. Your daily value may be higher or lower depending on your calorie needs.
Note
- Yeast Tip: Keep milk between 120–130°F (49–54°C) to activate yeast without killing it for optimal rise.
- Make Ahead: Shape dough, cover, and refrigerate overnight. Bring to room temperature, let rise, then bake as directed.
- Egg Safety: Raw eggs baked in bread will be soft-cooked. For food safety, use pre-hard-boiled eggs or remove decorative eggs before serving if bread sits at room temperature.
- Flavor Variations: Add 1 tsp vanilla, almond, or citrus extract, or 1-2 tsp lemon/orange zest for aromatic flair.
- Storage: Store bread (without decorative egg) in airtight container at room temperature up to 5 days, or freeze up to 2 months.
