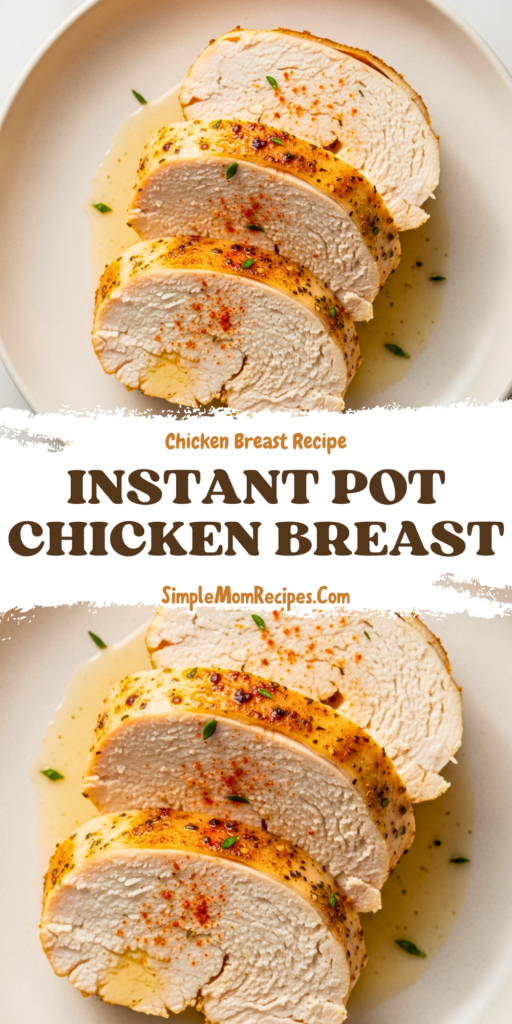
Instant Pot Chicken Breast is one of those recipes I didn’t think would change my life, and then somehow… it did. It’s fast, forgiving, and gives you chicken that’s actually juicy, not that sad, chalky stuff we’ve all suffered through before.
I lean on this recipe hard during busy weeks. School nights, late workdays, or those evenings when everyone’s hungry and patience is thin. This chicken shows up every time, calm and reliable, like it knows the assignment.
What I love most is how quietly useful it is. Dinner tonight, lunch tomorrow, maybe sliced into a salad the next day. One quick cook, and half your meals are already handled.
I’ve tested this more times than I can count, tweaking small things until it worked every single time. Thick breasts, thin ones, fresh, frozen, distracted cooks included. It still comes out tender.
If you’ve ever felt personally betrayed by dry chicken breast, I get it. This method fixes that. It’s simple, not flashy, and honestly, that’s exactly why it works.
Ingredients Needed for the Recipe
- Chicken breasts – Boneless and skinless, these are the star and cook up tender under pressure.
- Italian seasoning – Adds a balanced, herby base flavor without overpowering the chicken.
- Garlic powder – Brings depth and savoriness that soaks right into the meat.
- Smoked paprika – Gives subtle warmth and color, plus a little smoky edge.
- Salt – Essential for seasoning the chicken all the way through.
- Black pepper – Adds mild heat and balance to the spice mix.
- Olive oil – Used for searing, which builds flavor before pressure cooking.
- Chicken broth or water – Provides the steam needed for pressure and keeps the pot happy.
How to make Instant Pot Chicken Breast?
Step 1 – Mix the seasoning
I start by mixing all the dry spices in a small bowl. It takes maybe 30 seconds, but it makes a huge difference. When everything’s blended, the chicken gets seasoned evenly instead of patchy.
This is also where I sometimes adjust things. A little extra paprika if I want color, or more pepper if I’m feeling bold. Nothing complicated, just paying attention.
Step 2 – Season the chicken
The chicken gets rubbed generously on all sides. And yes, generously matters here. Pressure cooking locks in moisture, but it also locks in flavor, so whatever you add now really counts.
I make sure every surface is coated. No pale spots, no shy seasoning. Chicken doesn’t get better later if you skip this part.
Step 3 – Sear for flavor
I set the Instant Pot to sauté and heat the olive oil until it shimmers. Then the chicken goes in, without crowding. This step smells amazing, and that’s how you know it’s worth doing.
The goal isn’t to cook the chicken through. You’re just building color and those golden bits at the bottom that turn plain broth into something rich.
Step 4 – Deglaze and prep for pressure
Once the chicken comes out, I pour in the broth and scrape the bottom really well. Those browned bits are pure flavor, but they also need to come loose so the pot doesn’t complain.
The trivet goes in next, and the chicken sits on top. Keeping it elevated helps it cook evenly and stay juicy.
Step 5 – Pressure cook
The lid goes on, valve set to sealing, and it cooks on high pressure. Fresh chicken needs five minutes. Frozen chicken gets ten. That’s it.
This is where the magic happens quietly. No stirring, no flipping, no babysitting. Just trust the process.
Step 6 – Natural release and rest
After cooking, I let the pressure drop naturally for ten minutes. This part matters more than people think. Rushing it can make the chicken tighten up.
Once it’s out, I let the chicken rest for five minutes before slicing. That pause keeps the juices where they belong.
Why This Method Works So Well
Chicken breast is lean, which is usually the problem. It dries out fast and gives you very little room for error. Pressure cooking changes that completely.
The sealed environment traps moisture, so the chicken cooks gently from the inside out. It stays tender even if your timing isn’t perfect.
Searing first adds another layer. You’re not just steaming chicken, you’re building flavor before the lid ever goes on. That combination is what makes this recipe feel reliable.
I also love that it scales easily. Cooking for two or six doesn’t really change the process. The Instant Pot handles it without drama.
Tips
- Match the cook time to the thickness of your chicken, not just the weight.
- Always use at least one cup of liquid to avoid burn warnings.
- Let the pressure release naturally for juicier results.
- Don’t skip seasoning, pressure cooking won’t fix bland chicken.
- Sear in batches if needed, crowding kills browning.
- Rest the chicken before slicing so juices don’t run out.
How I Like to Serve It
Some nights, this chicken goes straight onto plates with mashed potatoes and vegetables. Simple, comforting, and nobody complains.
Other times, I slice it thin and pile it onto salads. It stays moist even after chilling, which is rare for chicken breast.
It’s also perfect for pasta dishes. Tossed with noodles and a sauce, it tastes like you cooked it separately on purpose.
If I shred it, it becomes the base for sandwiches, wraps, or quick lunches. Having it ready makes everything easier.
Storage and Make-Ahead Notes
Once cooked, the chicken keeps well in the fridge for up to four days. I store it sliced or whole, depending on how I plan to use it.
For longer storage, it freezes beautifully. I wrap it tightly or use freezer bags, then thaw gently in the fridge overnight.
When reheating, I add a splash of broth or water and warm it slowly. That little bit of moisture keeps it from drying out.
This is one of those recipes that actually gets better with planning. Cooking once saves you time all week.
Small Variations I Use Often
Sometimes I swap the seasoning entirely. Taco spices, lemon pepper, or even just salt and garlic all work with the same method.
If I want a quick sauce, I thicken the leftover liquid right in the pot. It turns into a simple gravy without another pan.
For shredding, I skip the sear and go straight to pressure cooking. The texture stays perfect for salads and casseroles.
No matter how I tweak it, the base method stays the same. That’s what makes this recipe such a keeper.
Instant Pot Chicken Breast isn’t fancy, but it’s dependable, and that counts for a lot. Once you make it this way, it’s hard to go back.


Instant Pot Chicken Breast Recipe
Description
This Instant Pot Chicken Breast recipe is the weeknight lifesaver you need in your corner. Juicy, tender, and ready in under 30 minutes, it’s the kind of recipe that keeps you sane when school nights get chaotic. Make it once and suddenly lunches, salads, and pastas practically build themselves.
ingredients
Instructions
-
In a small bowl combine the Italian seasoning, garlic powder, smoked paprika, salt and pepper.
-
Rub the spice mix generously over each chicken breast.
-
Set the Instant Pot to the Sauté setting and add the olive oil to heat. When the oil is hot, add the chicken breasts and sear on all sides until golden. You might have to do this in 2 batches. Remove the chicken from the Instant Pot and set aside. (Skip this step if using frozen chicken or planning to shred the meat.)
-
Pour the chicken broth into the Instant Pot, then place the trivet inside. Place the chicken on top of the trivet and close the lid.
-
Set the valve to sealing and cook on Manual/High Pressure for 5 minutes if using fresh chicken, or 10 minutes if using frozen chicken.
-
When the time is up, let the Instant Pot release naturally for 10 minutes, then quick release any remaining pressure.
-
Open the lid and transfer the chicken to a cutting board or serving platter. Let the chicken rest for 5 minutes before slicing or serving.
Nutrition Facts
Servings 4
- Amount Per Serving
- Calories 245kcal
- % Daily Value *
- Total Fat 10g16%
- Saturated Fat 2g10%
- Cholesterol 115mg39%
- Sodium 420mg18%
- Potassium 560mg16%
- Total Carbohydrate 2g1%
- Protein 36g72%
- Calcium 20 mg
- Iron 1 mg
* Percent Daily Values are based on a 2,000 calorie diet. Your daily value may be higher or lower depending on your calorie needs.
Note
- Frozen chicken? Use 10 minutes on High Pressure and ensure pieces are separated in a single layer.
- Avoid burn notice: Always use at least 1 cup of liquid and deglaze the pot after searing.
- Make gravy: After removing chicken, whisk 1 tbsp cornstarch + 2 tbsp water into the broth and simmer until thickened.
- Storage: Keep in the fridge up to 4 days or freeze for up to 3 months. Reheat with a splash of broth to retain moisture.