
Let’s talk about a little magic you can make with that jar of sourdough discard sitting in your fridge.
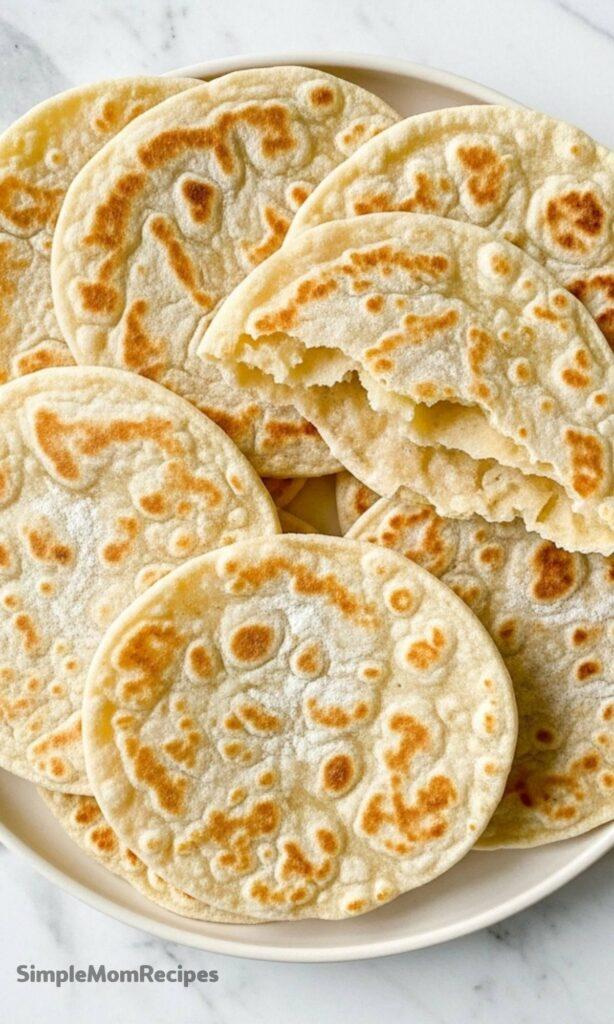
These tortillas are a game-changer, incredibly soft and packed with a flavor so good, the store-bought kind just won’t cut it anymore.
The Joy of a Zero-Waste Kitchen
There’s a special kind of satisfaction in using something that might have been poured down the drain.
Your sourdough discard isn’t waste; it’s a secret ingredient waiting to transform simple flour and water into something with real character.
It adds a subtle, tangy depth that makes these tortillas interesting, not just a blank wrapper for your fillings.
You’re not just baking, you’re giving that starter a delicious second life, and honestly, that feels pretty great.
Ingredients Needed for the Recipe
Just five simple things stand between you and a stack of warm, homemade tortillas. Here’s what you’ll need:
- All-Purpose Flour: The reliable foundation that gives our tortillas their structure and that perfect, tender chew.
- Salt: Absolutely crucial. This isn’t just for a hint of savoriness; it makes the flavor of the wheat and the sourdough truly sing.
- Butter (Softened): Use salted butter for the best flavor. It weaves richness into the dough and creates a wonderfully pliable texture that’s easy to roll.
- Sourdough Discard: The star of the show! This adds a lovely complexity and, believe it or not, makes the final tortilla incredibly soft.
- Warm Water: The glue that brings it all together. Warm water helps blend the butter evenly and coaxes the flour into a smooth, cooperative dough.
How to make Homemade Sourdough Discard Tortillas?
The process is straightforward, a gentle rhythm of mixing, resting, and rolling. Let’s walk through it step-by-step.

Step 1 – Bring the Dough Together
In a large bowl, whisk your flour and salt together. Then, add the softened butter.
Use your fingers, a fork, or a pastry cutter to work it in until the mixture looks like coarse crumbs, with little butter pieces throughout.
Step 2 – Form and Rest the Dough
Pour in the sourdough discard and warm water, then stir until a shaggy ball forms. Turn it onto a floured surface and knead for just a minute or two, until smooth.
Divide this dough into 16 equal pieces for taco-size tortillas, roll them into balls, and cover them with a damp towel.
Step 3 – The Patient Rest
Now, walk away for at least 30 minutes. This rest is non-negotiable, I promise.
It lets the gluten relax completely, so when you go to roll, the dough won’t fight you and stubbornly snap back into a small ball.
Step 4 – Roll Them Thin
Lightly flour your surface and rolling pin. Take one dough ball and flatten it slightly with your hand.
Roll from the center outwards, turning the dough frequently, until it’s paper-thin and almost see-through. Don’t worry about a perfect circle, rustic is beautiful here.
Step 5 – Cook to Bubbly Perfection
Heat a dry cast-iron skillet or griddle over medium heat. No oil is needed. Carefully lay your rolled tortilla in the hot pan.
Cook for about 30 seconds, until you see large bubbles form and the underside has toasted golden spots.
Step 6 – Flip and Finish
Gently flip the tortilla with a spatula. It should cook for another 20-30 seconds on the second side.
Transfer the cooked tortilla to a plate and cover it with a clean kitchen towel to keep the whole stack warm and soft.
Mastering the Art of Rolling
This is the part that can feel meditative, or maybe a tiny bit tedious the first time. Put on some music, though, and settle in.
The key is to keep both the dough and your rolling pin lightly floured to prevent any sticking, which can lead to tearing.
Don’t try to force it thin in two big rolls. Use gentle, even pressure, and give the dough a quarter-turn after every few rolls.
If it starts resisting, flip it over completely. You’ll get a feel for it, and each tortilla will be easier than the last.
Tips
- For a deeper flavor and potentially easier digestion, you can let the dough balls rest, covered, in the fridge for 12-24 hours. Just let them warm up a bit at room temperature before rolling.
- Resist the urge to crank the heat to cook them faster. Medium heat allows the interior to cook through before the outside burns, giving you a flexible tortilla, not a cracker.
- As you roll, you can stack the uncooked tortillas with a small square of parchment paper between each one. This lets you roll the entire batch first, then cook in a continuous, efficient flow.
Your Tortilla, Your Way
While all-purpose flour is my go-to for the ideal texture, bread flour can work in a pinch for a slightly chewier result.
And if you need a dairy-free version, try using refined coconut oil in place of the butter for a similar effect.
The beauty of this recipe is its simplicity and adaptability. Once you master the basic method, the possibilities open up.
Maybe you’ll add a sprinkle of garlic powder or dried herbs into the flour next time, turning them into a flavorful wrap for sandwiches.
Storing Your Homemade Bounty
Let the cooked tortillas cool completely, then store them in an airtight bag at room temperature for up to 5 days.
They reheat beautifully over a gas flame, in a dry skillet, or even wrapped in foil in a warm oven.
To freeze, place parchment paper between each tortilla and seal them in a freezer bag. They’ll keep for months.
The best part? You can take a frozen tortilla straight to a hot skillet—no thawing required for a quick, fresh meal anytime.


Homemade Sourdough Discard Tortillas Recipe
Description
Incredibly flavorful and soft sourdough discard tortillas made with just 5 simple ingredients! Healthier and more delicious than anything you'll find in the store. Plus, make a big batch and store them in the freezer for fresh, homemade tortillas anytime—no thawing necessary! Even my picky toddler can't get enough of them!
ingredients
Instructions
-
Mix together the flour and salt in a large bowl. Work the softened butter into the flour mixture using a dough hook, fork, or pastry blender until it resembles pea-sized crumbs.
-
Add the sourdough discard and warm water. Mix until a shaggy dough begins to form.
-
Turn the dough out onto a lightly floured surface and knead for 2–3 minutes until smooth. Add a bit more flour if sticky.
-
Divide the dough into 16 equal pieces (or 8–10 for burrito size). Roll each into a ball.
-
Cover the dough balls with a damp kitchen towel and let rest for 30 minutes (or up to 3 hours). Optional: Refrigerate for 12–24 hours for a long ferment—bring to room temp before rolling.
-
On a lightly floured surface, roll each ball into a paper-thin circle (~9 inches). Add flour as needed, flip and rotate the dough to prevent sticking and achieve even thinness.
-
Heat a cast iron skillet or griddle over medium heat. Cook each tortilla for about 30 seconds per side, until bubbles form and light golden spots appear.
-
Stack cooked tortillas on a plate and cover with a clean kitchen towel to keep them soft and warm.
Nutrition Facts
Servings 16
- Amount Per Serving
- Calories 105kcal
- % Daily Value *
- Total Fat 5g8%
- Saturated Fat 3g15%
- Cholesterol 10mg4%
- Sodium 180mg8%
- Potassium 35mg1%
- Total Carbohydrate 13g5%
- Dietary Fiber 0.5g2%
- Protein 2g4%
- Calcium 15 mg
- Iron 0.7 mg
* Percent Daily Values are based on a 2,000 calorie diet. Your daily value may be higher or lower depending on your calorie needs.
Note
- Have patience when rolling: Achieving paper-thin tortillas takes practice. Flour as needed and flip/rotate the dough to prevent sticking.
- Burrito-size option: Divide into 8–10 larger balls and use a 12-inch skillet.
- Storage: Keep at room temperature in an airtight container for up to 5 days.
- Freezing: Layer with parchment paper in a freezer bag for up to 3 months—no need to thaw before reheating.
- Reheating tips: Warm over a gas flame, in a skillet, or bake wrapped in foil at 350°F for 10–15 minutes.