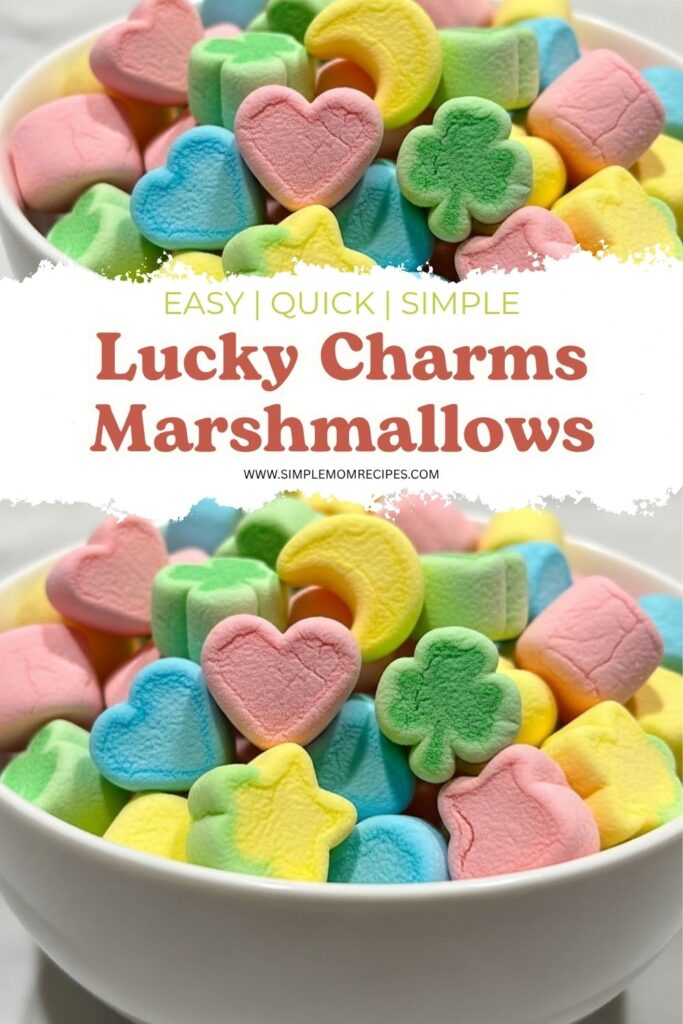
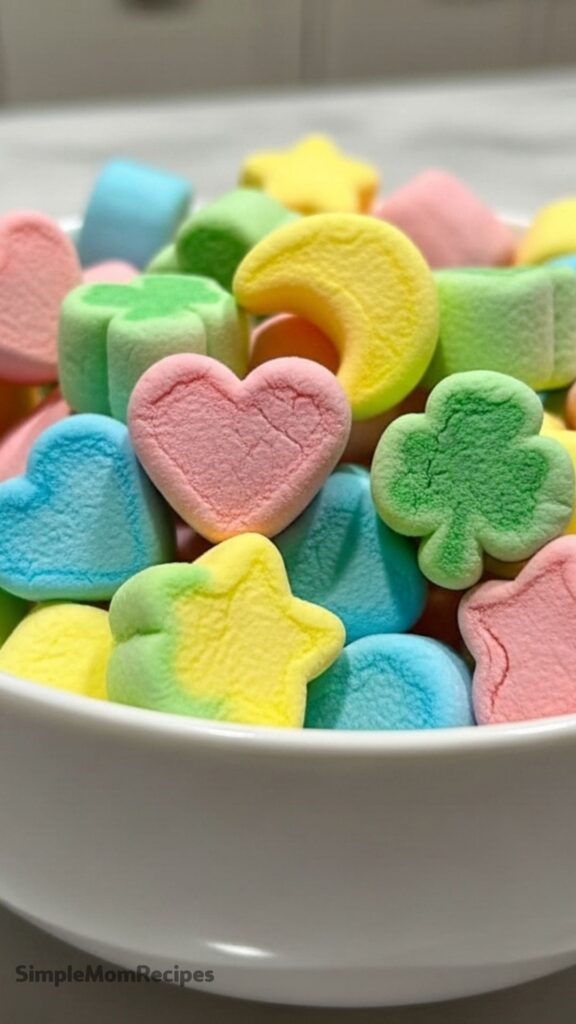
Homemade Lucky Charms marshmallows that turn crisp, colorful, and nostalgic with simple ingredients and real steps you can actually follow.
A small kitchen project that turned into a full obsession
I didn’t plan to get this into homemade cereal toppings, but here I am. It started with wanting those crunchy little marshmallows without all the extra stuff I couldn’t pronounce. Next thing I knew, I had trays of tiny pastel shapes drying on my counter and checking them every twenty minutes like they were cookies.
What surprised me most was how close they got to the real thing. That airy crunch, that slight melt when they hit milk. I messed up my first batch though. Way too soft. I rushed the drying step and paid for it later when everything turned sticky overnight.
Now I take my time. And honestly, making these feels kind of relaxing in a weird way. It’s repetitive but not boring. Plus, I get to pick my own colors, which is way more fun than I expected.
Ingredients I Used for the Recipe
- 170 g egg whites – this is the base, gives structure and that fluffy marshmallow texture
- 340 g granulated sugar – adds sweetness and helps create that glossy, stable fluff
- 1/8 tsp cream of tartar – keeps the egg whites stable so they don’t collapse
- 1 tsp vanilla extract – gives that soft, sweet flavor that makes it taste like actual marshmallows
- Food coloring – for the classic bright shapes, I usually go for softer tones but that’s just me
How to make Homemade Lucky Charms?
Step 1 – Whip the base
I start by adding the egg whites to a bowl and whipping them on high. After about 30 seconds, I toss in the cream of tartar. This part needs a little patience. I keep going until I get medium peaks. Not too stiff, not runny. When I flip the whisk, the peaks should hold but still look smooth.
Step 2 – Add sugar slowly
This part matters more than I thought. I add the sugar slowly while the mixer is running on high. If I dump it all at once, the texture gets weird and grainy. When it’s done right, the mixture turns glossy and kind of shiny. It only takes about a minute but I always watch it closely.
Step 3 – Mix in flavor
Now I pour in the vanilla extract. Just a quick mix. I don’t overdo it here because the texture can loosen if I keep mixing too long. Learned that the hard way.
Step 4 – Divide and color
I split the marshmallow fluff into small bowls. This is where it gets fun. I add different food colors to each bowl. Sometimes I try to match the classic Lucky Charms colors, sometimes I just go with whatever looks nice. No rules here.
Step 5 – Pipe the shapes
I transfer each color into piping bags. If I don’t feel like washing extra tools, I just use sandwich bags and snip the corner. Then I pipe little shapes onto a parchment-lined baking sheet. Hearts, stars, random blobs that I pretend are clovers. They don’t have to be perfect. Mine never are.
Step 6 – Bake low and slow
I preheat the oven to 200°F and let them bake for about 2 to 3 hours. It’s more like drying than baking. I check them around the 2-hour mark. They should feel dry, not sticky. If they’re still soft, I give them more time.
Step 7 – Let them finish on the counter
This is the step I used to skip, and it shows. I leave them out for another 2 to 3 hours so they fully dry. It makes a huge difference. They go from slightly chewy to that crisp texture that actually holds up in milk.
Step 8 – Store them properly
Once they’re completely dry, I store them in an airtight container. If there’s even a little moisture, they’ll clump together. I keep them at room temp and they last longer than I expected.
What they actually taste like once you get it right
The first time I nailed the texture, I just stood there eating them straight off the tray. No cereal, nothing. They’re light, crunchy, and slightly melt when you bite into them. Not overly sweet either, which I appreciate.
They don’t taste exactly like store-bought, but close enough that it scratches that same nostalgic itch. Maybe even better because they don’t have that artificial aftertaste. It’s a cleaner sweetness.
I started tossing them into random things. Yogurt, cookies, even just a handful on top of peanut butter toast once. That one was accidental but not bad at all.
Tips
I know it’s tempting. I’ve done it. But if they’re not fully dry, they turn sticky later. It’s not worth it. Let them sit.
On humid days, they take longer to dry. Sometimes a lot longer. I’ve had batches that needed an extra hour in the oven. Now I just adjust instead of forcing it.
Even a little grease messes up the egg whites. If they won’t whip properly, this is usually why. I wipe everything down before starting.
If I pipe them too big, the inside stays soft longer. Smaller shapes dry more evenly and end up closer to that classic crunch.
I used to squeeze too hard and ended up with weird shapes that spread out. Now I go slower and lighter. It’s not perfect, but better.
I keep a small silica packet in the container sometimes. It helps keep moisture out. Not required, but it saved a batch once so I keep doing it.
Little things I figured out along the way
I didn’t expect this to become something I’d repeat, but it kind of stuck. There’s something satisfying about making something this simple turn into those tiny colorful pieces I used to pick out of cereal as a kid.
One thing I noticed is how forgiving the process is once you get the basics down. Even when my shapes look off or the colors bleed a little, they still taste good. That takes some pressure off.
I also realized I don’t need to copy the exact shapes. Half the time I just pipe random swirls and dots. They still end up crunchy and fun to eat. No one’s grading them.
And yeah, I’ve eaten way too many straight from the container. No regrets there. If anything, I kind of like them better on their own than in cereal.
At this point, I keep thinking about trying different flavors. Maybe almond extract next time. Or something citrusy. I haven’t tested that yet, but it’s definitely on my list.
If you try this, just don’t stress about making them look perfect. Focus on getting that texture right. Once you hear that little crunch when you bite in, you’ll know you got it.
Homemade Lucky Charms Marshmallows Recipe
Description
These homemade Lucky Charms style marshmallows have the classic crispy texture but use simple ingredients. Perfect for cereal, cookies, or snacking, they are fun to make and customizable with colorful shapes.
ingredients
Instructions
- Preheat oven to 95°C (200°F) and line baking tray with parchment paper.
- Whip egg whites on high speed for 30 seconds, add cream of tartar and whip until medium peaks form.
- Slowly add sugar while mixing on high speed until mixture becomes glossy.
- Add vanilla extract and mix until combined.
- Divide mixture into bowls and mix in food coloring to create different colors.
- Transfer mixture to piping bags and pipe small shapes like hearts, stars, moons, and clovers.
- Bake for 2–3 hours until marshmallows are dry and crisp.
- Let marshmallows rest at room temperature for 2–3 hours until fully dry.
- Store in airtight container.
Nutrition Facts
Servings 12
- Amount Per Serving
- Calories 120kcal
- % Daily Value *
- Total Fat 0 gg0%
- Saturated Fat 0 gg0%
- Trans Fat 0 gg
- Cholesterol 0 mgmg0%
- Sodium 20 mgmg1%
- Potassium 30 mgmg1%
- Total Carbohydrate 29 gg10%
- Dietary Fiber 0 gg0%
- Sugars 28 gg
- Protein 2 gg4%
- Calcium 1% mg
- Iron 1% mg
* Percent Daily Values are based on a 2,000 calorie diet. Your daily value may be higher or lower depending on your calorie needs.
Note
- Use gel food coloring for vibrant pastel colors.
- Pipe small shapes for best crisp texture.
- Dry completely before storing to avoid stickiness.
- Perfect for cereal, cookies, or dessert toppings.
