Welcome to grilled cheese 101, except not the neat version. The version where the pan gets a little too hot, the cheese spills out the side, and I still eat it standing at the stove because I can’t wait.
There’s something funny about how such a simple thing can still trip me up. Bread, cheese, heat. That’s it. And yet, I’ve made soggy ones. Dry ones. Ones where the cheese refused to melt like it was protesting. But after enough of those small mess-ups, I figured out what actually matters.
And it’s not perfection. It’s paying attention in tiny moments. The sound of the sizzle. The smell right before it burns. The way the bread feels when you press it lightly.
A quick moment before cooking started
I didn’t even plan to make this. I was just hungry in that annoying way where nothing sounds right. I opened the fridge, stared too long, closed it, opened it again like something new would magically appear.
Then I saw the cheese. Two different kinds, half used. Good enough.
Bread was slightly dry. Not stale, just… tired. Which actually works better than fresh sometimes. Fresh bread can go floppy. This one had a bit of structure left in it.
I almost skipped the mustard. Then added it anyway. I do that a lot. Doubt something, add it, and then later think yeah okay that was the right call.
Ingredients I Used for the Recipe
- 2 slices sourdough bread – slightly dry helps it crisp better
- 1 tablespoon mayonnaise – for that golden crust, not for flavor really
- 1 teaspoon Dijon mustard – just enough to add a quiet tang
- 1/2 cup grated sharp cheddar – melts well and gives that familiar bite
- 1/2 cup grated Gruyère – softer melt, makes everything stretchier
- 1 teaspoon butter – for the pan, adds flavor and helps browning
Something that almost ruined it
Heat. It’s always the heat.
I turned the stove to medium because I was impatient. Then I hovered. Then I forgot about it for maybe 30 seconds too long while checking my phone.
That’s all it takes.
The pan got hotter than I thought, and when I placed the sandwich down, it started browning fast. Too fast. That’s when people panic and flip too early or press too hard.
I almost did both.
Instead, I lowered the heat and covered the pan. That little fix saved it. The inside caught up while the outside slowed down.
Still a little darker than ideal. But honestly, that edge? Kinda great.
How to make Grilled Cheese Sandwich?
Step 1 – Prep the bread without overthinking it
I laid the bread down and spread a thin layer of mayonnaise on one side of each slice. Not thick. I’ve made that mistake. Too much and it tastes heavy.
Then I flipped one slice and added Dijon mustard on the inside. I hesitated here, like I always do, but it makes a difference. Not obvious. Just enough to keep things from tasting flat.
Step 2 – Pile the cheese a little higher than feels reasonable
I used grated cheese instead of slices. It melts better, even if it looks messy at first.
I added cheddar first, then Gruyère on top. A small mound, not neatly arranged. Some of it fell off the sides. I pushed it back in with my fingers. No big deal.
Then I topped it with the second slice, mayo side facing out.
Step 3 – Heat the pan and try not to rush it
I added butter to the pan and let it melt slowly. This is where I usually mess up by rushing.
Medium-low heat is the sweet spot. I say that, but I still sometimes go higher. This time I tried to behave.
Once the butter was melted and slightly bubbling, I placed the sandwich in.
Step 4 – Cover it and let it do its thing
I covered the pan. That’s the trick I ignored for too long.
It traps heat so the cheese melts without burning the bread. I let it cook for about 2 to 3 minutes. I didn’t touch it much, just peeked once.
The smell changed right at the end. That warm, toasty smell that says okay, flip me now.
Step 5 – Flip carefully and adjust if needed
I flipped it. Not perfectly. One corner slid a bit and cheese tried to escape.
I pushed it back in. Lowered the heat just a little because the first side browned faster than expected.
Covered it again. Another couple minutes. I pressed gently with the spatula, not smashing it, just checking.
Step 6 – Take it off before you think it’s ready
This sounds weird, but I’ve learned this the hard way.
If you wait until it looks fully perfect in the pan, it’s usually a bit overdone by the time you eat it.
I pulled it off when it looked just slightly under what I wanted. The heat keeps working for a minute.
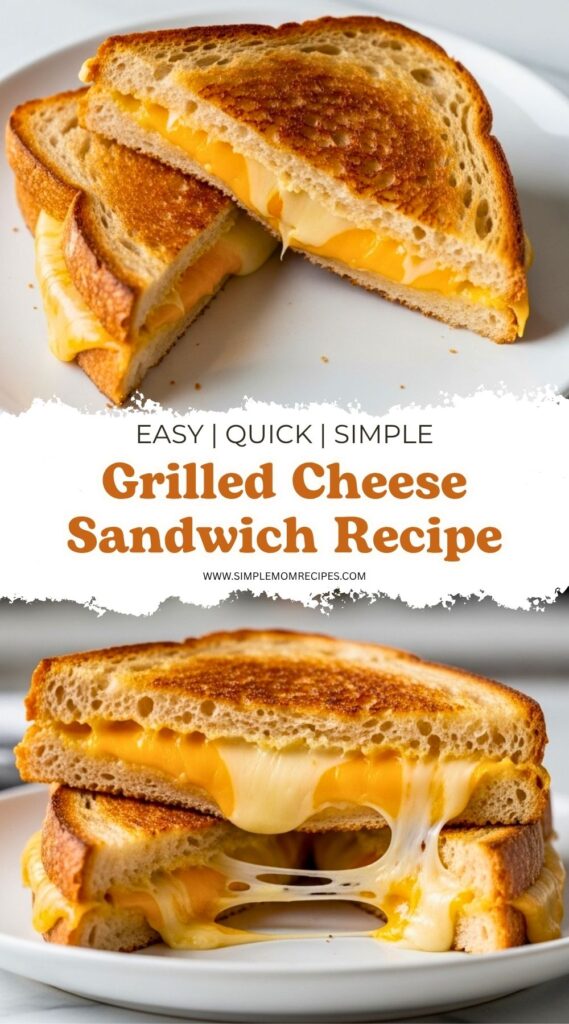
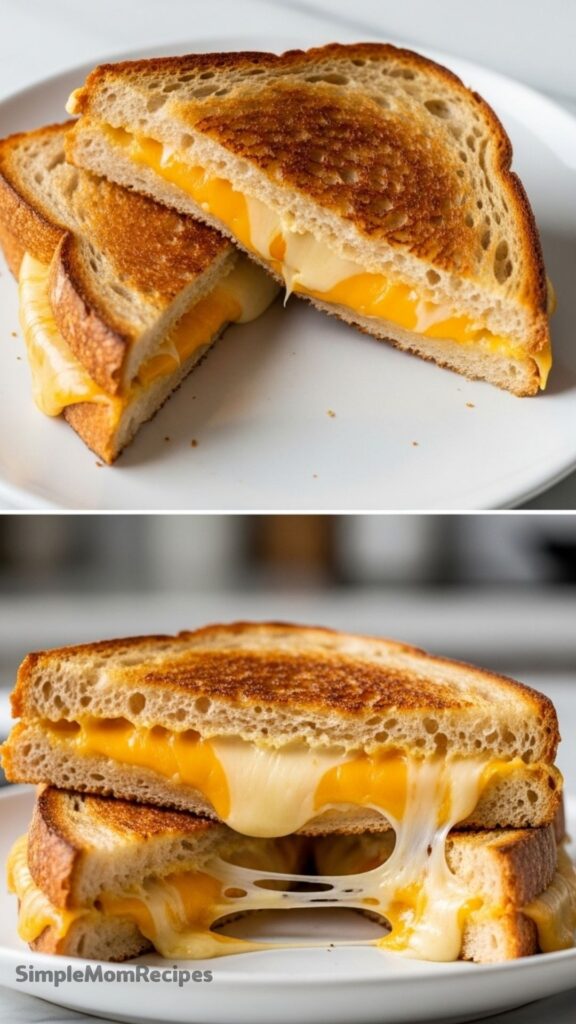
Then I cut it diagonally. Always diagonally. It just tastes better that way.
Texture, smell, and that first bite
The outside had that crisp sound when I pressed it lightly. Not hard. Just enough to hear it. That’s how I check now instead of staring at it.
The smell was buttery but not greasy. Slight tang from the sourdough and mustard. Nothing overpowering.
Then the bite.
The cheese stretched, but not in a dramatic, over-the-top way. Just enough to feel right. The cheddar gave that sharpness, and the Gruyère made it smoother.
The slightly darker edge I worried about earlier? That turned into the best part. A little crunchier, a little deeper in flavor.
I ate half of it standing there. Didn’t even grab a plate at first.
Tips
- Keep the heat lower than you think – burning happens fast, melting takes time
- Grated cheese melts better than slices – even if it feels messier
- Use mayo on the outside – it crisps more evenly than butter alone
- Cover the pan – it fixes most melting problems instantly
- Don’t overload with fillings – too much and the center won’t heat properly
- Pull it off the pan slightly early – it keeps cooking for a bit
- Dry-ish bread works better than super fresh bread
A small habit I keep doing
I always make one extra half.
Not a full second sandwich. Just an extra slice folded over with whatever cheese is left. It cooks faster, usually gets crispier, and ends up being the one I snack on while the “real” one rests.
Also, I rarely clean the pan right away. I leave it there, still warm, with those little crispy cheese bits stuck to it. Sometimes I go back and scrape them off and eat them. Not proud of that. But also not stopping.
Grilled cheese isn’t fancy. It’s not supposed to be. It’s just one of those things that somehow feels better than it should.
Even when it’s slightly burned. Maybe especially then.
Grilled Cheese Sandwich Recipe
Description
Master the art of the perfect grilled cheese with this simple yet elevated recipe. Featuring crisp, golden sourdough bread brushed with mayonnaise for that irresistible crunch, and a luxurious blend of sharp cheddar and nutty Gruyère cheese for the ultimate melt.
Ingredients
The Sandwich
Instructions
Prepare the Bread
Place the two slices of bread on a clean surface. Spread a thin, even layer of mayonnaise on one side of each slice. This will be the exterior that touches the pan.Mayo creates a crispier, more evenly browned crust than butter alone.Assemble the Sandwich
Flip one slice of bread over so the un-mayoed side is facing up. Spread a thin layer of Dijon mustard on this side. Pile the grated cheddar and Gruyère cheeses generously on top. Place the second slice of bread on top, mayo-side facing out.Grated cheese melts more evenly than slices.Heat the Pan
Place a cast-iron skillet or non-stick pan over medium-low heat. Add the butter and let it melt, coating the bottom of the pan.Keep heat moderate to prevent burning before the cheese melts.Cook Covered
Place the sandwich in the pan. Cover with a lid to trap steam, which helps melt the cheese. Cook for 2-3 minutes until the bottom is deep golden brown.Covering is the secret to a gooey center.Flip and Finish
Carefully flip the sandwich. Cover again and cook for another 1-3 minutes until the second side is golden and the cheese is fully melted. If browning too fast, reduce heat to low.Serve
Remove from pan, slice diagonally (for better aesthetics!), and serve immediately while hot and gooey.Pairs perfectly with tomato soup.
Nutrition Facts
Servings 1
- Amount Per Serving
- Calories 420kcal
- % Daily Value *
- Total Fat 26g40%
- Saturated Fat 14g70%
- Trans Fat 0.5g
- Cholesterol 75mg25%
- Sodium 850mg36%
- Potassium 150mg5%
- Total Carbohydrate 28g10%
- Dietary Fiber 1g4%
- Sugars 3g
- Protein 18g36%
* Percent Daily Values are based on a 2,000 calorie diet. Your daily value may be higher or lower depending on your calorie needs.
Note
For a variation, try adding caramelized onions, apple slices, or swapping the mustard for pesto.
