I didn’t grow up calling these “gold coin” cookies, but the first time I made them, that name just made sense. They’re small, round, lightly golden, and honestly feel a little fancy even though the ingredients are super basic. The kind of cookie you make when you want something sweet without turning your kitchen upside down.
What I love most is how simple they are. No chilling dough. No complicated steps. Just mix, pipe, bake, done. And somehow they still come out tasting like something from a bakery window.
I started making these on a random afternoon when I didn’t want to deal with rolling dough. Now they’ve become my go-to when I need a quick batch for guests, tea time, or honestly just when I want my house to smell like vanilla and butter.
Why These Little Cookies Became a Regular Thing in My Kitchen
There’s something really comforting about small cookies. They bake fast, they cool fast, and you can grab one every time you walk past the tray without committing to a full dessert situation.
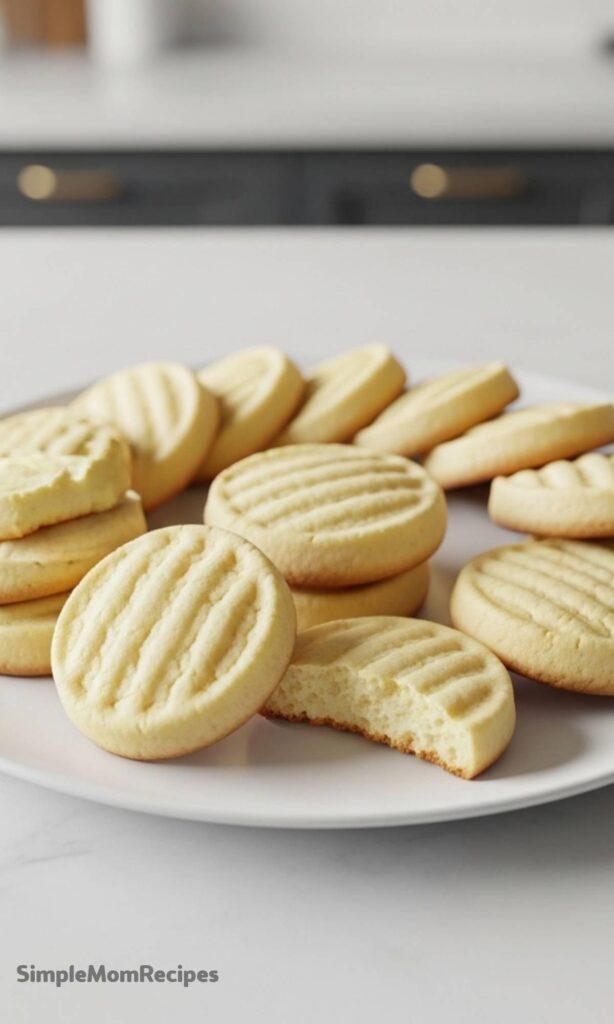
The texture is what hooked me. Slightly crisp on the edges, soft in the center, and light. Not heavy like some butter cookies. These feel airy, almost delicate, but still satisfying.
I also like that they don’t require perfection. The shapes don’t have to match. Some come out bigger, some smaller. That unevenness actually makes them feel more homemade, which I prefer.
Ingredients I Used for the Recipe
2 eggs - These give the cookies structure and help create that soft, sponge-like bite.
1/2 cup sugar - Just enough sweetness without making them overly sugary.
2 teaspoons melted ghee or butter - Adds richness and that warm bakery flavor. I switch between both depending on what I have.
1 cup maida (all-purpose flour) - The base that holds everything together and keeps the cookies light.
1 teaspoon baking powder - Helps the cookies rise slightly so they don’t feel dense.
1/2 teaspoon baking soda - Works with the baking powder to create a soft texture.
A few drops yellow food color - Gives that classic golden look. Totally optional, but I like the cheerful color.
Vanilla essence (about 1 teaspoon) - The main flavor. Makes the whole kitchen smell incredible.
How to Make These Cookies?
Step 1 - Whisk the Eggs
I start by beating the eggs really well. Not just a quick stir. I whisk until they look slightly frothy. This helps give the cookies that light texture later.
If I rush this step, the cookies turn out flatter. Learned that the hard way once.
Step 2 - Add Sugar and Flavor
Next, I mix in the sugar, vanilla essence, and the melted ghee or butter. Then I add a few drops of yellow color.
The batter already starts smelling like a bakery at this point. That’s usually when someone walks into the kitchen asking what I’m making.
Step 3 - Mix in the Dry Ingredients
I add the maida, baking powder, and baking soda together. Then gently fold everything until it forms a smooth batter.
I don’t overmix. Once it looks combined, I stop. Overworking it makes the cookies lose that soft feel.
Step 4 - Prepare the Tray
I grease a baking tray lightly so nothing sticks. You don’t need a thick layer, just enough to prevent browning on the bottom.
Then I transfer the batter into a piping bag. If I don’t feel like using a nozzle, I just snip the tip. Works fine.
Step 5 - Pipe the Coin Shapes
I pipe small round portions onto the tray, leaving a little space between each one. They spread slightly while baking.
They don’t have to be perfect circles. Mine never are. They still bake beautifully.
Step 6 - Bake Until Light Golden
I bake them at 180°C (350°F) for about 25 to 30 minutes.
Around the 20-minute mark, I start checking because every oven behaves differently. I look for lightly golden edges, not dark brown.
Step 7 - Let Them Cool Before Touching
This part takes patience. Fresh out of the oven they’re very soft. If I try to move them too soon, they break.
After 10 minutes, they firm up just enough to lift easily.
Tips
Don’t Rush the Mixing
Beating the eggs properly makes a difference. It’s a small step, but it’s what gives the cookies their lightness.
Use Melted Butter That Isn’t Hot
If the butter is too hot, it can mess with the batter texture. I let it cool for a minute before adding.
Pipe Small Portions
These cookies look best when they’re bite-sized. Larger ones don’t get that same delicate feel.
Watch the Oven Closely
They go from pale to golden pretty quickly near the end. I stay nearby instead of walking away and forgetting.
Let Them Rest
Cooling is part of the baking process here. They set as they sit, so don’t skip that time.
How I Like to Serve Them (And Why They Never Last Long)
I usually make these in the late afternoon, right when everyone starts craving something sweet but not heavy. They’re perfect with tea, coffee, or honestly even plain milk.
They store well in a simple container, but in my house they rarely last more than a day. Someone always sneaks a few. Then I sneak a few. Then suddenly the batch is gone.
What I appreciate most is how unfussy they are. No decorating. No layering. No stress. Just soft vanilla cookies that feel homemade in the best way possible.
And every time I bake them, that warm vanilla smell fills the kitchen again, which is reason enough for me to keep coming back to this recipe.
Best Season:
All Seasons, Festive Season, Ramadan, Eid
Description
These delicate Gold Coin Vanilla Cookies are light, buttery, and infused with classic vanilla flavor. With a soft bakery-style texture and a hint of yellow food colour for that signature golden look, they're perfect for tea time, parties, or gifting. Easy to pipe and bake, these cookies bring a touch of elegance to any occasion.
ingredients
2large eggs (room temperature)
1/2cup granulated sugar
2tsp melted ghee or butter (cooled slightly)
1cup all-purpose flour (maida) (sifted)
1tsp baking powder
1/2tsp baking soda
2-3drops yellow food colour (optional, for golden hue)
1tsp vanilla extract (pure vanilla preferred)
Instructions
1
Preheat your oven to 180°C (350°F). Line a baking tray with parchment paper or lightly grease it.
2
In a mixing bowl, beat the eggs until frothy and well combined.
3
Add the sugar, melted ghee or butter, vanilla extract, and yellow food colour to the beaten eggs. Mix thoroughly until smooth and fully incorporated.
4
Sift in the all-purpose flour, baking powder, and baking soda. Gently fold the dry ingredients into the wet mixture until a smooth, pipeable batter forms. Avoid overmixing.
5
Transfer the batter to a piping bag fitted with a plain round nozzle. Pipe small coin-shaped cookies onto the prepared baking tray, spacing them about 1 inch apart to allow for slight spreading.
6
Bake for 25-30 minutes, or until the edges are lightly golden and the cookies are set. They should remain pale in the center for that classic bakery-style look.
7
Remove from the oven and let the cookies cool on the tray for 5 minutes before transferring to a wire rack. Enjoy warm or store in an airtight container once completely cooled.
Nutrition Facts
Servings 10
Amount Per Serving
Calories107kcal
% Daily Value *
Total Fat2gg4%
Saturated Fat0.8gg4%
Trans Fat0gg
Cholesterol37mgmg13%
Sodium95mgmg4%
Potassium50mgmg2%
Total Carbohydrate20gg7%
Dietary Fiber0.3gg2%
Sugars10gg
Protein2.5gg5%
Calcium 20mg mg
Iron 0.8mg mg
* Percent Daily Values are based on a 2,000 calorie diet. Your daily value may be higher or lower depending on your calorie needs.
Note
Perfect piping consistency: If the batter feels too thick, add a teaspoon of milk; if too thin, add a little more flour.
No piping bag? Use a zip-top bag with a small corner snipped off for easy shaping.
Storage tip: Keep cookies in an airtight container at room temperature for up to 5 days, or freeze for up to 1 month.
Flavor twist: Add a pinch of cardamom powder or lemon zest for an aromatic variation.
I’m a London-based food writer, recipe developer, and home cook who has been passionate about cooking for over 15 years. What started as a way to recreate my mother’s traditional dishes turned into a lifelong love for experimenting with flavors, writing about food, and helping others feel more confident in the kitchen.