I’ve cooked green beans a hundred different ways over the years, and most of them were… fine. Some were too soft, some tasted like nothing, and a few honestly just felt like I was forcing myself to eat vegetables.
But this garlic sautéed version? This is the one I make on repeat. It’s quick, it smells amazing halfway through, and somehow it turns a basic bag of green beans into something I actually crave.
The first time I made it, I overcooked the garlic and nearly ruined the whole thing. That bitter burnt smell hit me fast. I remember standing there thinking, wow, I messed up something this simple. But once I figured out the timing, everything clicked.
Now I make this in about 15 minutes without thinking too hard about it. It’s one of those side dishes that quietly steals attention from whatever else is on the plate.
Ingredients I Used for the Recipe
- 1 pound fresh green beans – I always go for bright green ones that snap easily, that’s how I know they’ll cook up crisp and tender.
- 1 teaspoon olive oil – just enough to get the beans going in the pan and help them blister slightly.
- 1/4 teaspoon fine salt – I add this early so the beans start building flavor right away.
- 1/4 cup water or stock – this is what softens the beans after that initial sauté, kind of a quick steam.
- 1 tablespoon butter – this melts into everything at the end and gives that rich, slightly glossy coating.
- 3 garlic cloves, minced – the main flavor here, I like it strong but not overpowering.
- 1/2 teaspoon lemon zest – adds a fresh brightness that keeps the dish from feeling heavy.
- 1/4 teaspoon black pepper – just a little heat and depth.
- Lemon wedges – I squeeze some on top right before serving, it makes a difference.
How to make Garlic Sautéed Green Beans?

Step 1 – Heat the pan and start the beans
I add the olive oil to a wide skillet and let it heat up for a minute. Then I toss in the green beans with the salt.
I don’t touch them right away. I let them sit for a bit so they get those slightly blistered spots. Then I toss them around every couple minutes so they cook evenly.
Step 2 – Let them blister a little
This part matters more than I thought it would. I used to rush it, but giving the beans a few minutes to get those light charred spots adds so much flavor.
They shouldn’t be fully cooked yet. Just a little wrinkled and starting to soften.
Step 3 – Add liquid and cover
I pour in the water or stock and quickly cover the pan. The steam does the rest of the cooking.
It usually takes about 2 minutes. I check one bean, and if it’s tender but still has a slight bite, I know it’s ready.
Step 4 – Let the extra moisture cook off
I remove the lid and lower the heat slightly. Then I just let the remaining liquid evaporate.
This step keeps the beans from turning soggy. I learned that the hard way when I skipped it once and ended up with something closer to green bean soup.
Step 5 – Add garlic, butter, and finish
This is my favorite part. I add the butter and garlic together so the garlic cooks gently as the butter melts.
I stir everything for about a minute, just until the garlic smells really good but not browned. Then I add lemon zest and black pepper.
Right before serving, I squeeze a bit of lemon juice over the top. It wakes everything up.
Why this method actually works for me
I used to think sautéing vegetables just meant tossing them in a pan and hoping for the best. That’s probably why mine were always uneven, half overcooked and half raw.
Breaking it into these small stages changed everything. First the blister, then the steam, then the finish. It sounds simple, but each step fixes a different problem.
The blister adds flavor. The steam makes them tender without drying them out. And finishing with butter and garlic ties it all together in a way that feels intentional.
Also, I like that the beans still have some bite. I don’t want them mushy. I’ve had those at too many family dinners growing up, and I just can’t go back to that texture.
How I usually serve these without overthinking it
Most of the time, I make these as a last-minute side. While something else is cooking, I’ll throw this together quickly and it just fits with everything.
I’ve paired it with roasted chicken, simple pan-seared fish, even just rice and eggs on lazy nights. It never feels out of place.
There was one night I made these and ended up eating half the pan straight from the skillet before dinner even started. That garlic butter situation is hard to resist.
If I’m trying to make things feel a little nicer, I’ll add extra lemon and maybe a bit more pepper. It suddenly feels like something I’d order at a restaurant.
Tips I learned after messing this up a few times
I didn’t get this perfect right away. A few small things made a big difference once I paid attention.
- Don’t overcrowd the pan – if the beans are piled up, they steam instead of blistering, and you lose that flavor.
- Watch the garlic closely – it goes from perfect to burnt faster than you think.
- Use fresh beans if you can – frozen ones work, but they don’t get that same texture.
- Don’t skip the lemon – even a little bit balances the richness from the butter.
- Taste before serving – sometimes I add a tiny pinch more salt at the end, depending on how it turned out.
One thing I didn’t expect was how much better these got once I stopped rushing. It’s still a fast recipe, but giving each step its moment makes a difference you can actually taste.
And yeah, it’s just green beans. But when they’re cooked like this, they don’t feel like an afterthought anymore. They feel like something I actually wanted to make.

Garlic Sautéed Green Beans Recipe
Description
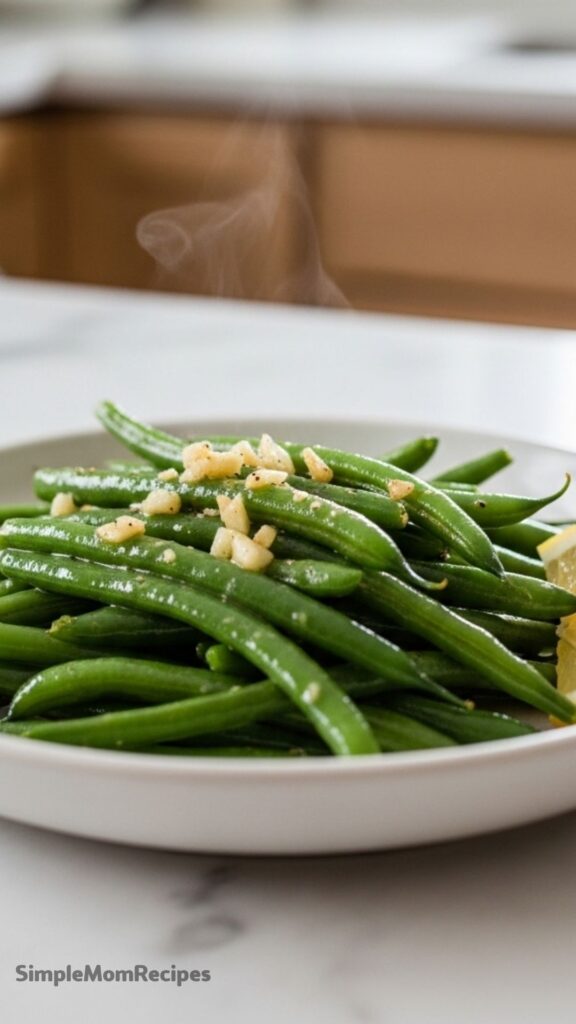
These easy sautéed green beans are perfectly tender and taste incredible thanks to the garlic butter stirred in at the end. You can make this flavorful side dish in just 15 minutes! My favorite way to cook fresh green beans is in a skillet on the stovetop—quick, easy, and seriously delicious with that incredible garlic butter finish.
ingredients
Instructions
-
Add olive oil to a wide skillet over medium-high heat. Add the green beans and 1/4 teaspoon of salt.
-
Cook for about 5 minutes until lightly blistered, tossing the beans around the pan so they cook evenly.
-
Pour in water (or stock). Cover the skillet (or use foil if needed) and cook for 2 minutes to steam the beans until tender.
-
Uncover, reduce heat to medium-low, and cook until the remaining liquid evaporates.
-
Stir in the butter, minced garlic, lemon zest, and black pepper. Cook for another minute, stirring constantly to toast the garlic without burning.
-
Serve immediately with lemon wedges on the side for a bright, fresh finish.
Nutrition Facts
Servings 4
- Amount Per Serving
- Calories 74kcal
- % Daily Value *
- Total Fat 4.3gg7%
- Saturated Fat 2gg10%
- Trans Fat 0gg
- Cholesterol 7.6mgmg3%
- Sodium 153mgmg7%
- Total Carbohydrate 8.8gg3%
- Dietary Fiber 3.2gg13%
- Sugars 3.7gg
- Protein 2.3gg5%
* Percent Daily Values are based on a 2,000 calorie diet. Your daily value may be higher or lower depending on your calorie needs.
Note
- Storing: Allow the green beans to cool, then store them in an airtight container in the fridge for 3 to 4 days. Gently reheat them in a skillet over medium heat and enjoy.
- Make it vegan: Use plant-based butter instead of dairy butter to keep this recipe completely vegan.
- Garlic tip: Add the garlic at the end and cook briefly to prevent burning and bitterness.
- Flavor variations: Swap garlic for fresh ginger, add red pepper flakes for heat, or finish with a splash of soy sauce for umami depth.
