
Let’s talk turkey, and more specifically, how to make it absolutely unforgettable.
If the thought of a dry, bland bird makes you nervous, I’m here to tell you there’s a foolproof solution, and it’s simpler than you think.
The Simple Magic of Brining
Brining is your secret weapon, a guaranteed path to a juicy, flavorful centerpiece.
It’s not a fancy trick, just a little bit of science and patience working in your favor.
Ingredients Needed for the Recipe
Gather these simple items, each playing a specific role in building flavor and moisture.
For the wet brine, you’ll need:
- Kosher Salt: The star of the show, it seasons the meat deeply and helps it retain moisture.
- Dark Brown Sugar: Balances the saltiness with a subtle, caramel-like sweetness.
- Water: The base that carries all the flavors into the turkey.
- Dried Red Pepper Flakes: Adds a gentle, warming heat that lingers in the background.
- Dried Sage & Fresh Thyme: Classic, aromatic herbs that scream Thanksgiving.
- Garlic: Infuses the brine with a savory, pungent depth you can’t beat.
For the dry brine, the ingredient list shifts slightly, focusing on dried seasonings:
- Kosher Salt & Cracked Black Peppercorns: The essential foundation for flavor.
- Dried Oregano, Basil, and Thyme: A convenient, potent herb blend.
- Garlic Powder & Paprika: Deliver consistent flavor and a touch of color to the skin.
Picking the Perfect Turkey
This step is crucial, and it’s where a lot of folks go wrong without realizing it.
You want a plain, non-pre-treated bird—look for labels that just say “turkey,” and avoid anything calling itself “enhanced,” “basted,” or “self-basting.”
How to make Easy Turkey Brine Recipe: Perfect Moisture & Flavor?
Here’s your step-by-step guide to brining success, broken down so you can’t miss.

First, decide your path: the classic wet brine or the no-fuss dry brine.
Step 1- Choose Your Method
The wet brine involves submerging the bird in a flavored saltwater solution.
The dry brine is a simple spice rub that works its magic over time in the fridge.
Step 2- Prepare the Brine
For the Wet Brine: Combine half the water with all salt, sugar, and aromatics in a large pot.
Bring it just to a simmer, stir until everything dissolves, then let it cool completely before adding the remaining cold water.
For the Dry Brine: Simply mix all the listed dried herbs and spices together in a bowl.
That’s it, your flavorful rub is ready to go—no cooking, no waiting for things to cool.
Step 3- Apply the Brine
Wet brine method: Place your turkey in a container large enough to hold it and the liquid.
Pour the cooled brine over the top, ensuring the bird is fully submerged, then refrigerate.
Dry brine method: Set the turkey on a rack over a baking sheet.
Generously rub the seasoning mix all over the bird, using about half for the back and legs, and the rest for the breast.
Step 4- The Waiting Game
This is where the magic happens. For a wet brine, let it soak for 8 to 72 hours.
A dry brine needs a bit longer to work its way in, so plan for 24 to 72 hours in the fridge, uncovered.
Step 5- Roast & Rest
When you’re ready to cook, remove the turkey from its brine and pat the skin completely dry with paper towels.
Do not rinse it. Season with herbs and butter (not extra salt), then roast. Finally, let it rest for a full 30 minutes before carving.
Wet Brine vs. Dry Brine: Your Choice
So, which method should you pick? It really depends on your kitchen and your goals.
A wet brine is fantastic for ensuring maximum juiciness throughout, which is great for leaner birds.
It does, however, require a large container and dedicated fridge space for a heavy, liquid-filled vessel.
A dry brine is my go-to for its sheer ease—no messy liquid, no giant pot to wrestle with.
It also promotes incredibly crispy, golden skin since the turkey air-dries in the fridge.
If you’re new to this, or simply value a streamlined process, start with the dry brine.
Tips
- Keep it Cold: Always brine in the refrigerator. If using a cooler for a wet brine, pack it with ice to keep the temperature safely below 40°F.
- Timing Tip: Start 2 to 3 days before Thanksgiving. This removes stress and gives the brine ample time to work.
- Skin is In: After brining and patting dry, let the turkey sit uncovered in the fridge for a few extra hours if you can. This dries the skin for ultimate crispiness.
- Season Smartly: The brine does all the heavy salting. Afterward, focus on adding flavor with generous amounts of fresh herbs, butter, or oil.
- Save the Drippings: The pan juices from a brined turkey make exceptionally flavorful gravy, so don’t let them go to waste.
Common Brining Questions, Answered
A lot of questions pop up around brining, so let’s clear a few things up right now.
First, is it worth the effort? Honestly, yes. It transforms the turkey from the inside out.
You’re seasoning the meat itself, not just the surface, and locking in moisture that would otherwise evaporate in the oven.
Can you brine a frozen turkey? You can, and it’s a great way to thaw it safely in the refrigerator.
Just account for the extra thawing time in your overall schedule. What about rinsing?
Please, do not rinse your brined turkey. It’s unnecessary and can spread bacteria around your sink.
Just pat it thoroughly dry—you’ll be rewarded with better browning and safer cooking.
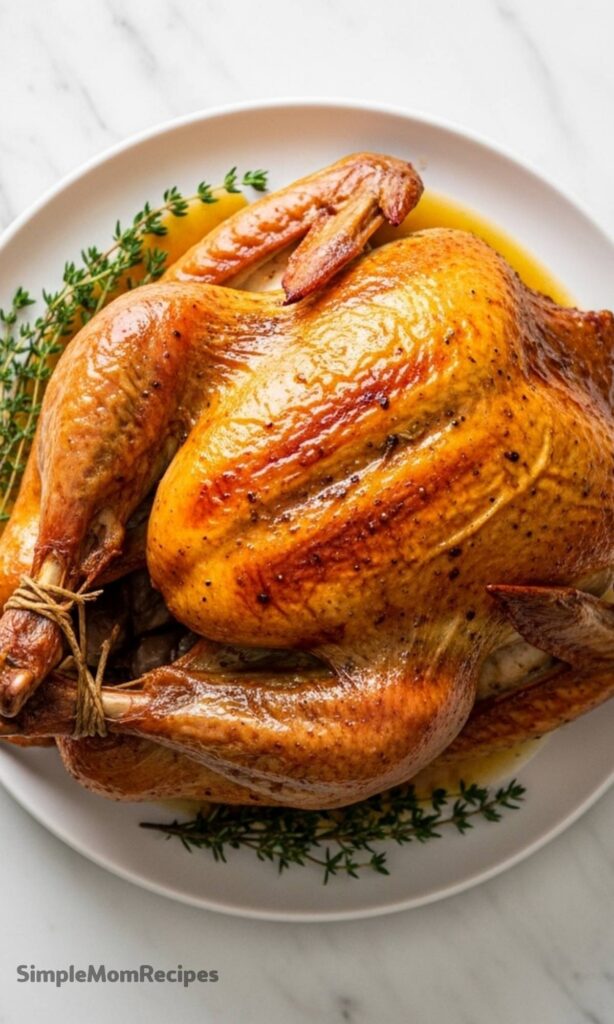
The goal is a stunning, juicy turkey that earns its place as the glorious center of your holiday table.


Easy Turkey Brine Recipe
Description
If you're looking for an easy way to add flavor and moisture to your Thanksgiving turkey, look no further than this easy turkey brine recipe. There are two options: a dry brine and a wet brine. Both methods are simple and produce delicious results. So choose the option that fits your schedule and get ready to enjoy an easy and delicious turkey on Thanksgiving Day!
ingredients
For the Wet Brine
For the Dry Brine
Instructions
For the Wet Brine
-
Combine 8 cups of the water, salt, dark brown sugar, red pepper flakes, sage, thyme, and garlic in a large pot and place over medium-high heat. Bring to a boil, lower heat, and simmer for 5 minutes until everything is evenly combined and the sugar is dissolved.
-
Remove from heat and allow to cool. Stir in the remaining 8 cups of water and cool completely.
-
Pour the brine into a container just large enough to hold the turkey comfortably. Add the turkey; adding more water if needed to cover the bird entirely.
-
Turn the bird a few times and then leave breast-side down in the water. Chill for at least 8 hours, and up to 72 hours.
-
Remove the bird from brine, discard brine, and roast as needed.
For the Dry Brine
-
Combine all the dry brine seasonings together.
-
Set a wire cooling rack on a baking sheet and place the turkey on the rack.
-
Rub ½ cup of the dry brine on the back side of the turkey, ½ cup on the legs, and 1 cup on the breast.
-
Transfer the turkey, uncovered, to the fridge and refrigerate for at least 24 hours, and up to 72 hours.
-
After the brine period, brush off all the dry brine and discard. Let the bird sit uncovered in the fridge for 4 hours if possible to dry out skin, or pat dry and proceed with roasting. Remove any excess dry brine from the bottom of the roasting pan before roasting to avoid overly salty gravy.
Nutrition Facts
Servings 10
- Amount Per Serving
- Calories 5kcal
- % Daily Value *
- Sodium 1160mg49%
- Potassium 20mg1%
- Total Carbohydrate 1g1%
- Sugars 1g
- Calcium 10 mg
- Iron 0.1 mg
* Percent Daily Values are based on a 2,000 calorie diet. Your daily value may be higher or lower depending on your calorie needs.
Note
- Wet Brine: Best for maximum juiciness and moisture. Great for older or leaner turkeys. Requires large container + fridge or cooler.
- Dry Brine: No mess, crispier skin. Requires fridge space and time uncovered. Easiest and most foolproof for beginners.
- Never rinse a brined turkey. Pat it dry and proceed with roasting.
- After brining, season with herbs and butter/oil—but skip extra salt.