There’s something just perfect about a Halloween treat that’s equal parts spooky and sweet, don’t you think? These Easy Ghost Cupcakes are exactly that—a delightful little project that brings more smiles than scares.
They’re the kind of cute that makes both kids and adults light up. And the best part, honestly, is how incredibly simple they are to pull off.
You don’t need any fancy pans or professional decorating skills. Just a little bit of creativity and a love for all things fun.
Why These Ghost Cupcakes Are a Halloween Must-Make
Before we dive into the ingredients, let’s talk about why this recipe is such a winner. It’s all about the clever trick with aluminum foil that shapes your regular cupcakes into adorable ghostly forms.
This method is a game-changer because it means you can create something special without buying a single-use kitchen gadget. It’s resourceful, and it just feels good to be a little clever in the kitchen.
Plus, the yield is fantastic for parties. You get more friendly little ghosts from one batch, which is always a bonus when you’re feeding a crowd.
Ingredients Needed for the Recipe
Gathering your ingredients is the first step to any baking adventure. Here’s what you’ll need to bring these spooky spirits to life.
- Cake Mix: Any flavor you and your family love. Chocolate, vanilla, or even funfetti—it’s your call!
- Eggs, Oil, and Water: As specified on your chosen cake mix box.
- Butter: Softened, for a creamy, dreamy frosting base.
- Powdered Sugar: The essential ingredient for that smooth buttercream.
- Milk: Just a few tablespoons to get the frosting to the perfect spreading consistency.
- Vanilla Extract: For a touch of warm, classic flavor.
And for the supplies, you’ll want aluminum foil, cupcake liners, a large round piping tip (like a 2A or 1A), a frosting bag, and, of course, some candy eyes to give your ghosts their charming personalities.
The Secret to the Perfect Ghostly Shape
So, how do you get that wavy, flowing ghost shape without a special pan? It all comes down to a simple, brilliant hack using aluminum foil. You’ll roll small pieces of foil into balls and tuck them strategically between the cupcake liner and the pan.
This creates little indentations as the cupcake bakes, forming a head and arms. It sounds almost too easy, but it works like a charm. The batter naturally rises around the obstacles, creating that iconic, whimsical ghost silhouette.
It’s one of those techniques that will make you feel like a kitchen magician. And who doesn’t want a bit of that kind of magic?
How to make Easy Ghost Cupcakes?

Step 1: Prepare the Batter
Start by preheating your oven to the temperature recommended on your cake mix box. Then, go ahead and prepare the cupcake batter exactly as the directions state.
This is the easy part—just mix the powder with the eggs, oil, and water. No need to overcomplicate things here; the cake mix is our trusty foundation.
Step 2: Line the Pan and Create Foil Balls
Next, line your muffin pan with paper baking cups. Now, for the magic trick: tear off small sheets of aluminum foil and roll them into firm, marble-sized balls.
You’ll need about four balls per cupcake. Don’t worry about making them perfectly spherical; they just need to be firm enough to hold their shape against the batter.
Step 3: Fill the Liners and Position the Foil
This is the most crucial step. Using a medium cookie scoop or a tablespoon, add only about two tablespoons of batter to each liner. This is half the amount you’d normally use—do not overfill!
Now, gently place your foil balls between the side of the metal pan and the paper liner. Position two near the top for the ghost’s “arms” and two closer to the center to help define the head.
Step 4: Bake and Cool with Care
Slide the pan into the preheated oven and bake for about 16-18 minutes, or until a toothpick inserted into the center of a cupcake comes out clean.
When they’re done, let the cupcakes cool right in the pan for 10 to 15 minutes. This patience is key, as it helps them set and hold their new ghostly shape before you move them to a wire rack to cool completely.
Step 5: Whip Up the Buttercream Frosting
While the cupcakes cool, make the frosting. In a large bowl, beat the softened butter with an electric mixer until it’s smooth and creamy.
Gradually add in the powdered sugar, mixing well after each addition. Then, beat in the vanilla and add the milk, one tablespoon at a time, until the frosting is fluffy and spreadable.
Step 6: Frost and Create the Ghosts
Fit a frosting bag with a large round tip and fill it with the white buttercream. Pipe a tall, generous swirl onto each cooled cupcake, aiming for a soft, cloud-like shape.
You can then use a butter knife or small spatula to gently smooth the frosting, creating a flowing, ethereal look. The shape doesn’t have to be perfect—ghosts are meant to be a little amorphous!
Step 7: Add the Eyes and Serve
The final, most fun step! Gently press two candy eyes into the frosting near the top of each ghost to give them life. You can add a little mouth with more candy pearls or a dot of black frosting if you like.
And just like that, you have a whole platoon of cute, friendly ghosts ready to haunt your Halloween party—in the best way possible.
Tips
The number one tip is to resist the urge to fill those cupcake liners too much. Using only two tablespoons of batter seems scant, but trust the process.
The foil balls will displace the batter, and it will rise significantly during baking. Overfilling is the main culprit for misshapen ghosts, so show some restraint!
Also, if a few cupcakes come out looking a bit lopsided, don’t fret. A generous swirl of white frosting covers a multitude of sins. Once they’re decorated, no one will ever know.
Fun Flavor Variations to Try
While vanilla cupcakes with vanilla frosting are a classic, why not mix it up? The ghost design works with any flavor combination you can dream up.
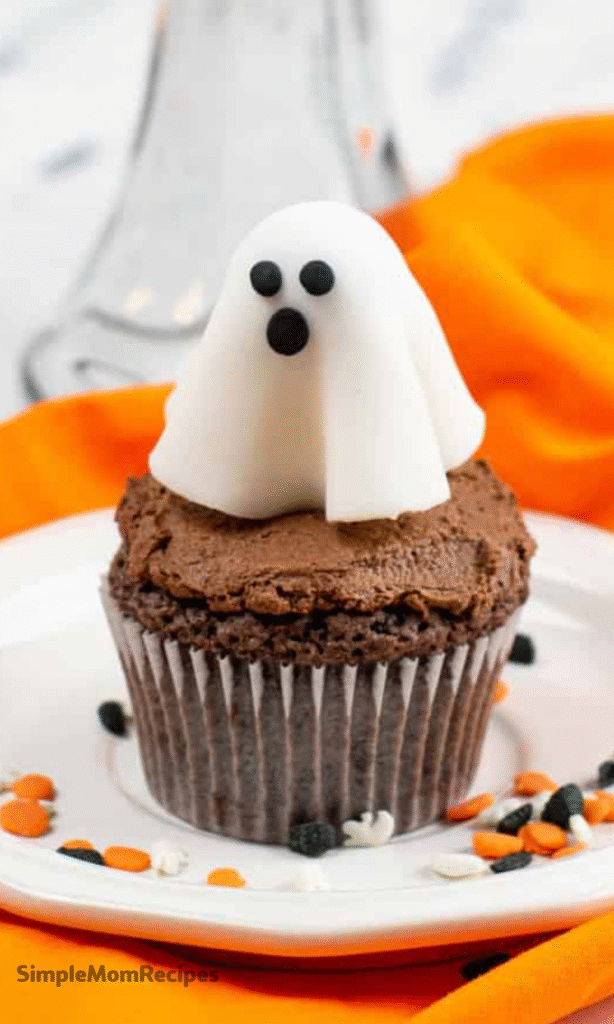
Imagine a rich chocolate cupcake underneath that white frosting—a delicious surprise. Or maybe a strawberry cake mix for a sweet, fruity twist.
You could even add a teaspoon of mint extract to the frosting for a cool, refreshing ghost. The possibilities are endless, making this recipe your own year after year.
Storing and Transporting Your Spooky Treats
Once assembled, these cupcakes are best stored in a single layer inside an airtight container at room temperature. They’ll stay fresh and delicious for up to three days.
If you need to travel with them, place the container on a flat surface in your car. Avoid stacking anything on top of them to keep your ghostly frosting from getting squashed.
For make-ahead convenience, you can bake and freeze the unfrosted cupcakes up to a month in advance. Just thaw completely before frosting and decorating.
Getting Kids Involved in the Fun
This is a fantastic recipe to make with little helpers. They can roll the foil balls, help scoop the batter (with supervision), and of course, place the candy eyes.
Letting them add the eyes is where their creativity can really shine. Some ghosts can be surprised, others sleepy, and some can even be cross-eyed! It’s a wonderful way to create lasting Halloween memories together in the kitchen.
The pride they’ll feel when they serve cupcakes they helped create is absolutely priceless. It turns baking from a task into a treasured activity.

Easy Ghost Cupcakes Recipe
Description
These Easy Ghost Cupcakes are a spooktacular Halloween treat that’s almost too cute to eat! Made with your favorite cake mix and shaped into playful ghosts using simple foil molds, they’re frosted with fluffy white buttercream and finished with candy eyes for instant charm. Perfect for parties, kid-friendly, and no special pan required!
ingredients
Cupcakes
Frosting
Decorations & Equipment
Instructions
-
Preheat oven to 175°C (350°F). Prepare cake batter according to box instructions.
-
Line cupcake pans with 36 paper liners. Roll aluminum foil into small balls (about 1-inch).
-
Add only 2 tablespoons of batter to each liner (do NOT overfill). Gently press 2 foil balls against the liner near the top (for head) and 2 near the middle (for arms).
-
Bake for 16–18 minutes, or until a toothpick inserted comes out clean. Let cool in pan 10–15 minutes, then transfer to a wire rack to cool completely.
-
Make frosting: Beat butter until smooth. Gradually add powdered sugar, then vanilla and milk (1 tbsp at a time) until fluffy and spreadable.
-
Fill a piping bag fitted with a large round tip with frosting. Pipe a generous swirl onto each cupcake, then smooth gently with a knife to create a ghostly dome.
-
Press two candy eyes and a small black sprinkle or chocolate chip (for mouth) into the frosting to create a friendly ghost face.
Nutrition Facts
Servings 36
- Amount Per Serving
- Calories 240kcal
- % Daily Value *
- Total Fat 10gg16%
- Saturated Fat 6gg30%
- Trans Fat 0gg
- Cholesterol 30mgmg10%
- Sodium 220mgmg10%
- Potassium 60mgmg2%
- Total Carbohydrate 36gg12%
- Dietary Fiber 0gg0%
- Sugars 28gg
- Protein 2gg4%
- Calcium 20 mg
- Iron 1 mg
* Percent Daily Values are based on a 2,000 calorie diet. Your daily value may be higher or lower depending on your calorie needs.
Note
- No special pan needed: Use regular muffin tins with foil to shape ghost arms and head.
- Don’t overfill: Only 2 tbsp batter per cup ensures proper ghost shape without overflow.
- Candy eyes tip: Use non-bleeding black sugar pearls (like PME brand) to prevent color bleed into frosting.
- Make ahead: Bake cupcakes 1–2 days ahead; frost and decorate the day of serving.
- Storage: Keep in an airtight container at room temperature for up to 3 days.