There’s something truly magical about making Christmas truffles, a little ritual that ushers in the holiday spirit.
They are these incredibly rich, decadent bites of joy, and decorating them is half the fun, a chance to get really creative.
Why You'll Adore This Recipe
First off, these are no-bake treats, which is a massive win during a busy season.
You get to create stunning, gift-worthy confections with just about ten minutes of active, hands-on work.
They are deeply customizable, welcoming your favorite chocolate and all the festive sprinkles you can find.
And honestly, presenting a box of these to someone feels like giving a hug, a truly personal and delicious gift.
Ingredients Needed for the Recipe
Gathering the right ingredients is your first step to truffle success.
Each one plays a specific role in creating that perfect, melt-in-your-mouth texture.
Semi-sweet or dark chocolate bars: The star of the show, providing the deep, chocolatey base. Use high-quality baking bars for the best texture.
Heavy cream: This is what creates the luxuriously soft and rich ganache center, you simply can’t substitute it with lighter liquids.
Vanilla extract: A classic flavor enhancer that rounds out the chocolate’s intensity beautifully.
Holiday sprinkles: For that essential festive cheer and a delightful crunch on the outside.
Holiday icing or extra chocolate for coating: These are your artistic tools for creating dazzling, picture-perfect truffles.
The Heart of the Matter: Choosing Your Chocolate
This is the most important decision you'll make, and it makes a world of difference in the final result.
You absolutely want to use high-quality semi-sweet or dark baking chocolate bars, the kind sold in blocks near the chocolate chips.
Avoid chocolate chips at all costs, as they contain stabilizers that prevent them from melting smoothly.
And regular snacking chocolate bars? They often have added fats that will throw off the delicate truffle consistency, so stick with the baking bars.
How to make Christmas Truffles?
The process is surprisingly simple, a quiet little kitchen project with a spectacular payoff.
Just follow these steps, and you’ll have a tray of gorgeous truffles before you know it.
Step 1 - Create the Ganache
Start by placing your finely chopped chocolate into a medium bowl.
Then, gently heat the heavy cream until it's just beginning to simmer, with tiny bubbles forming around the edges.
Step 2 - Melt and Combine
Pour the warm cream over the chopped chocolate and add the vanilla extract.
Stir it slowly, patiently, until the chocolate melts completely into a smooth, glossy, and unified mixture.
Step 3 - The Patient Chill
Now, cover the bowl with plastic wrap, pressing the wrap directly onto the surface of the chocolate.
This prevents condensation from dripping back in and seizing your ganache. Refrigerate it for a full two hours, no shortcuts.
Step 4 - Scoop and Roll
Once the mixture is firm, use a tablespoon or a small cookie scoop to portion it out.
Then, quickly roll each portion between your palms to form a neat ball. If things get sticky, don’t panic.
Step 5 - The Grand Decoration
This is where the Christmas magic happens. Roll your truffles in sprinkles, or get fancy.
You can dip them in melted chocolate first for a shell, then add sprinkles or delicate icing designs.
Step 6 - The Final Set
Let your decorated truffles sit for a few minutes to set, especially if you added a chocolate coating.
Then, you can pop them back in the fridge for another 20-30 minutes to firm up completely. Enjoy them cool or at room temperature.
Storing Your Holiday Creations
Your beautiful truffles will keep happily in the refrigerator for up to two weeks.
Just store them in a single layer in an airtight container, perhaps with parchment paper between layers.
They also freeze remarkably well for up to three months, so you can truly get a head start on your holiday baking.
Thaw them overnight in the fridge, and they’ll taste just as fabulous as the day you made them.
Tips
A few little insights can make the process even smoother and more enjoyable.
They’re simple, but they truly guarantee perfection every single time.
Finely chopping your chocolate bar is non-negotiable; it ensures quick, even melting without any stubborn chunks.
If the mixture becomes too soft and sticky while rolling, just pop the tray into the freezer for five minutes. Rinsing your hands with cold water and drying them thoroughly also works wonders.
Resist the urge to skip or shorten the two-hour chilling time. A properly set ganache is the key to a mess-free, enjoyable rolling experience.
If your ganache seems too soft even after chilling, you can gently re-melt it and stir in a bit more chopped chocolate to balance the ratios.
Endless Ways to Make Them Yours
This is where you can let your personality shine through. The basic recipe is a perfect canvas for your ideas.
Swap the semi-sweet chocolate for a dark baking bar if you prefer a more intense, less sweet flavor.
Roll them in crushed nuts, toasted coconut, or a simple dusting of cocoa powder for an elegant finish.
And for the filling, feel free to stir in a hint of almond extract, a touch of orange zest, or even a tiny bit of peppermint essence.
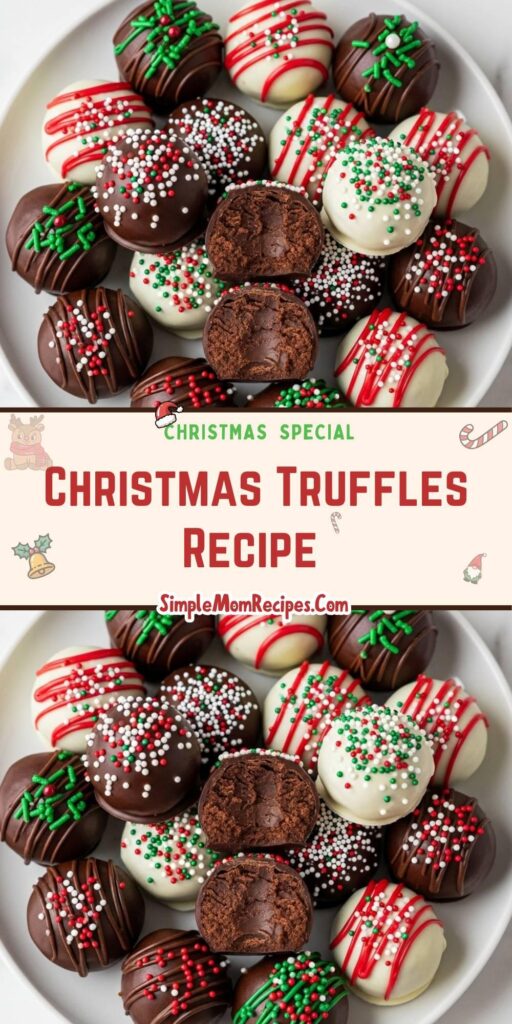
These Christmas Truffles are seriously the most festive and colorful chocolate treats to celebrate the holidays! Rich, decadent, and incredibly easy to make with just a few premium ingredients, they’re perfect for gifting or serving at your holiday gatherings. Customize them with your favorite chocolate and holiday sprinkles for a personal festive touch!
Ingredients
Truffle Filling
8ounces semi-sweet baking chocolate bar, finely chopped ((or two 4-oz bars; do not use chocolate chips))
½cup heavy cream (full-fat only)
½teaspoon vanilla extract
Decoration (Optional)
Holiday sprinkles of your choice (store-bought)
Holiday icing of your choice (store-bought)
8ounces semi-sweet, dark, or white baking chocolate bar (for coating, optional)
Instructions
1
Melt ChocolatePlace the finely chopped semi-sweet chocolate in a medium bowl. Set aside.
2
Warm CreamBring the heavy cream to a very light simmer (do not boil) on the stovetop or in the microwave. Pour the warm cream over the chopped chocolate along with vanilla extract. Stir gently until smooth and fully melted. If needed, microwave in 10-second bursts to finish melting.
Make sure the chocolate is finely chopped for even melting.
3
ChillCover the bowl tightly with plastic wrap, pressing it directly onto the surface of the chocolate to prevent condensation. Refrigerate for 2 hours or until firm enough to scoop.
Do not skip this step—firm chocolate is essential for rolling neat truffles.
4
Roll TrufflesUsing a tablespoon or small cookie scoop, portion the chilled chocolate and roll into 1-inch balls. If the mixture becomes too soft or sticky, return to the freezer for 5–10 minutes and rinse your hands with cold water, then pat dry before continuing.
Work quickly to keep the chocolate cool.
5
DecorateRoll truffles in holiday sprinkles, or dip in melted coating chocolate (semi-sweet, dark, or white), then add sprinkles or drizzle with icing while still wet.
For chocolate coating: melt 8 oz baking chocolate in 30-second microwave intervals, stirring between each.
6
Set & ServePlace decorated truffles on a parchment-lined tray and let set at room temperature for 10–15 minutes, or refrigerate for 20–30 minutes if coated in chocolate. Serve at room temperature for the softest texture.
Store in the fridge for best results.
Nutrition Facts
Servings 24
Amount Per Serving
Calories140kcal
% Daily Value *
Total Fat10g16%
Saturated Fat6g30%
Cholesterol15mg5%
Sodium10mg1%
Potassium80mg3%
Total Carbohydrate12g4%
Dietary Fiber1g4%
Sugars10g
Protein2g4%
Calcium 30 mg
Iron 1 mg
* Percent Daily Values are based on a 2,000 calorie diet. Your daily value may be higher or lower depending on your calorie needs.
Note
Chocolate Quality Matters: Always use high-quality baking chocolate bars (e.g., Ghirardelli, Baker’s, or Scharffen Berger). Do NOT use chocolate chips or snack bars—they contain stabilizers that ruin the truffle texture.
Make-Ahead Friendly: The ganache can be refrigerated for up to 3 days before rolling. Freeze for up to 3 months; thaw overnight in the fridge.
Storage: Keep truffles refrigerated in an airtight container for up to 2 weeks. Bring to room temperature 10 minutes before serving.
Vegan Option: Substitute heavy cream with full-fat canned coconut milk (not coconut beverage).
Flavor Variations: Add ¼ tsp almond, orange, or peppermint extract for a festive twist.
I’m a London-based food writer, recipe developer, and home cook who has been passionate about cooking for over 15 years. What started as a way to recreate my mother’s traditional dishes turned into a lifelong love for experimenting with flavors, writing about food, and helping others feel more confident in the kitchen.