Chicken enchiladas are the ultimate comfort food, a cozy hug on a plate after a long day.
They transform simple ingredients into something truly magical, with a saucy, cheesy, deeply satisfying result.
Why You'll Make These Again and Again
This is one of those wonderfully forgiving recipes that welcomes your own personal touch.
It’s a fantastic way to use up leftover chicken, turning yesterday's meal into tonight's brand-new dinner sensation.
Ingredients Needed for the Recipe
Gathering your ingredients is the first step to creating this family favorite.
Each one plays a specific role in building the layers of flavor and texture that make enchiladas so irresistible.
Cooked, Shredded Chicken: The hearty star of the filling, providing protein and a tender texture that soaks up all the delicious seasonings.
8-Inch Flour Tortillas: These act as the soft, pliable wrappers for our filling, holding everything together beautifully without cracking.
Mexican-Blend Shredded Cheese: Delivering that iconic, gooey meltiness that binds the enchiladas together and creates a golden top.
Enchilada Sauce: The flavor powerhouse, a tangy and slightly spicy sauce that infuses every single bite with moisture and zest.
Vegetable or Olive Oil: Used to sauté our aromatics, creating a flavorful base for the chicken filling.
Onion and Garlic: These aromatics form the essential flavor foundation, adding sweetness and a savory depth to the mixture.
Salt and Black Pepper: Simple seasonings that enhance all the other ingredients and make the flavors pop.
Optional Toppings (Cilantro, Sour Cream, Avocado): The finishing flourish, adding fresh, cool, and creamy contrasts to the warm, baked enchiladas.
The Right Tools for the Job
You don't need any fancy equipment to make a fantastic pan of enchiladas.
A few basic kitchen items are all it takes to get this dinner on the table.
9x13 Inch Baking Dish: A ceramic or glass dish is ideal here, as it heats evenly and prevents the edges from burning.
Large Skillet: This is your main workstation for cooking the flavorful filling before the enchiladas are even assembled.
How to make Chicken Enchiladas?
The process is straightforward, and there's something almost therapeutic about assembling them.
Just follow these steps, and you'll have a bubbling, beautiful dish ready for the oven.
Step 1 - Prep and Sauté
Begin by preheating your oven to 350°F and greasing your baking dish.
In your large skillet, heat the oil over medium-high heat, then add the diced onion, salt, and pepper, cooking until the onion softens and becomes fragrant.
Step 2 - Build the Flavor Base
Stir in the minced garlic and cook for just one more minute.
The goal is to smell that wonderful garlicky aroma, but you don't want it to brown and become bitter.
Step 3 - Create the Filling
Now, add your shredded chicken and about a third of a cup of the enchilada sauce to the skillet.
Give it a gentle stir and let it warm through for a few minutes, allowing the chicken to fully absorb the sauce's flavor.
Step 4 - Assemble the Enchiladas
This is the fun part. Spoon a little sauce onto a tortilla, then add a generous portion of the chicken mixture.
Top that with a handful of cheese, roll it up snugly, and place it seam-side down in your prepared dish. Repeat, lining them up neatly.
Step 5 - Sauce and Cheese Topping
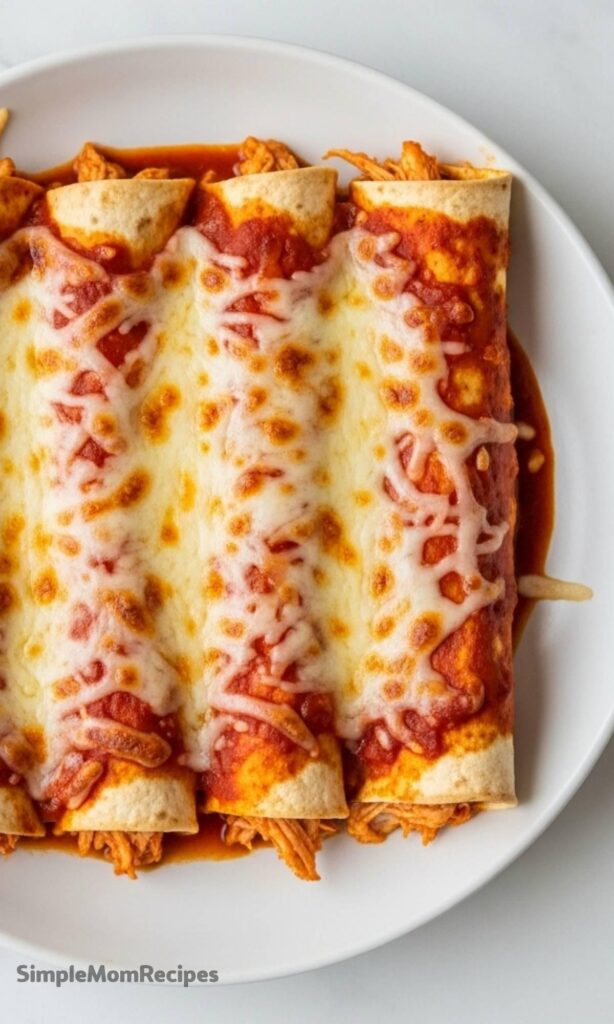
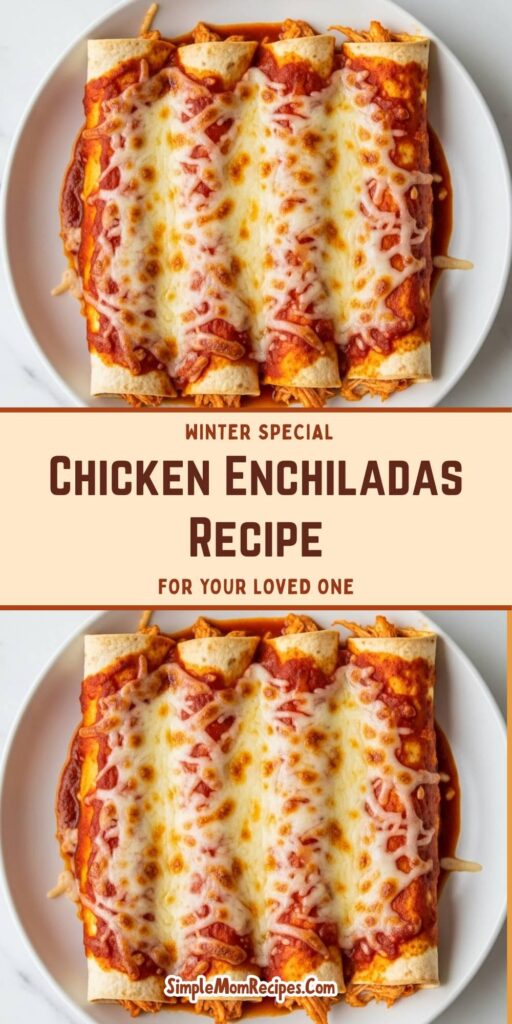
Once all your enchiladas are nestled in the dish, pour the remaining sauce evenly over the top.
Be generous, now, this is what keeps them moist. Finish by sprinkling the rest of the cheese over everything.
Step 6 - Bake to Perfection
Slide the dish into your preheated oven and bake for 20 to 30 minutes.
You're waiting for the cheese to be completely melted, bubbly, and perhaps even a little spotted with golden brown.
Choosing Your Tortilla: A Friendly Debate
Flour tortillas are incredibly user-friendly, staying soft and pliable throughout the assembly and baking process.
Corn tortillas offer a more traditional, authentic flavor and texture, but they can be a bit more delicate to work with.
Tips
A few little insights can make the difference between good enchiladas and great ones.
These are the kind of tips you pick up after making a recipe more than a few times.
Avoid Overfilling: It’s tempting to pack in as much filling as possible, but a moderate amount ensures a tidy roll that stays sealed.
Warm Your Tortillas: If your flour tortillas feel a bit stiff, warm them for a few seconds in the microwave to make them more flexible.
Consider Homemade Sauce: A from-scratch enchilada sauce comes together in minutes and adds a remarkable depth of flavor you can taste.
Let Them Rest: Allow the enchiladas to cool for five minutes after baking; this lets them set, making them much easier to serve.
Brilliant Make-Ahead Strategies
You can assemble the entire dish, cover it tightly, and refrigerate it for up to a full day before you need to bake it.
This is a genuine weeknight lifesaver, turning active cooking time into a simple "pop in the oven" task.
Deliciously Creative Variations
Don't be afraid to make this recipe your own, it's a wonderful canvas for experimentation.
A simple switch can create a whole new meal that feels entirely different.
Green Chile Twist: Use a tangy salsa verde or green enchilada sauce instead of the red for a brighter, zestier flavor profile.
Beef or Pork: Swap the chicken for seasoned ground beef, shredded carnitas, or even pulled pork for a richer, heartier filling.
Go Vegetarian: Replace the chicken with a mix of black beans, corn, and sautéed bell peppers for a satisfying meat-free version.
Spice It Up: Add diced jalapeños to the filling or use a pepper jack cheese for a pleasant, lingering heat.
Serving Your Enchiladas with Style
The enchiladas are the undeniable star, but the supporting cast makes the meal complete.
Think about textures and temperatures when choosing your sides for a truly balanced plate.
A simple mound of fluffy Mexican rice or cilantro-lime rice is a classic and perfect partner.
Creamy refried beans or seasoned black beans add a comforting, earthy element to the meal.
A crisp, colorful salad with a lime vinaigrette can cut through the richness beautifully.
And don't forget the toppings—a dollop of cool sour cream, some creamy avocado slices, and a sprinkle of fresh cilantro.
Storing and Reheating Leftovers
Leftover enchiladas keep wonderfully, making for excellent next-day lunches.
Store them in an airtight container in the refrigerator, where they will stay fresh for up to four days.
To reheat, you can use the microwave for speed, but for a result that's nearly as good as fresh, use an oven or air fryer.
Baking them again at 350°F for 15-20 minutes will re-melt the cheese and re-crisp the edges delightfully.
Chicken enchiladas are a quick and simple dinner perfect for busy weeknights. Your family will love the seasoned chicken filling, incredibly flavorful sauce, and melty cheese. They’re also a fantastic way to use up leftover chicken, which saves you even more cooking time! You can even make a double batch and freeze half for later, making meal prep a breeze.
Ingredients
3tablespoons vegetable or olive oil
1 medium onion (diced (225g))
½teaspoon salt (plus more to taste)
¼teaspoon ground black pepper (plus more to taste)
Preheat oven to 350°F (177°C). Grease a 9×13-inch casserole dish.
2
Heat a large skillet over medium-high heat and add the oil, onion, salt, and pepper. Cook, stirring frequently, for about 5 minutes, until slightly translucent.
3
Add the garlic and cook while mixing for one more minute or until fragrant. Add the shredded chicken and ⅓ cup (80mL) of enchilada sauce. Stir gently and cook to warm through for 2 to 3 minutes, then set aside. Season with more salt and pepper to taste.
4
Spoon a few tablespoons of enchilada sauce over a tortilla. Add a generous amount (1/8 the total) of the chicken mixture and top with 2 to 3 tablespoons of cheese. Roll and place in the prepared casserole dish seam-side down. Repeat with the remaining tortillas.
5
Spoon the remaining enchilada sauce over the tortillas, then top with the remaining shredded cheese.
6
Bake for 20 to 30 minutes until the cheese is melted and the enchiladas are warm in the center.
7
Top with optional toppings before serving, if desired.
Nutrition Facts
Servings 6
Amount Per Serving
Calories420kcal
% Daily Value *
Total Fat20g31%
Saturated Fat9g45%
Cholesterol75mg25%
Sodium890mg38%
Potassium420mg12%
Total Carbohydrate32g11%
Dietary Fiber3g12%
Sugars4g
Protein30g60%
Calcium 25 mg
Iron 15 mg
* Percent Daily Values are based on a 2,000 calorie diet. Your daily value may be higher or lower depending on your calorie needs.
Note
Use a ceramic or glass baking dish. A metal pan can cause the sauce, cheese, and tortillas to turn crisp or hard around the edges and on the bottom.
Don’t overfill the tortillas, or they will be difficult to roll and may tear or unroll in the pan.
Make it ahead: Assemble through Step 4, cover, and refrigerate for up to 24 hours before baking.
I’m a London-based food writer, recipe developer, and home cook who has been passionate about cooking for over 15 years. What started as a way to recreate my mother’s traditional dishes turned into a lifelong love for experimenting with flavors, writing about food, and helping others feel more confident in the kitchen.