I bought a huge bag of cherries thinking I’d snack on them slowly. That didn’t happen. A couple days in, they were staring at me from the fridge, slightly softer, still sweet, but clearly on a timeline.
I didn’t want anything complicated. No layers, no frosting, no stress. Just something simple that would actually taste like cherries and not bury them under sugar. That’s how this cake became my go-to.
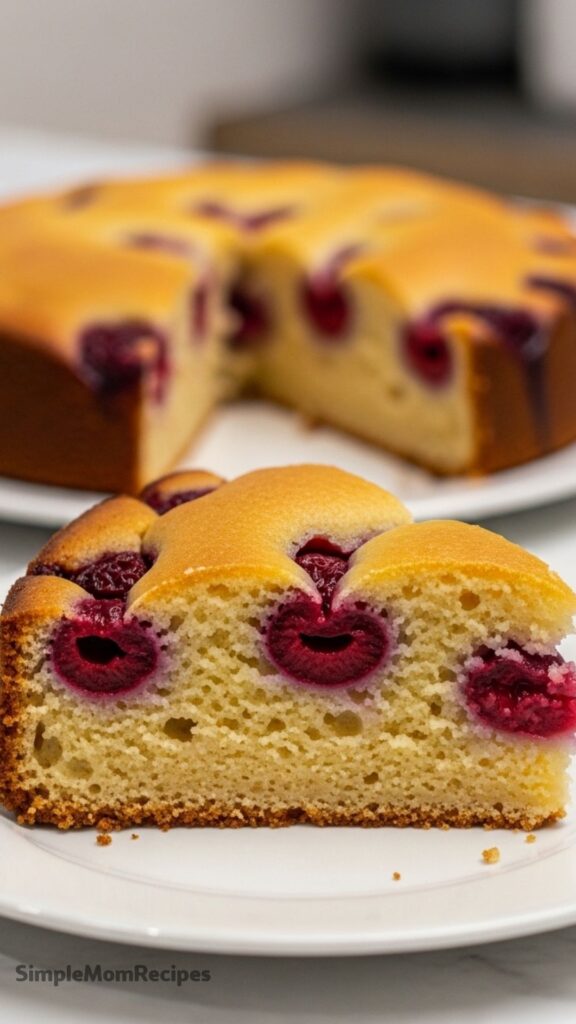
It’s buttery, a little dense but still soft, and those cherries sit right on top like they belong there. No sinking, no weird pockets. Just a solid, honest cake.
What surprised me about this recipe
I didn’t expect almond extract to change things this much. I almost skipped it the first time. Big mistake avoided.
There’s something about that slightly bitter almond flavor mixing with sweet cherries that just works. It doesn’t taste overpowering. It just kind of pulls everything together quietly.
Also, the batter is thicker than I thought it would be. At first I wondered if I messed it up. Turns out, that’s exactly why the cherries stay on top instead of disappearing into the cake.
Ingredients I Used for the Recipe
2 cups (240g) all-purpose flour - gives the cake its structure and keeps it sturdy enough for the fruit
1 teaspoon baking powder - helps the cake rise without making it too airy
1/2 teaspoon salt - balances the sweetness and sharpens the flavors
1 cup (227g) unsalted butter, softened - this is where the richness comes from
1 1/4 cups (250g) granulated sugar - sweetens and keeps the cake moist
4 large eggs - bind everything together and add softness
1/2 teaspoon almond extract - gives that subtle nutty flavor that pairs with cherries
2 1/2 cups (about 394g) fresh cherries, pitted - the main star, juicy and slightly tart
How to make Cherry Cake I Can’t Stop Making?
Step 1 - Prep the pan and oven
I preheat the oven to 350°F. Then I grease a cake pan really well with butter and dust it lightly with flour. This step matters more than it seems. I’ve skipped proper greasing before and regretted it instantly.
Step 2 - Mix the dry stuff
In a bowl, I whisk together flour, baking powder, and salt. Nothing fancy here. Just make sure it’s evenly combined so you don’t get random salty bites later.
Step 3 - Cream butter and sugar
I beat the butter and sugar until it turns pale and fluffy. It takes a few minutes. I used to rush this, but letting it get light and airy really changes the texture of the final cake.
Step 4 - Add eggs slowly
One egg at a time. I mix each one in fully before adding the next. If the batter starts looking weird or slightly curdled, I don’t panic. A spoonful of flour usually fixes it.
Step 5 - Stir in almond extract
I add the almond extract and mix just enough to blend it in. The smell at this point is already kind of amazing.
Step 6 - Combine everything
I add the dry ingredients slowly and mix just until no streaks of flour are left. I stop as soon as it looks combined. Overmixing makes it tough, and I’ve learned that the hard way.
Step 7 - Add cherries on top
I spread the batter into the pan, then press the cherries gently into the surface. Not too deep. Just enough so they stay in place.
Step 8 - Bake
It goes into the oven for about an hour. I check with a toothpick in the center. If it comes out clean, it’s done. The top turns golden and the cherries stay visible, which I love.
Step 9 - Cool it down
I let it cool in the pan for about 10-15 minutes, then move it to a rack. Cutting too early is tempting, but it really does need time to settle.
Texture, taste, and what actually matters
This isn’t one of those super fluffy cakes. It’s got some weight to it. In a good way.
The crumb is soft but slightly dense, which is exactly why it works with juicy fruit. If it were lighter, the cherries would just sink or make everything soggy.
The sweetness is balanced. The cherries bring a little tartness, and that almond flavor cuts through the sugar just enough. It doesn’t feel heavy even though there’s a good amount of butter in it.
How I serve this on lazy days
Most of the time, I don’t do anything extra. Just slice and eat. It’s perfect with coffee, especially in the morning when I want something slightly sweet but not over the top.
If I feel like putting in a tiny bit of effort, I dust some powdered sugar on top. That’s it.
Sometimes I add whipped cream if I’m serving it to people. Not necessary, but it makes it feel a little more put together.
Tips
Room temperature matters more than you think
If the butter or eggs are too cold, the batter doesn’t come together right. I’ve seen it turn lumpy and weird. Let things sit out a bit before starting.
Don’t overmix after adding flour
Once the flour goes in, I slow down. Mixing too much makes the cake dense in the wrong way.
Fresh cherries work best
I tried frozen once. It added too much moisture and changed the texture. Fresh is worth it here.
Cherry placement actually matters
If I push them too deep, they disappear into the cake. Keeping them near the top gives that nice look and better texture in each bite.
Let it rest before cutting
I know it’s hard, but cutting too soon makes it crumbly. Giving it time helps everything settle properly.
Storage is easy
I keep it covered at room temperature for a couple days. After that, I move it to the fridge. It actually gets softer the next day, which I kind of like.
This cake ended up being one of those recipes I don’t really think about anymore. I just make it when I have cherries and want something simple that works every single time. No stress, no overthinking, just a really solid cake.
This rich, buttery cake is studded with fresh, juicy cherries and flavored with almond extract. With a dense yet soft crumb that prevents the fruit from sinking, it's perfect as a simple dessert, a breakfast treat, or an afternoon snack with coffee.
ingredients
2cups all-purpose flour (plus more for dusting)
1teaspoon baking powder
1/2teaspoon salt
1cup unsalted butter (2 sticks, softened)
1 1/4cups granulated sugar
4 large eggs
1/2teaspoon almond extract
2 1/2cups fresh cherries (stemmed and pitted)
Instructions
1
Preheat the oven to 350°F (175°C). Grease a 10-inch springform cake pan with butter, dust lightly with flour, and tap out any excess.
2
In a medium bowl, whisk together the flour, baking powder, and salt until combined.
3
In a large bowl, beat the softened butter and sugar with an electric mixer on medium-high speed until pale and fluffy, about 3 minutes.
4
Add the eggs one at a time, beating well after each addition. Scrape down the bowl as needed. The batter should be smooth and fluffy. Add the almond extract and mix to combine.
5
Beat in the flour mixture on low speed, or fold it in with a rubber spatula, just until combined and no streaks of flour remain.
6
Transfer the batter to the prepared cake pan. Lightly press the pitted cherries into the batter in a circular pattern, ensuring they are not pressed in too deep.
7
Bake for about 60 minutes, or until a toothpick inserted in the center comes out clean and the cake is golden.
8
Let the cake cool in the pan for 10-15 minutes before unmolding. Cool completely on a wire rack before serving.
Nutrition Facts
Servings 9
Amount Per Serving
Calories380kcal
% Daily Value *
Total Fat19gg30%
Saturated Fat11gg56%
Trans Fat0gg
Cholesterol110mgmg37%
Sodium180mgmg8%
Potassium150mgmg5%
Total Carbohydrate48gg16%
Dietary Fiber1gg4%
Sugars29gg
Protein6gg12%
Calcium 4% mg
Iron 8% mg
* Percent Daily Values are based on a 2,000 calorie diet. Your daily value may be higher or lower depending on your calorie needs.
Note
Room temperature ingredients: Ensure butter and eggs are at room temperature for a smooth, emulsified batter.
Don't overmix: Mix the dry ingredients until just combined to keep the cake tender.
Pitting cherries: Use a cherry pitter for ease, or a paring knife to remove pits.
Storage: Store at room temperature for up to 3 days, or refrigerate for up to a week. Can be frozen for 3 months.
I’m a London-based food writer, recipe developer, and home cook who has been passionate about cooking for over 15 years. What started as a way to recreate my mother’s traditional dishes turned into a lifelong love for experimenting with flavors, writing about food, and helping others feel more confident in the kitchen.