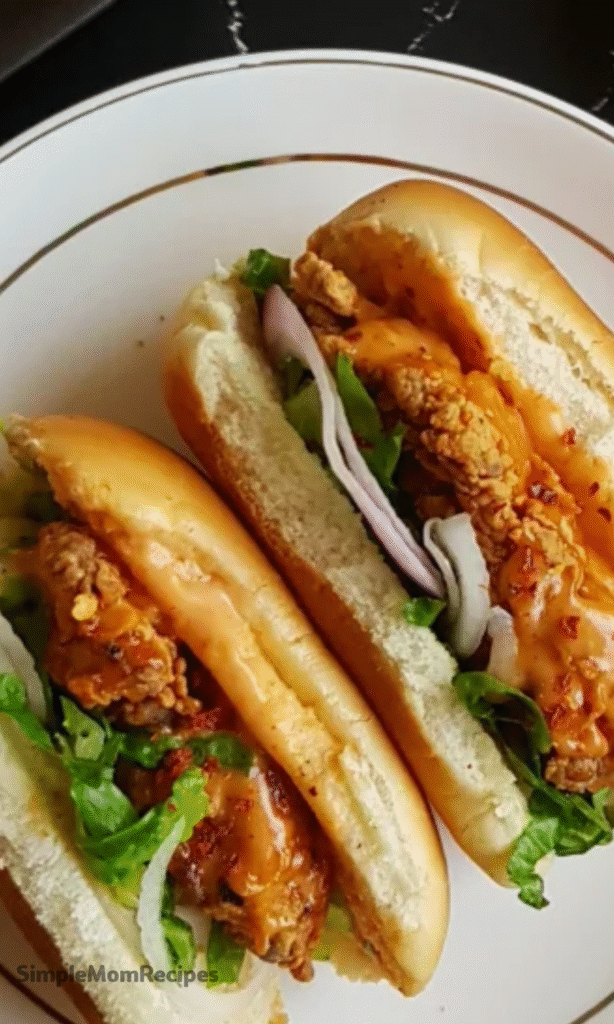
Warm, soft, and cheesy on the inside, golden perfection on the outside — that’s the magic of Cheesy Dynamite Chicken Buns. They’re spicy, creamy, and loaded with flavor, yet they come together with surprisingly simple steps. Whether you’re cooking for family, prepping a party spread, or just treating yourself, this recipe hits the sweet spot between comfort food and fun snacking.
This recipe is not only easy but wildly customizable. You can dial down the heat for kids, add more chili for spice lovers, or even switch up the cheese type for new flavors. Ready? Let’s take the journey into homemade deliciousness.
When’s the Best Time to Serve These Dynamite Buns?
These buns shine at casual gatherings — think game nights, potlucks, or small family parties. Their handy “grab and eat” size makes them perfect finger food. Pair them with cold drinks, and you’ll notice they disappear fast.
They also work beautifully as a quick dinner. Served warm with a fresh salad or even alongside soup, they turn into a hearty main meal. Bonus: they travel well in lunchboxes, making them family-friendly through and through.
Ingredients Needed for the Recipe
Here’s what you’ll need to bring these fluffy, spicy, cheesy buns to life:
- 2 cups cooked, shredded chicken (rotisserie chicken works great)
- 1 tbsp olive oil
- 1 small onion, finely chopped
- 2 cloves garlic, minced
- 1 tbsp tomato paste
- 2 tbsp hot sauce (adjust as needed)
- 1 tsp smoked paprika
- ½ tsp ground cumin
- Salt & pepper to taste
- ½ cup cream cheese (or Greek yogurt for lightness)
- 1 cup shredded mozzarella or cheddar
- 3 cups all-purpose flour
- 1 tbsp sugar
- 2¼ tsp instant yeast
- 1 tsp salt
- ¾ cup warm milk
- ¼ cup warm water
- 3 tbsp softened butter
- 1 egg (for egg wash)
- Toppings: sesame seeds, chili flakes, grated cheese
How to make Step-by-Step Cheesy Dynamite Chicken Buns Recipe Everyone Will Love?

Step 1: Prepare the Dough
In a large bowl, combine flour, sugar, salt, and yeast. Add warm milk, warm water, and softened butter. Knead until smooth and elastic. It should feel soft but not sticky. Cover and let it rise for about an hour, until doubled in size.
Step 2: Cook the Spicy Chicken Filling
Sauté chopped onions in olive oil until soft. Add garlic, tomato paste, and spices—your kitchen will smell heavenly at this point. Mix in hot sauce and shredded chicken. Kill the heat, then stir in cream cheese and shredded mozzarella until creamy and rich.
Step 3: Fill and Shape the Buns
After the dough has risen, punch it down and divide into equal balls. Flatten each one and spoon in a bit of chicken filling. Seal tightly like a pouch (no leaks, please). Place seam-side down on a tray lined with parchment.
Step 4: Bake to Golden Goodness
Brush each bun with egg wash for shine. Sprinkle sesame seeds, chili flakes, or extra cheese if you want some glamour. Bake at 375°F (190°C) for 18–20 minutes, until golden brown on top.
Ingredient Swaps: What If I Don’t Have Everything?
No cream cheese? Use sour cream or Greek yogurt. Both add that same creamy texture. Out of hot sauce? A spoonful of chili flakes or even BBQ sauce works.
For a twist, add colorful diced bell peppers, jalapeños, or a sprinkle of oregano into the filling. You can even play with the dough — try whole wheat flour for a nuttier feel or store-bought pizza dough for a quick fix.
Tips
Adjust Spice: If you hate spicy food, cut the hot sauce in half or switch to a mild version. If you love heat — double it up.
Seal Well: Pinch the dough edges tightly to avoid cheesy bursts in the oven.
Resting Matters: Let the buns sit for 10 minutes before baking. It helps with fluff and shape.
Use Moist Chicken: If your chicken feels dry, stir in a spoon of broth while mixing the filling.
Golden Finish: Don’t skip brushing with egg wash — it’s what makes them bakery-beautiful.
How Do You Store and Reheat Them Without Losing Flavor?
If you manage to have leftovers (rare, but possible), let them cool completely before storing. Pop them into an airtight box and refrigerate for 3–4 days.
For freezing, wrap each bun individually in foil or plastic wrap, then store them in a freezer bag for up to 2 months. To reheat, use an oven or air fryer for crispy edges. The microwave works, but it may soften the crust.
Fun Variations to Try with Cheesy Dynamite Chicken Buns
Make them mini for party snacks — cute, poppable buns no bigger than your palm. Or go all out with jumbo buns, big enough to be a personal meal.
Switch the cheese to pepper jack for extra spice or cheddar for more richness. You can brush the tops with garlic butter before baking for a whole new level of flavor. And yes, vegetarian versions with mushrooms, chickpeas, or spiced paneer taste incredible too.
Conclusion
Cheesy Dynamite Chicken Buns aren’t just food — they’re little bundles of cozy, spicy joy. Each bite mixes warm bread, gooey cheese, and zesty chicken in a way that feels homemade yet indulgent. They’re perfect for sharing, but honestly, you’ll want to keep a few for yourself.
If you love experimenting, this recipe is your playground. Switch spices, play with toppings, make them big or small — every version turns out delicious. So, roll up your sleeves, get the oven ready, and watch how quickly these buns become a favorite at your table.

Cheesy Dynamite Chicken Buns Recipe
Description
Soft, fluffy buns filled with spicy, creamy chicken and melted cheese — perfect for snacks, parties, or quick dinners. Easy to make and full of bold flavors! These Cheesy Dynamite Chicken Buns are a crowd-pleasing favorite, combining a savory, zesty chicken filling with a buttery, golden-brown dough. Whether you're hosting a gathering or need a fun family meal, this recipe delivers comfort and flavor in every bite.
Ingredients
For the Chicken Filling
For the Dough
For Assembly & Baking
Instructions
-
Make the Dough
In a large bowl, combine flour, sugar, salt, and instant yeast. Add warm milk, warm water, and softened butter. Mix until a dough forms, then knead on a floured surface for 8–10 minutes until smooth and elastic. Place in a greased bowl, cover with a damp cloth, and let rise for 1 hour or until doubled in size.Ensure liquids are warm, not hot, to activate yeast properly. -
Prepare the Filling
Heat olive oil in a skillet over medium heat. Sauté onion until soft (3–4 minutes). Add garlic and cook for 30 seconds. Stir in tomato paste, hot sauce, smoked paprika, cumin, salt, and pepper. Add shredded chicken and mix well. Remove from heat and stir in cream cheese and half of the shredded cheese until creamy and well combined. Let cool slightly before filling.Cooling prevents the dough from melting or tearing during assembly. -
Assemble the Buns
Punch down the risen dough and divide into 12 equal balls. Flatten each ball into a circle, add 1 tablespoon of filling in the center, then pinch the edges to seal completely. Place seam-side down on a parchment-lined baking tray. Let rest for 10–15 minutes.Seal tightly to prevent leaks during baking. -
Bake the Buns
Preheat oven to 375°F (190°C). Brush the buns with beaten egg (egg wash) and sprinkle with sesame seeds, chili flakes, or extra cheese if desired. Bake for 18–20 minutes until golden brown and cooked through.For a crispier texture, avoid overbaking. -
Cool and Serve
Let the buns cool for 5–10 minutes before serving. This allows the filling to settle and makes them easier to handle.Serve warm for the best flavor and texture.
Nutrition Facts
Servings 12
- Amount Per Serving
- Calories 380kcal
- % Daily Value *
- Total Fat 18g28%
- Saturated Fat 8g40%
- Trans Fat 0.5g
- Cholesterol 65mg22%
- Sodium 420mg18%
- Potassium 210mg6%
- Total Carbohydrate 36g12%
- Dietary Fiber 2g8%
- Sugars 6g
- Protein 19g38%
- Calcium 180 mg
- Iron 2.5 mg
* Percent Daily Values are based on a 2,000 calorie diet. Your daily value may be higher or lower depending on your calorie needs.
Note
- Spice Level: Adjust hot sauce to taste. Use mild BBQ sauce or skip it entirely for a kid-friendly version.
- Store-Bought Dough: Save time by using pre-made pizza or dinner roll dough (about 1 lb).
- Vegetarian Option: Replace chicken with mashed chickpeas, crumbled tofu, or sautéed mushrooms.
- Make Ahead: Assemble unbaked buns and refrigerate for up to 12 hours before baking.
- Freezing: Freeze baked buns in an airtight container for up to 2 months. Reheat in oven or air fryer for best texture.
- Parchment Paper: Always line the baking tray to prevent sticking.
