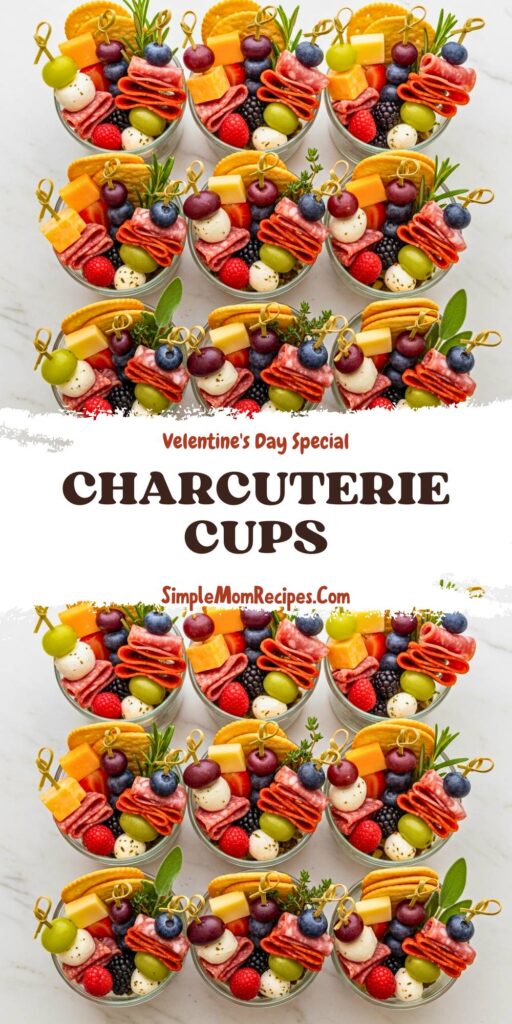
Charcuterie boards had their moment, and honestly, I still love them, but charcuterie cups feel like the next natural step. They’re tidy, playful, and somehow feel both casual and fancy at the same time. The kind of food that makes people smile before they even take a bite.
I started making these when I wanted something easier to serve but just as impressive. No hovering over a big board, no awkward reaching, no guessing who touched what. Everyone gets their own little bundle of snacks, perfectly portioned and thoughtfully arranged.
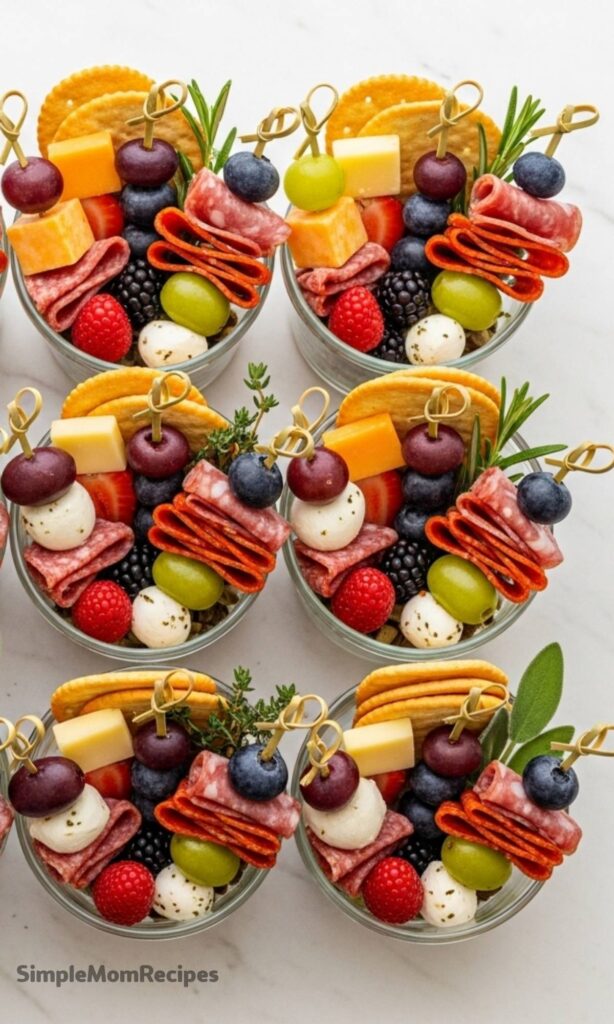
Charcuterie cups are basically personal grazing boards in a cup. Each one holds a balanced mix of salty, creamy, crunchy, and fresh elements. They’re flexible enough for everyday snacking and polished enough for parties.
Why Charcuterie Cups Work So Well for Gatherings
One of the biggest reasons I keep coming back to charcuterie cups is how practical they are. Guests can grab one and mingle without juggling plates or napkins. It keeps the flow of a party relaxed and natural.
They also solve the hygiene question in a way that feels effortless. Instead of everyone reaching for the same crackers or cheese, each person has their own selection. It’s a small detail that makes people feel more comfortable.
I also love how adaptable they are. You can dress them up for a formal dinner or keep them playful for a backyard get-together. The same idea works across seasons, menus, and moods.
Ingredients Needed for the Recipe
Assorted cheeses – Adds creaminess and richness, and anchors the savory flavors.
Cured meats – Brings salt and depth, balancing the sweeter elements.
Mixed berries – Adds freshness, color, and a pop of natural sweetness.
Grapes – Juicy and mild, perfect for filling space and refreshing the palate.
Olives – Offers a briny contrast that ties everything together.
Nuts – Adds crunch and a toasty flavor that rounds out the cup.
Long thin crackers – Provides structure and a crisp bite without overpowering.
Fresh herbs – Used as garnish to add aroma and a polished finish.
How to make Charcuterie Cups?
Make this recipe yours—just save it to your Pinterest board!"
Step 1 – Start with the Base
Begin by filling the bottom of each cup with smaller items like nuts and grapes. These create a stable base and help prop up the taller ingredients later. If you’re using a dip or spread, this is where it goes.
Try to distribute these evenly so every cup feels equally generous. This first layer sets the tone for the rest of the build.
Step 2 – Add the Crackers
Tuck the crackers toward the back of the cup, standing them upright if possible. Taller crackers create height and make the cups look abundant without overcrowding them.
Leaving open space in the front makes the rest of the assembly much easier. Think of this as creating a backdrop.
Step 3 – Skewer the Stars
Using toothpicks, skewer cheeses, meats, olives, and berries in different combinations. Mixing textures and colors on each pick keeps things visually interesting.
There’s no right or wrong here, and I actually prefer when they’re slightly imperfect. That handmade feel is part of the charm.
Step 4 – Place with Intention
Insert the skewers into the cups, spacing them out and varying their heights. This keeps everything from blending together and makes each ingredient easy to see.
If you’re using mini forks for special cheeses, slide those in now. They add a thoughtful, finished touch.
Step 5 – Fill the Gaps
Look for empty spots and gently fill them with extra fruit, nuts, or olives. This helps secure the skewers and keeps the cup feeling full.
The goal is balance, not stuffing everything in tightly. You want it to look abundant but still easy to grab from.
Step 6 – Garnish and Finish
Top each cup with a sprig of fresh herbs for color and fragrance. I also love using small cookie cutters to shape a few cheese slices for a playful detail.
At this point, step back and take a look. A small adjustment here or there can make a big difference visually.
Creative Theme Ideas to Try
Once you get comfortable with the basic method, the fun really begins. Charcuterie cups are a blank canvas, and themes make them feel fresh every time.
For breakfast gatherings, I like using mini waffles, berries, and yogurt. It feels special without being heavy, and guests always comment on how clever it is.
Dessert versions are another favorite. Brownie bites, fruit, chocolate-dipped pretzels, and a little whipped cream at the bottom turn the cup into a full experience.
Savory themes work beautifully too. Mediterranean flavors with hummus, pita chips, olives, and feta are always a hit and feel naturally cohesive.
Tips
Choose firmer cheeses when possible, as they’re easier to skewer and hold their shape.
Use pitted olives to make eating effortless and mess-free.
Vary colors and textures in each cup to keep them visually appealing.
Prep the cups a few hours ahead and refrigerate until serving time.
Use containers you already own for a more relaxed, personal feel.
Add herbs just before serving so they stay fresh and vibrant.
I truly think charcuterie cups are one of those ideas that stick around for a long time. They’re simple, thoughtful, and endlessly adaptable, which is a rare combination.
Every time I serve them, someone asks how they’re made or says they’re stealing the idea. That’s always my sign that a recipe is worth sharing.
If you give these charcuterie cups a try, I hope they bring the same ease and joy to your table that they do to mine. They’re meant to be enjoyed, one little cup at a time.
Charcuterie boards are so last year—try these charcuterie cups instead! These adorable, customizable cups are like mini personal charcuterie boards. They’re perfect for any occasion and will elevate your snacking game like never before. Easy to assemble, portable, and visually stunning, they’re ideal for parties, picnics, or cozy nights in.
16 long thin crackers (such as La Panzanella or breadsticks)
8pieces fresh herbs (rosemary, thyme, or sage sprigs)
Instructions
1
Start by filling your containers (12 oz paper cups or 4–6 oz jars) with smaller items like nuts and grapes, distributing them evenly.
2
Tuck the crackers toward the back of the container, leaving space in the front for toothpick-skewered items.
3
Using toothpicks or mini forks, skewer a variety of ingredients such as cheeses, meats, olives, and berries.
4
Insert the skewered items into the cup, varying heights and colors to create visual interest.
5
Fill in any remaining gaps with extra berries, nuts, or small cheese cubes to hold everything securely in place.
6
Garnish each cup with a sprig of fresh herb and optional festive cheese shapes cut with mini cookie cutters.
Nutrition Facts
Servings 8
Amount Per Serving
Calories380kcal
% Daily Value *
Total Fat24gg37%
Saturated Fat9gg45%
Trans Fat0gg
Cholesterol45mgmg15%
Sodium720mgmg30%
Potassium210mgmg6%
Total Carbohydrate18gg6%
Dietary Fiber2gg8%
Sugars6gg
Protein22gg44%
Calcium 20 mg
Iron 8 mg
* Percent Daily Values are based on a 2,000 calorie diet. Your daily value may be higher or lower depending on your calorie needs.
Note
Make ahead: Assemble up to one day in advance; store covered in the refrigerator. Add crackers just before serving to keep them crisp.
Dietary swaps: Use vegan cheeses, plant-based meats, or gluten-free crackers to accommodate dietary needs.
Themed variations: Try breakfast, dessert, Mediterranean, or taco-inspired versions using seasonal or favorite ingredients.
Serving tip: Pair with wine, sparkling water, or non-alcoholic spritzers for a complete experience.
Keywords:
charcuterie cups, jarcuterie, party appetizer, grazing cups, individual charcuterie
Kelsey Perez
Food & Lifestyle Blogger
I’m a London-based food writer, recipe developer, and home cook who has been passionate about cooking for over 15 years. What started as a way to recreate my mother’s traditional dishes turned into a lifelong love for experimenting with flavors, writing about food, and helping others feel more confident in the kitchen.