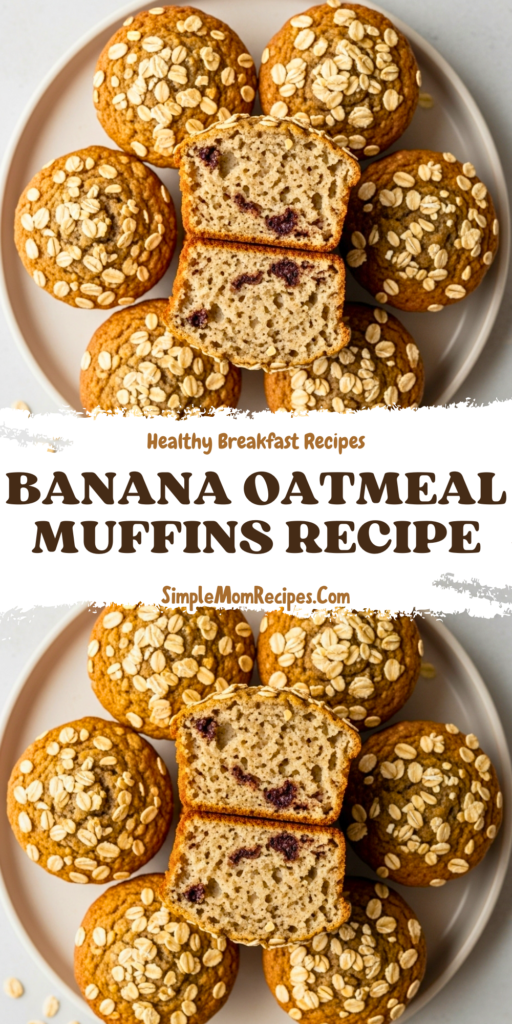
There’s something truly special about the smell of muffins baking. It’s a warm, welcoming promise that something good is about to happen. And these banana oatmeal muffins? They deliver on that promise every single time. They’re a perfect little package of cozy, banana-filled comfort with a satisfying hint of heartiness from the oats.
I rely on muffins for busy mornings, and this recipe is a favorite in my kitchen. You don’t need any fancy equipment or hard-to-find ingredients. Just a couple of bowls, a few simple staples, and you’re on your way to a fantastic, grab-and-go breakfast or snack. They come out incredibly light and fluffy, yet they still manage to feel substantial and filling.
Honestly, they’re the kind of treat that just makes a day feel a little bit better.
The Simple Joy of Muffins
I’ve always loved muffins for their versatility. They’re humble, they’re quick, and they’re endlessly adaptable. You can enjoy them warm from the oven with a pat of butter, pack them cold in a lunchbox, or even freeze them for a future craving. They bridge the gap between a treat and something genuinely sustaining.
This particular recipe combines two classic, beloved flavors. The natural sweetness and moisture from ripe bananas pairs so beautifully with the gentle, nutty chew of rolled oats. It’s a classic combination for a very good reason. And the process of making them is just as comforting as eating them.
There’s a gentle rhythm to it—mashing bananas, whisking ingredients, filling the liners—that feels wonderfully straightforward and rewarding.
Ingredients Needed for the Recipe
Gathering your ingredients first makes the whole process flow smoothly. Here’s what you’ll need, and why each one matters.
- All-Purpose Flour: This forms the main structure of your muffins, giving them that tender, cake-like crumb we all love.
- Old-Fashioned Rolled Oats: These are the star for texture and heartiness. They absorb the liquid beautifully, adding a lovely chew and that classic oatmeal muffin look. Save a small handful for sprinkling on top before baking.
- Granulated Sugar: It sweetens the deal, of course, but it also helps with browning and contributes to a soft texture.
- Baking Powder & Baking Soda: Our dynamic leavening duo. They work together to create the lift and lovely rise that makes these muffins so fluffy. Please check their dates—fresh agents are non-negotiable for the best results.
- Ground Cinnamon & Salt: Cinnamon adds a whisper of warm spice that complements the banana perfectly. Salt is the flavor enhancer, making all the other tastes pop.
- Milk: I always use milk instead of water. It adds a subtle creaminess and richness that water just can’t provide, making the muffins more flavorful and tender.
- Vegetable Oil: This is the secret to a supremely moist muffin. Oil creates a more tender texture than solid fats and keeps the muffins soft for days.
- Eggs & Vanilla Extract: Eggs bind everything together and add richness. Vanilla is the background note that rounds out all the flavors beautifully.
- Ripe Bananas: The riper, the better! Those spotted, soft bananas are sweet, easy to mash, and pack the most intense banana flavor and moisture into every bite.
- Chocolate Chips (Optional): A half-cup stirred into the batter is a delightful, melty surprise. It’s completely optional, but highly recommended for a little extra joy.
How to make Banana Oatmeal Muffins?
The process is simple, but a few mindful steps make all the difference. Let’s walk through it together.
Step 1- Prep and Preheat
Start by preheating your oven to 375°F (190°C). This ensures it’s perfectly hot and ready when your batter is. Line a standard 12-cup muffin pan with paper liners. This makes cleanup a breeze and gives you those perfect, portable portions.
Step 2- Combine the Dry Ingredients
In a large mixing bowl, whisk together your flour, rolled oats, sugar, baking powder, baking soda, cinnamon, and salt. Whisking does two important things: it combines them evenly, and it aerates the flour a bit, which helps with the texture. You’ll see it all come together into a uniform, fragrant mixture.
Step 3- Mix the Wet Ingredients
In a separate medium bowl, whisk the milk, vegetable oil, eggs, and vanilla extract. Whisk until the mixture is smooth and completely combined. Now, take your ripe bananas. Using a fork, mash them right on a plate or in a small bowl until mostly smooth—a few small lumps are perfectly fine. Stir the mashed banana into the wet mixture.
Step 4- Bring It All Together
Pour the entire bowl of wet ingredients into the bowl with the dry ingredients. If you’re using chocolate chips, add them now. This is the crucial moment: stir gently with a spatula or wooden spoon until the flour is just incorporated. A few streaks are okay! Overmixing is the enemy of tender muffins, as it develops the gluten and can make them tough.
Step 5- Portion and Bake
Divide the batter evenly among the 12 prepared muffin cups. They will be quite full, and that’s exactly what you want for a nice, domed top. For that bakery-style finish, sprinkle a pinch of extra rolled oats over the top of each one. Slide the pan into your preheated oven.
Step 6- Cool and Enjoy
Bake for 18 to 22 minutes. You’ll know they’re done when the tops are a lovely golden brown and the center of a muffin springs back lightly when pressed. Let them cool in the pan for about 5 minutes—this allows them to set. Then, transfer them to a wire rack to cool completely. Try to wait at least 10 minutes before that first delicious bite!
Serving Your Muffins with Style
These muffins are wonderful all on their own, but a little presentation goes a long way. For a simple breakfast, just pop one on a plate. If you’re feeling fancy, split one warm and add a thin spread of salted butter or almond butter. The slight melt is heavenly. They’re also fantastic alongside a morning coffee or an afternoon cup of tea.
For a more dessert-like treat, try a light drizzle of honey or a simple glaze made from powdered sugar and a splash of milk. A dollop of Greek yogurt on the side makes for a balanced, protein-packed snack. They truly are as versatile as you want them to be.
And don’t forget, they travel beautifully. Toss one in a bag for a mid-hike pick-me-up or pack one for a workday treat. They hold up wonderfully.
Tips
A few little secrets from my kitchen to yours can ensure muffin perfection every time.
- Don’t Overmix: I’ll say it again because it’s so important. Stir the wet and dry ingredients together until you no longer see dry flour. A slightly lumpy batter is a good batter.
- Measure Flour Correctly: The most common mistake is using too much flour, which leads to dry, dense muffins. For absolute accuracy, use a kitchen scale. If using cups, fluff the flour in its container first, then spoon it gently into your measuring cup and level it off with a knife.
- Use an Ice Cream Scoop: For perfectly even muffins that bake uniformly, a standard ice-cream scoop (about a ¼-cup size) is your best friend. It’s neat, quick, and ensures every muffin is the same.
- Skipping Liners? If you’re not using paper liners, be generous. Grease the muffin tin wells thoroughly with butter or non-stick spray, and consider dusting them lightly with flour for extra insurance.
- Test for Doneness: Ovens vary. Start checking at 18 minutes. The best test is a light press on the muffin top—it should feel firm and spring back. A toothpick inserted should come out with just a moist crumb or two.
Storing and Freezing for Later
Once completely cooled, store your muffins in an airtight container at room temperature. They’ll stay fresh and delicious for up to 4-5 days. You can enjoy them at room temp or give them a quick 10-second warm-up in the microwave for that fresh-baked feel.
These muffins also freeze like a dream. Wrap each cooled muffin individually in plastic wrap, then place them all in a large freezer bag. They’ll keep for up to 3 months. To enjoy, simply thaw one at room temperature for a couple of hours or microwave it from frozen for about 30-40 seconds.
Having a stash in the freezer means a homemade breakfast is always just minutes away, even on the most chaotic mornings. It’s a little act of kindness for your future self.


Banana Oatmeal Muffins Recipe
Description
Filled with banana and oat flavors, this banana oatmeal muffins recipe is a tasty way to start off your day. You don’t need anything fancy to make these scrumptious muffins. All you need are a few bowls and some simple ingredients, and you’ll have these banana and oatmeal muffins ready in no time.
ingredients
Instructions
-
Preheat the oven to 375°F (190°C). Line a 12-cup muffin pan with paper liners.
-
In a large bowl, whisk together the flour, oats, sugar, baking powder, baking soda, cinnamon, and salt.
-
In a medium bowl, whisk together the milk, oil, eggs, and vanilla until well combined. Stir in the mashed banana.
-
Pour the wet mixture into the dry ingredients and stir until just combined. Do not overmix.
-
Stir in the chocolate chips, if using.
-
Divide the batter evenly among the muffin cups (they will be very full). Sprinkle with extra oats and a pinch of cinnamon, if desired.
-
Bake for 18 to 22 minutes, or until golden brown and the centers feel firm when lightly pressed.
-
Let the muffins cool in the pan for 5 minutes, then transfer to a wire rack to cool completely.
Nutrition Facts
Servings 12
- Amount Per Serving
- Calories 180kcal
- % Daily Value *
- Total Fat 7gg11%
- Saturated Fat 1gg5%
- Trans Fat 0gg
- Cholesterol 35mgmg12%
- Sodium 180mgmg8%
- Potassium 150mgmg5%
- Total Carbohydrate 27gg9%
- Dietary Fiber 2gg8%
- Sugars 12gg
- Protein 3gg6%
- Calcium 6 mg
- Iron 8 mg
* Percent Daily Values are based on a 2,000 calorie diet. Your daily value may be higher or lower depending on your calorie needs.
Note
- Don’t overmix the batter—it leads to dense muffins or large holes in the crumb.
- Use a scale to measure flour and oats accurately—this prevents overly dense muffins.
- For even muffins, use an ice cream scoop to portion the batter.
- No liners? Butter and flour the muffin tin thoroughly or use non-stick spray. Cool for at least 10 minutes before removing.