I’ll be honest. I didn’t grow up loving corned beef. It always felt like one of those meals people got excited about while I quietly wondered what else was in the fridge.
Most of the versions I had were boiled. They were fine, but kind of flat. Soft in a way that didn’t feel intentional. Just… there.
One year I decided to try baking it instead, mostly out of stubborn curiosity. That one change completely flipped how I felt about this cut of meat.
Baking gives it real texture. The top gets a little browned. The inside stays juicy. The flavor feels deeper, not watered down. And the best part is I don’t have to babysit a pot on the stove.
Now this is the only way I make it. Every single time.
What Corned Beef Actually Is and Why It Works So Well in the Oven
Corned beef is basically brisket that’s been cured in a salty brine with spices. That curing is what gives it that signature flavor and pink color.
The seasoning has already done most of the hard work before I even open the package. That’s why this recipe stays simple. I’m not trying to reinvent it, just cook it in a way that lets it shine.
You’ll usually find it vacuum sealed with a little spice packet tucked inside. I used to toss that packet without thinking. Big mistake. That tiny thing carries a ton of flavor.
Cooking it in the oven lets the meat roast while staying moist from gentle steam underneath. So you get the best of both worlds. Tender like braising, but with actual structure.
Ingredients I Used for the Recipe
3 to 4 pound corned beef brisket with spice packet - this is the star, already cured and ready to cook.
2 to 3 cups water - added to the pan to create steam so the meat stays juicy.
6 to 8 small potatoes, halved (optional) - these soak up the salty, savory drippings.
4 large carrots, cut into chunks (optional) - they add a little sweetness that balances the meat.
1 onion, quartered (optional) - gives the whole pan extra depth while it cooks.
1/2 head cabbage, cut into wedges (optional) - classic pairing that cooks quickly at the end.
How to make Baked Corned Beef Brisket?
Step 1 - Preheat and Build the Cooking Setup
I start by heating the oven to 325°F. Low and steady is the goal here. This isn’t a rush job.
I place a rack inside a roasting pan and pour water into the bottom until it sits just below the rack. The meat should never touch the water. That separation matters more than you’d think.
This creates a steamy environment that keeps everything tender without turning the brisket into boiled meat.
Step 2 - Rinse the Brisket
This step felt weird the first time I did it, but now I never skip it. I rinse the brisket under cold water to wash away excess brine.
If I don’t rinse it, the finished meat can lean too salty. Learned that the hard way once, and only once.
After rinsing, I pat it completely dry so it roasts properly instead of steaming on the surface.
Step 3 - Trim Just Enough Fat
I look at the fat cap and trim it down if it’s really thick. I leave some behind though. That fat slowly renders and bastes the meat while it cooks.
Too much fat makes slicing messy. Too little means less flavor. I aim for a middle ground without overthinking it.
Step 4 - Season with the Included Spice Packet
I place the brisket fat side up on the rack and sprinkle the spice packet evenly across the top.
That’s it. No extra seasoning. No marinades. The curing process already packed the meat with flavor, so adding more can actually muddy things.
Step 5 - Cover and Let the Oven Do the Work
I cover the pan tightly with foil and slide it into the oven. For the first couple hours, it just sits there cooking gently.
The smell starts creeping through the kitchen somewhere around the one hour mark. That’s when I know things are heading in the right direction.
I check the water level once or twice and add a little more if it looks low. The steam is what keeps everything tender.
Step 6 - Uncover to Finish Roasting
After about 2 hours, I remove the foil so the top can brown slightly. This is where baked corned beef separates itself from boiled versions.
The edges develop texture. Not crunchy, just enough to give contrast to the soft interior.
I keep cooking until a fork slides in easily. That’s my real test. If it resists, it’s not ready.
Step 7 - Add Vegetables If I Want a Full Meal
If I’m making this as a one pan dinner, I add potatoes and carrots to the water under the rack first since they take longer.
Onions go in a bit later, and cabbage gets added last because it cooks fast. Everything absorbs that seasoned steam and ends up tasting like it belonged there all along.
This also saves me from washing extra pots, which is always a win.
Step 8 - Let It Rest Before Slicing
Once it’s done, I pull the pan out and let the meat rest for about 15 minutes. Cutting too early lets all the juices run out onto the board.
When I do slice it, I always cut against the grain. That’s what keeps each bite tender instead of stringy.
If I mess that up, the texture tells on me immediately.
Things I Learned After Making This More Times Than I Can Count
Use the Rack Even If You Have to Improvise
The rack is what allows heat to circulate. Without it, the brisket just sits in liquid and you lose that roasted character.
If I don’t have a rack, I roll up foil into thick ropes and set the meat on top. Works surprisingly well.
Fat Side Up Is Not Optional
I tested it both ways once out of curiosity. Fat side down didn’t baste the meat the same way.
With the fat on top, it slowly melts and self seasons everything. Nature’s little automatic sauce system.
Low Temperature Is What Makes It Tender
It’s tempting to crank the oven higher to speed things up. I tried that early on and ended up with tougher slices.
This cut needs time, not heat. Around 30 to 40 minutes per pound is a good rhythm.
Flat Cut vs Point Cut Depends on Mood
Flat cut gives cleaner slices and looks nicer if I’m serving people. Point cut has more fat and richer flavor.
If it’s just dinner at home, I grab whatever looks good and don’t stress.
Leftovers Might Be the Best Part
I always cook more than I need. The next day I slice it thin for sandwiches or chop it into hash.
The flavor actually deepens overnight, which feels like a reward for planning ahead.
Why This Became My Go To Method
This recipe doesn’t try to be fancy. It just respects the ingredient and lets the oven handle the transformation.
I like meals that feel special but don’t require constant attention. Once this goes into the oven, I can clean up, set the table, or honestly just sit down for a bit.
There’s also something satisfying about pulling out a brisket that’s deeply seasoned, tender, and sliceable instead of falling apart in a pot of water.
It feels intentional. Like I cooked it, not just boiled it.
And now, whenever I make corned beef this way, people who claim they don’t like corned beef suddenly go quiet while eating. That’s usually the best compliment I get.
So if you’ve only ever had it boiled, this version might surprise you the same way it surprised me. It’s simple. It’s hands off. And it finally lets corned beef be something worth looking forward to.
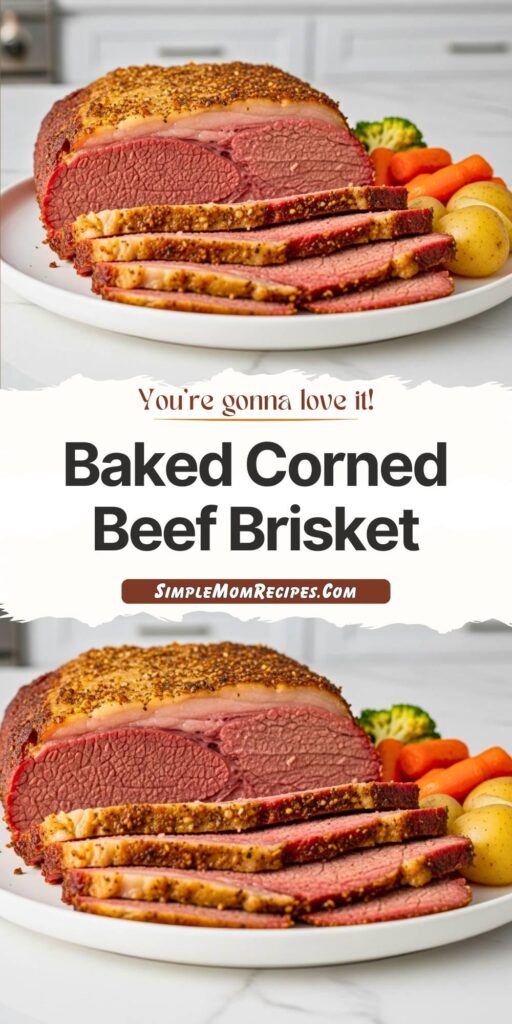
This baked corned beef brisket recipe is the easiest way to get tender, flavorful meat for your St. Patrick's Day dinner. Just season with the included spice packet and bake uncovered – no boiling, no fuss, and perfect results every time. The meat comes out incredibly tender with slightly crispy edges, and your whole house smells amazing.
4 Large carrots (cut into 2-inch pieces, optional)
1 Onion (quartered, optional)
1/2head Cabbage (cut into wedges, optional)
Instructions
1
Preheat and Prepare PanPreheat the oven to 325°F (163°C). Place a roasting rack or grate in the bottom of a roasting pan or large baking dish large enough to hold the meat.
2
Prepare the MeatRinse the corned beef under cold water to remove packing liquid and excess salt. Pat completely dry with paper towels.
3
Trim and PositionTrim the fat cap to within 1-inch of the meat. Place the brisket fat-side up on the rack. Fill the bottom of the pan with water up to just below the edge of the grate.
4
SeasonOpen the seasoning packet that came with the corned beef and sprinkle it evenly all over the top of the meat.
5
Initial BakeCover the pan tightly with a lid or aluminum foil. Bake covered for 2 hours.
Check water level once or twice and add hot water if needed to maintain level below rack.
6
Finish BakingRemove the lid or foil. Continue roasting uncovered for an additional 45-60 minutes, or until an instant-read thermometer inserted into the thickest part reads 185°F (85°C) and a fork slides in easily.
Optional: Add potatoes and carrots to the water below the rack during the last 45 minutes, onions at 30 minutes, and cabbage wedges during the last 20 minutes.
7
Rest and SliceRemove from oven and let the meat rest for 15 minutes before slicing. Always slice against the grain for the most tender bites.
Nutrition Facts
Servings 8
Amount Per Serving
Calories380kcal
% Daily Value *
Total Fat25gg39%
Saturated Fat9gg45%
Trans Fat0gg
Cholesterol100mgmg34%
Sodium1100mgmg46%
Potassium450mgmg13%
Total Carbohydrate3gg1%
Dietary Fiber0gg0%
Sugars2gg
Protein30gg60%
Calcium 2% mg
Iron 15% mg
* Percent Daily Values are based on a 2,000 calorie diet. Your daily value may be higher or lower depending on your calorie needs.
Note
Don't Skip the Rinse: Rinsing the corned beef before cooking helps reduce excess saltiness from the brine.
Watch the Water: Keep an eye on the water level in the pan. Add hot water if needed to maintain steam and moisture.
Fat Side Up: Always position the brisket fat-side up so the melting fat bastes the meat as it cooks.
Slice Against the Grain: Look for the direction of the meat fibers and cut perpendicular to them for maximum tenderness.
No Rack? No Problem: Create a makeshift rack by rolling up aluminum foil into coils to elevate the meat.
Keywords:
corned beef, baked brisket, St. Patrick's Day recipe, Irish dinner, easy corned beef
Kelsey Perez
Food & Lifestyle Blogger
I’m a London-based food writer, recipe developer, and home cook who has been passionate about cooking for over 15 years. What started as a way to recreate my mother’s traditional dishes turned into a lifelong love for experimenting with flavors, writing about food, and helping others feel more confident in the kitchen.