There’s something almost magical about the scent of apples and cinnamon wafting through a cozy kitchen, isn’t there?
It’s the kind of aroma that wraps you in a warm hug, promising a dessert that’s both comforting and incredibly delicious. This recipe is that promise, fulfilled.
Why This Recipe Feels Like Home
We’ve all had those desserts that feel fussy or complicated, but this one is different, truly. It’s straightforward, humble, and focuses entirely on celebrating the beautiful, simple flavors of fall.
You won’t find any unnecessary steps here—just a juicy, spiced apple filling and a buttery, crisp oat topping that’s pure perfection.
Ingredients Needed for the Recipe
Gathering these simple ingredients is the first step toward creating something wonderful. Each one plays a specific, important role in building the final flavor and texture.
You likely have most of these pantry staples on hand already, which makes this dessert feel even more accessible and inviting.
- Apples: The star of the show! You’ll need about 2½ pounds of good baking apples.
- Rolled Oats: These are essential for that classic, crave-worthy crisp topping.
- All-Purpose Flour: A little thickens the filling, and more binds the crumble.
- Brown Sugar: It adds a deep, molasses-like sweetness that white sugar just can’t match.
- Unsalted Butter: Cold and cubed, it creates those irresistible, craggy bits in the topping.
- Lemon Juice: A splash brightens the apples and keeps their flavor from feeling flat.
- Vanilla, Cinnamon, & Nutmeg: The warm, aromatic trio that defines autumn baking.
- Sea Salt: Never underestimate its power to make all the other flavors sing.
Picking Your Perfect Apple
Not all apples are created equal, especially when it comes to baking. The right choice will hold its shape and offer the perfect balance of sweet and tart after its time in the oven.
You can absolutely choose a single variety you love, or get creative and mix a couple for a more complex flavor profile.
Firm, crisp apples like Honeycrisp, Granny Smith, Fuji, or Gala are all fantastic, reliable choices that won’t turn to mush.
How to make Apple Crisp?
The process is a joy, really—a little bit of mixing, a little bit of sprinkling, and then the oven does most of the work for you.
Prepping Your Apples
Start by peeling, coring, and chopping your apples into even, bite-sized pieces. This ensures they all cook at the same rate, so every spoonful is perfect.
Toss them in a large bowl with the flour, sugar, lemon juice, vanilla, and spices until they’re all evenly and lovingly coated.
Creating the Crumble
In a separate bowl, whisk together the dry ingredients for the topping. Then, add the cold, cubed butter.
Use a pastry cutter, two forks, or even your clean fingers to work the butter into the mixture until it resembles coarse, pebbly sand.
Assembling and Baking
Spread the saucy apple mixture into your prepared baking dish, then sprinkle the oat crumble evenly over the top.
Bake it covered first to let the apples soften and release their amazing juices, then uncover to let the topping turn golden and wonderfully crisp.
The Secret to an Irresistible Topping
That perfect, crunchy-yet-tender streusel topping is what separates a good crisp from a great one. The secret, honestly, is all in the butter and a little patience.
Using your hands is often the best tool here; you can feel when the mixture is just right—clumpy and damp, but still plenty crumbly.
And whatever you do, please make sure your butter is cold. This little detail is what creates those delightful, melt-in-your-mouth pockets of flavor.
Tips
Let the crisp rest for at least 10 minutes after it comes out of the oven. I know, the wait is torture! But it allows the bubbling juices to thicken slightly.
For the ultimate experience, serve it warm. A scoop of cold vanilla ice cream melting over the top is pretty much non-negotiable in my book.
If you have any leftovers (a rare occurrence!), they reheat beautifully in the oven, bringing back that just-baked magic.
Making It Your Own: Fun Variations
This recipe is a classic for a reason, but it’s also a wonderful canvas for your own creativity. Feel free to play around and make it suit your taste.
Try adding a handful of chopped pecans or walnuts to the crumble topping for a delightful nutty crunch. A pinch of ginger or cardamom can add a lovely, warm twist to the spice profile.
For a special occasion, a drizzle of salted caramel sauce over each serving takes this homey dessert into seriously decadent territory.
Storing Your Dessert Masterpiece
Once completely cooled, you can cover the baking dish tightly with foil or transfer portions to an airtight container. It will keep happily in the refrigerator for up to two days.
Reheating is best done in a 350°F oven until warm throughout; this helps the topping recrisp. The microwave works in a pinch, though the topping will soften.
You can also freeze the baked and cooled crisp for up to 3 months. Just thaw overnight in the fridge and reheat in the oven.
A Dessert For Any Occasion
This apple crisp is incredibly versatile. It’s casual enough for a weeknight family treat, yet special enough to serve at a holiday gathering or dinner party.
It’s the perfect ending to a hearty autumn meal, but let’s be real, it also makes a spectacularly acceptable breakfast with a cup of coffee. No judgment here!
Really, any time you need a little comfort in a bowl, this is the answer. It’s a timeless recipe that everyone, from kids to grandparents, will absolutely adore.


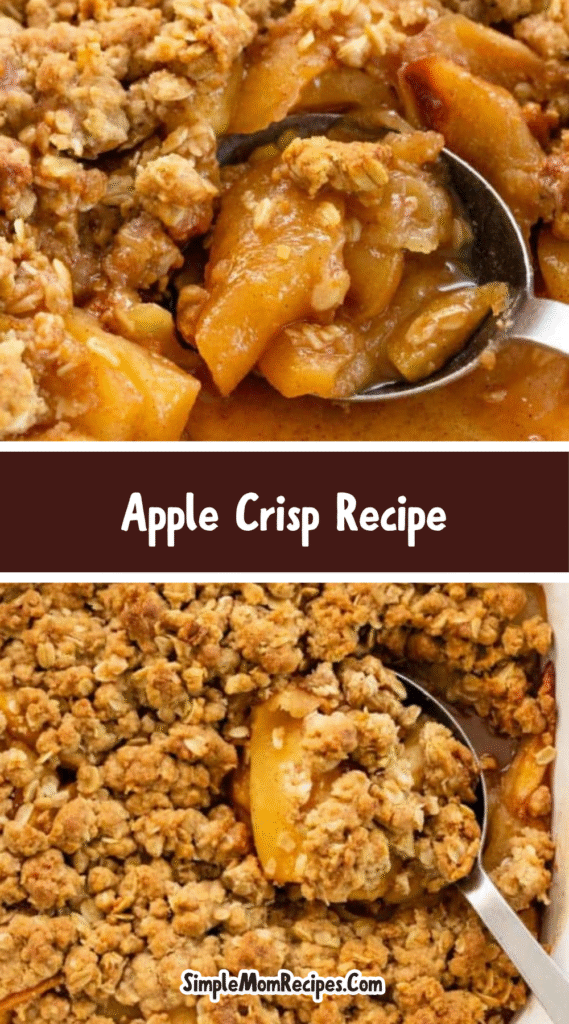
Apple Crisp Recipe
Description
This apple crisp recipe is a delicious fall dessert featuring tender, juicy cinnamon-spiced apples and a buttery brown sugar oat topping. It's simple to make, requires no pre-cooking of apples, and bakes up perfectly golden and fragrant. Serve warm with a scoop of vanilla ice cream for the ultimate cozy treat!
Ingredients
For the Apple Filling
For the Crumble Topping
Instructions
-
Preheat & Prep
Preheat oven to 375°F. Grease an 8×8-inch baking dish with butter. -
Prepare Apples
In a large bowl, combine chopped apples, flour, brown sugar, lemon juice, vanilla extract, cinnamon, nutmeg, and salt. Toss well until evenly coated.Use firm baking apples like Honeycrisp or a mix of Granny Smith and Gala. -
Arrange Filling
Spread the apple mixture evenly in the prepared baking dish. -
Make Topping
In a medium bowl, mix oats, flour, brown sugar, cinnamon, and salt. Add cold cubed butter and use a pastry cutter, two forks, or your hands to work it into the dry ingredients until the mixture is moist and crumbly.Don’t overmix—small clumps are perfect! -
Add Topping
Sprinkle the crumble topping evenly over the apples. -
Bake Covered
Cover the baking dish with aluminum foil. Bake for 35–40 minutes, or until the apples are bubbling underneath. -
Uncover & Brown
Remove the foil and bake for another 10–15 minutes, or until the topping is golden brown and crisp, and the apples are tender when pierced with a fork. -
Cool & Serve
Let cool for at least 10 minutes before serving. This allows the filling to thicken slightly.Serve warm with a scoop of vanilla ice cream or whipped cream.
Nutrition Facts
Servings 6
- Amount Per Serving
- Calories 320kcal
- % Daily Value *
- Total Fat 13g20%
- Saturated Fat 8g40%
- Trans Fat 0.5g
- Cholesterol 30mg10%
- Sodium 180mg8%
- Potassium 190mg6%
- Total Carbohydrate 48g16%
- Dietary Fiber 4g16%
- Sugars 32g
- Protein 3g6%
- Calcium 4 mg
- Iron 2 mg
* Percent Daily Values are based on a 2,000 calorie diet. Your daily value may be higher or lower depending on your calorie needs.
Note
- Best Apples: Use firm varieties like Honeycrisp, Granny Smith, Fuji, or Gala. A mix of tart and sweet works great!
- No Peeling? Not recommended—peels don’t soften well and can be tough in the filling.
- Serve With: Vanilla ice cream or whipped cream takes this crisp to the next level.
- Storage: Cool completely, cover, and refrigerate for up to 2 days. Reheat in microwave or 350°F oven.
- Make-Ahead: Assemble components separately and refrigerate for up to 2 hours before baking.