I have a soft spot for desserts that feel a little nostalgic but don’t require a full day in the kitchen. That’s exactly why I started making these strawberry shortcake bars. They remind me of the kind of treat you bring to a backyard gathering where nobody cares if the edges are uneven.
The first time I made them, I was trying to avoid baking an actual layer cake because I simply didn’t feel like dealing with stacking, frosting, and pretending to be neat. I wanted something relaxed. Something sliceable. Something I could eat straight from the pan while standing at the counter.
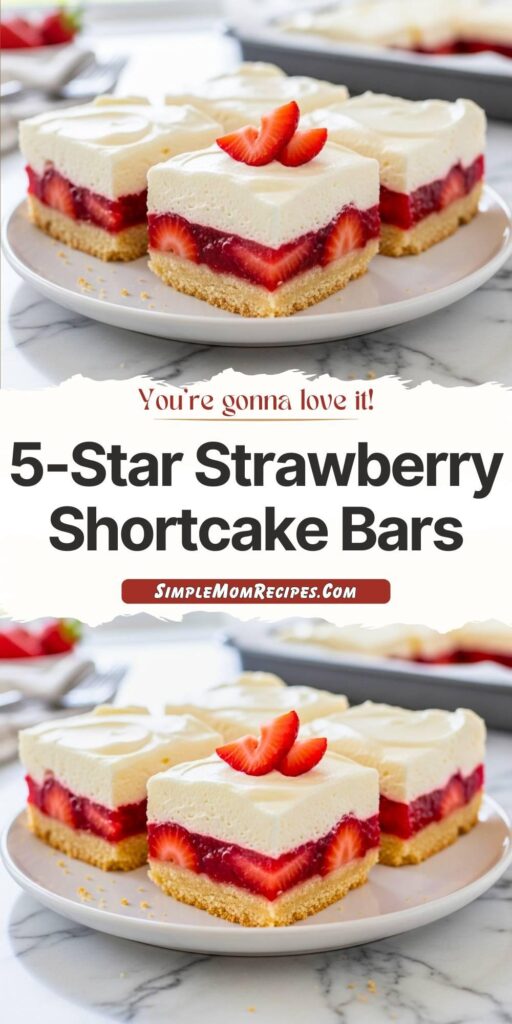
These bars solved everything. Buttery crust, creamy middle, sweet strawberries. All the good parts of classic shortcake, just easier and honestly more forgiving.
Now they’ve become one of those recipes I make without overthinking. I don’t need a special occasion. If strawberries look good at the store, that’s reason enough.
Ingredients I Used for the Recipe
1 cup unsalted butter, softened - This makes the crust rich and tender. I let it sit out so it mixes easily.
2 cups all-purpose flour - Gives structure to the shortbread base. Nothing fancy here.
1/2 cup granulated sugar - Sweetens the crust just enough without turning it into a cookie.
1/2 teaspoon salt - Balances the sweetness and keeps the crust from tasting flat.
2 cups fresh strawberries, diced - The star. I chop them small so every bite gets some.
1/2 cup sugar (for the filling) - Helps the strawberries release their juices and become jammy.
1 tablespoon cornstarch - Thickens the strawberry layer so it holds together when sliced.
8 oz cream cheese, softened - Adds a slight tang and gives the middle layer body.
1/2 cup powdered sugar - Sweetens the creamy layer while keeping it smooth.
1 teaspoon vanilla extract - Just for warmth and flavor. It makes everything taste more like dessert.
1 cup heavy whipping cream - Whipped into the cream cheese to create that light, fluffy texture.
How to make 5-Star Strawberry Shortcake Bars Recipe?
Step 1 - Make the Buttery Shortbread Base
I start by preheating the oven to 350°F. Then I mix the butter, flour, sugar, and salt together until it looks crumbly. I usually use a bowl and my hands because it’s faster and less dishes.
Once it comes together, I press it into a greased 9×13-inch pan. No need to make it perfect. It bakes for about 20 minutes until lightly golden.
Step 2 - Let the Crust Cool (This Matters More Than You Think)
I used to rush this part and regret it every time. If the crust is warm, the layers melt into each other and you lose that clean look.
Now I let it cool completely on the counter. I use that time to work on the filling.
Step 3 - Cook the Strawberry Layer
I combine the diced strawberries, sugar, and cornstarch in a saucepan over medium heat. After a few minutes, the berries start breaking down and turning glossy.
It thickens into something between a sauce and a jam. That’s when I pull it off the heat and let it cool. If you spread it hot, it will soak into the crust.
Step 4 - Make the Creamy Layer
In one bowl, I beat the softened cream cheese, powdered sugar, and vanilla until smooth. No lumps allowed here. Lumps don’t magically disappear later.
In another bowl, I whip the heavy cream until stiff peaks form. Then I gently fold it into the cream cheese mixture. Folding keeps it light instead of dense.
Step 5 - Assemble the Layers
First goes the strawberry layer, spread evenly over the cooled crust. Then I add the cream mixture on top and smooth it out.
I try not to overwork it. The more you fuss, the softer it gets.
Step 6 - Chill Until Set
This goes into the fridge for at least 2 hours. Overnight is even better. The layers firm up, the flavors settle, and slicing becomes much easier.
When ready, I cut them into squares using a sharp knife and wipe the blade between cuts. It’s a small step that makes them look way nicer.
Little Things I Learned After Making These Too Many Times
Fresh strawberries really do make a difference. I tried frozen once when I was desperate, and they released too much water. The bars still tasted good, just softer than I wanted.
If your berries aren’t super sweet, toss them with a spoonful of sugar and let them sit for 10 minutes before cooking. That wakes them up.
I also found that whipping the cream separately is non negotiable. I tried skipping that step once to save time and ended up with a heavy filling that felt more like cheesecake.
Another habit I’ve picked up is lining the pan with parchment paper. Now I can lift the whole slab out and slice it cleanly instead of digging pieces out like a crumble.
And yes, they taste even better the next day. I didn’t believe that at first, but now I actually plan ahead when I can.
How I Serve Them and Keep Them Fresh
I like these bars cold. Straight from the fridge. The texture is firmer and the layers stay distinct. If they sit out too long, they soften, which isn’t bad, just different.
For gatherings, I cut them smaller than I think I should because people always come back for seconds. They’re rich but not heavy, which makes it easy to justify another square.
Sometimes I add a little extra on top if I’m feeling fancy. Crushed cookies, a few sliced strawberries, or even a light dusting of powdered sugar. Nothing complicated.
They keep well in the fridge for about three days, covered tightly. After that, the crust starts losing its texture. I’ve never had a batch last longer than that anyway.
You can freeze them too. I wrap individual squares so I can grab one when I want something sweet without baking again.
Tips
Don’t overbake the crust. Light golden is enough. Too dark and it turns hard instead of tender.
Cool every layer. Warm layers lead to a messy final result. Patience here actually saves frustration later.
Use full-fat cream cheese. I tried a lighter version once and the filling didn’t set the same. It tasted fine but lacked that creamy bite.
Chill longer if you can. Two hours works, but overnight gives you those clean bakery-style slices.
Cut with confidence. A sharp knife and a quick wipe between cuts makes them look like you knew what you were doing all along.
Don’t stress about perfection. These are meant to be casual. A little unevenness makes them feel homemade in the best way.
That’s honestly why I love this recipe so much. It delivers big flavor without demanding precision. It’s the kind of dessert you make once, then suddenly it becomes part of your regular rotation without you even noticing.
And every time I pull a chilled pan from the fridge and slice into those layers, I remember why I started making them in the first place. Simple ingredients. Real strawberry flavor. No fuss. Just a really good bar that disappears faster than expected.
These delightful strawberry shortcake bars capture the classic flavors of traditional strawberry shortcake in a convenient, easy-to-eat bar form. Featuring layers of buttery shortbread crust, a luscious creamy filling, and juicy fresh strawberries, they're perfect for summer gatherings, picnics, birthday parties, or whenever you crave something sweet and refreshing.
ingredients
For the Shortbread Crust
1cup unsalted butter (softened)
2cups all-purpose flour
1/2cup granulated sugar
1/2teaspoon salt
For the Strawberry Filling
2cups fresh strawberries (diced)
1/2cup sugar
1tablespoon cornstarch
For the Creamy Layer
8oz cream cheese (softened)
1/2cup powdered sugar
1teaspoon vanilla extract
1cup heavy whipping cream
Instructions
1
Prepare the CrustPreheat your oven to 350°F (175°C). Mix butter, sugar, flour, and salt until crumbly. Press into a greased 9×13-inch baking pan and bake for 20 minutes or until golden.
2
Make the Strawberry FillingIn a saucepan, combine strawberries, sugar, and cornstarch. Cook over medium heat until thickened, about 5 minutes. Let it cool completely before spreading over the baked crust.
3
Prepare the Creamy LayerBeat cream cheese, powdered sugar, and vanilla until smooth. In a separate bowl, whip heavy cream until stiff peaks form, then gently fold into the cream cheese mixture.
4
Assemble and ChillSpread the creamy layer over the cooled strawberry filling. Chill for at least 2 hours before cutting into bars for clean slices.
Nutrition Facts
Servings 12
Amount Per Serving
Calories270kcal
% Daily Value *
Total Fat18gg28%
Saturated Fat10gg50%
Trans Fat0gg
Cholesterol50mgmg17%
Sodium150mgmg7%
Total Carbohydrate28gg10%
Dietary Fiber1gg4%
Sugars18gg
Protein2gg4%
* Percent Daily Values are based on a 2,000 calorie diet. Your daily value may be higher or lower depending on your calorie needs.
Note
Vegan Option: Use coconut cream and dairy-free cream cheese for a plant-based version.
Gluten-Free: Substitute almond flour or oat flour for the all-purpose flour in the crust.
Keto-Friendly: Swap regular sugar with a keto-friendly sweetener and use almond flour for the crust.
Make Ahead: These bars taste even better after chilling overnight, making them perfect for preparing in advance.
Clean Cuts: Use a sharp knife and wipe between cuts for picture-perfect bars.
I’m a London-based food writer, recipe developer, and home cook who has been passionate about cooking for over 15 years. What started as a way to recreate my mother’s traditional dishes turned into a lifelong love for experimenting with flavors, writing about food, and helping others feel more confident in the kitchen.